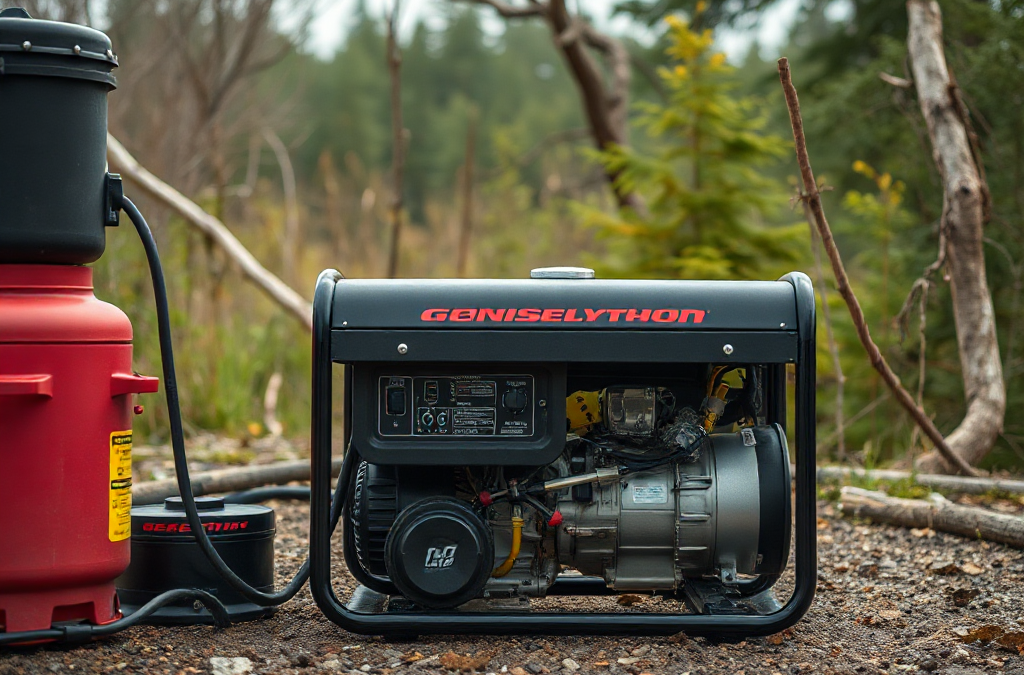
Build a Fuel Log That Reflects Actual Generator Use
Accurate fuel tracking begins with a repeatable record, not a guess based on the tank gauge. Before a long operating period, note the fuel level, hour-meter reading, generator model, fuel type, connected equipment, and the time the unit begins supplying power. At each refill, record the quantity added and the new hour-meter reading. A simple log makes it possible to distinguish fuel consumed by the engine from fuel that was spilled, transferred to another container, or left in an uncertain starting level.
The basic calculation is straightforward: fuel used divided by operating hours equals average fuel consumption per hour. If a generator uses 8 gallons during 10 hours of operation, its measured average is 0.8 gallons per hour. That number is useful only when the starting and ending measurements are credible. A partially filled tank, an inaccurate gauge, or a refill rounded to the nearest gallon can distort a short test.
For extended operation, use the same measuring method each time. A marked fuel container or a documented pump reading is generally more useful than estimating from a translucent tank. Record unusual events such as a shutdown, transfer switch change, extended idling period, or load being added. These details explain why two apparently similar shifts may show different results.
A common mistake is logging only the total number of hours. Runtime without fuel volume cannot reveal whether consumption is changing. Another weak assumption is treating the manual’s maximum runtime as a guaranteed operating figure; published runtime often depends on a stated load, a new engine, and favorable conditions. Your own log should become the primary planning reference, while the manual remains a technical baseline.
Measure Consumption Across Different Electrical Loads
Electrical load is usually the most important operating variable in a fuel-consumption record. A generator powering a refrigerator, lights, communications equipment, and a pump will not use fuel at the same rate as the same unit running a heater, compressor, or large well pump. Track the approximate wattage or amperage of connected equipment when possible, and record when major loads start or stop.
Load does not always rise in a perfectly linear relationship with fuel use. Engines have a baseline fuel demand whenever they are running, so a lightly loaded unit may consume a substantial amount of fuel while producing little useful power. At higher loads, fuel use normally increases as the engine supplies more energy, but operating near the generator’s continuous rating can create heat, voltage, and maintenance concerns. The useful comparison is not simply “low load versus high load”; it is measured gallons per hour alongside the work the generator is actually doing.
Consider a household that runs a freezer and battery charger for several hours, then briefly operates a sump pump and microwave. The average load may look modest, yet the pump’s starting surge can affect engine speed and cause a short period of higher fuel use. A separate record for steady loads and intermittent heavy loads gives a clearer picture than a single daily average.
Power meters, generator displays, or a properly installed energy monitor can improve the record, but they are not mandatory for useful tracking. A practical approach is to create three operating categories: standby or light load, normal essential load, and heavy or surge-prone load. Measure each category over enough time to smooth out brief starts and stops. Do not add loads merely to make a test convenient; prioritize equipment the generator is intended to support.
Light load: record idle-like operation and note whether the generator is cycling equipment.
Normal load: represent the appliances and circuits normally needed during the outage.
Heavy load: document large motors, heating elements, pumps, or simultaneous starts separately.
Linking tracking fuel consumption during prolonged generator operation to load conditions prevents a misleading conclusion such as “the generator suddenly became inefficient” when the actual cause was a newly connected appliance.
Turn Fuel Records Into Reliable Runtime Forecasts
A runtime forecast should use measured consumption plus a deliberate fuel reserve. Start with the usable fuel available, not the tank’s advertised capacity. Some fuel may remain below the pickup point, and operating until the tank is empty can introduce air into the fuel system or stop power at an inconvenient moment. Divide usable gallons by the observed gallons-per-hour figure for the relevant load category.
For example, if 12 usable gallons remain and the generator consumes 0.65 gallons per hour under the current essential load, the theoretical runtime is about 18 hours. That is not a promise. A cautious forecast should account for changing loads, weather, imperfect measurements, and the need to refuel before the tank is nearly empty. If a pump or heating appliance may be added later, use the higher measured rate rather than the light-load rate.
Separate short-term forecasting from supply planning. Short-term forecasting answers when the next refill may be needed. Supply planning asks whether the available fuel will cover the expected outage, whether fuel can be obtained safely, and whether storage arrangements are suitable for the fuel and location. A spreadsheet can calculate both, but the inputs must be updated after every meaningful change in use.
Forecasts become unreliable when users average together unrelated conditions. A six-hour low-load test should not be used to predict a night when a well pump, refrigerator, and space heater will cycle. Likewise, a brief heavy-load test may overstate the fuel needed for a mostly quiet overnight period. Keep separate rates for distinct operating patterns and label each figure with the load, temperature, and maintenance condition when those details could matter.
A useful refill trigger is based on time and reserve, not only on the gauge. For instance, schedule a check when the calculated remaining runtime reaches the next practical refill window, then verify the estimate against the physical fuel level. The gauge is a warning instrument, while the log supplies the trend. Comparing both helps expose a faulty sender or an unexpectedly changing consumption rate.
Spot Consumption Changes Before They Become Failures
A rising gallons-per-hour figure deserves investigation, especially when the electrical load has not changed. Engines may consume more fuel because of restricted airflow, poor maintenance, fuel-system problems, overloading, excessive idling, or operating conditions that differ from the original baseline. The record matters because it shows whether the change occurred suddenly after an event or gradually over several operating periods.
Begin by checking the simple explanations. Confirm that the hour meter is working, the refill amount was measured correctly, and the connected equipment has not changed. Inspect for fuel leakage, unusual exhaust, unstable engine speed, difficult starting, or visible damage. Review the air filter, oil level, cooling airflow, and service schedule according to the manufacturer’s instructions. Do not bypass guards or open hot components while the generator is running.
A scenario illustrates the value of trend data. Suppose a unit normally uses 0.7 gallons per hour at its ordinary load but records a higher rate during two consecutive shifts. If the load monitor shows the same demand, the owner can investigate maintenance and leakage before the tank empties unexpectedly. If the increase began when a refrigerator and pump began cycling together, the apparent fault may instead be a changed duty cycle.
Low consumption is not automatically good news. A generator that is producing less power because a circuit has tripped, an appliance has disconnected, or the engine is failing to carry load may use less fuel while also failing its purpose. Compare fuel data with output, voltage behavior, engine sound, and the equipment actually operating. Consumption should be interpreted as part of a performance record, not as a standalone score.
Keep a dated baseline after maintenance and after any major change in connected equipment. Link each abnormal entry to what happened next, such as cleaning the filter, removing an unnecessary load, correcting a leak, or arranging professional service. That history is more useful than a vague note that the generator “seemed thirsty.”
Refill Decisions, Storage Limits, And Operating Safety
Fuel records are most valuable when they change behavior before a shortage or hazardous refill. Set a personal minimum reserve based on the generator’s measured rate, the importance of the connected loads, and the time required to obtain more fuel. A unit supporting a sump pump during severe weather may justify a larger operational buffer than one serving only occasional lighting, because an unplanned shutdown could have greater consequences.
Refueling requires a cooled, shut-down generator in a suitable outdoor location, with ignition sources controlled and the fuel container handled according to its labeling and local requirements. Never store fuel in an occupied living area or treat a generator fuel tank as a long-term storage solution. Follow the generator and fuel-container instructions for fuel type, stabilizer use, inspection, and disposal of degraded fuel. Carbon monoxide safety remains separate from fuel tracking: operate the generator outdoors and away from doors, windows, and ventilation openings as directed by official safety guidance.
Use a compact operating checklist before a prolonged run:
Record the hour-meter reading and measured starting fuel.
Confirm the connected load and identify equipment with motor-start surges.
Inspect for leaks, blocked airflow, loose connections, and warning indicators.
Log every refill, shutdown, load change, and unusual engine behavior.
Recalculate the next refill window using the latest load-specific rate.
Do not confuse a large reserve with unlimited readiness. Fuel ages, containers require inspection, and a generator may need service before the stored supply is consumed. A smaller, well-rotated supply with reliable records can be more useful than a larger quantity that is poorly labeled or has an unknown age. The practical goal of tracking fuel consumption during prolonged generator operation is dependable decision-making: knowing how much fuel is usable, how fast it is being consumed, and when continued operation should give way to maintenance or a controlled shutdown.
For equipment-specific fuel rates, maintenance intervals, fuel specifications, and operating limits, consult the generator manufacturer’s current owner’s manual. For fire, carbon monoxide, and generator placement guidance, use official information from agencies such as the U.S. Consumer Product Safety Commission, the U.S. Environmental Protection Agency, or local fire authorities rather than relying on an unofficial runtime chart.
Frequently Asked Questions
What is the simplest way to calculate generator fuel consumption?
Measure the fuel added during a known operating period, then divide gallons used by hours run. Record the electrical load because the result applies only to similar conditions.
Why can a generator use more fuel than its runtime estimate suggests?
Runtime estimates may assume a particular load and operating condition. Added appliances, motor-start surges, poor maintenance, leaks, cold weather, or inaccurate fuel measurements can raise actual consumption.
Should fuel use be tracked at light and heavy loads separately?
Yes. Separate load-specific rates are more useful than one average because a generator’s baseline engine demand and changing appliance cycles can make fuel use vary considerably.
How much reserve fuel should be kept?
Keep enough usable fuel to cover the next practical refill opportunity plus a margin for changing loads and measurement uncertainty. The exact reserve depends on access to fuel, generator demand, and the consequences of shutdown.
What does a sudden rise in fuel consumption indicate?
First verify the refill measurement, hour meter, and connected load. If those are unchanged, inspect for leaks, airflow restrictions, overload, poor engine performance, or other maintenance issues before continuing a long run.
Further Reading
Authoritative Sources
Investor.gov investor.gov
SEC investor education resources for evaluating financial products and risk.
FINRA Investor Insights finra.org
Investor education, broker-check tools, and financial decision resources.
Consumer Financial Protection Bureau consumerfinance.gov
Consumer guidance on credit, debt, lending, and financial products.
Internal Revenue Service irs.gov
Official tax guidance, forms, and compliance information.
Conclusion
Reliable generator fuel planning comes from measured operating data, not a gauge reading or a single number in a manual. Record fuel volume and hours together, separate light, normal, and heavy-load conditions, and update the forecast whenever appliances or operating patterns change. Treat rising consumption as a diagnostic clue, but compare it with electrical output and engine behavior before assuming a mechanical fault. Refuel early enough to preserve a practical reserve, and keep fuel handling, ventilation, storage, and maintenance requirements separate from the arithmetic. After the next operating period, review the log for a usable gallons-per-hour baseline and mark the refill point that fits your actual access to fuel. That small record can prevent both an avoidable shutdown and an unnecessary overestimate of supply needs.
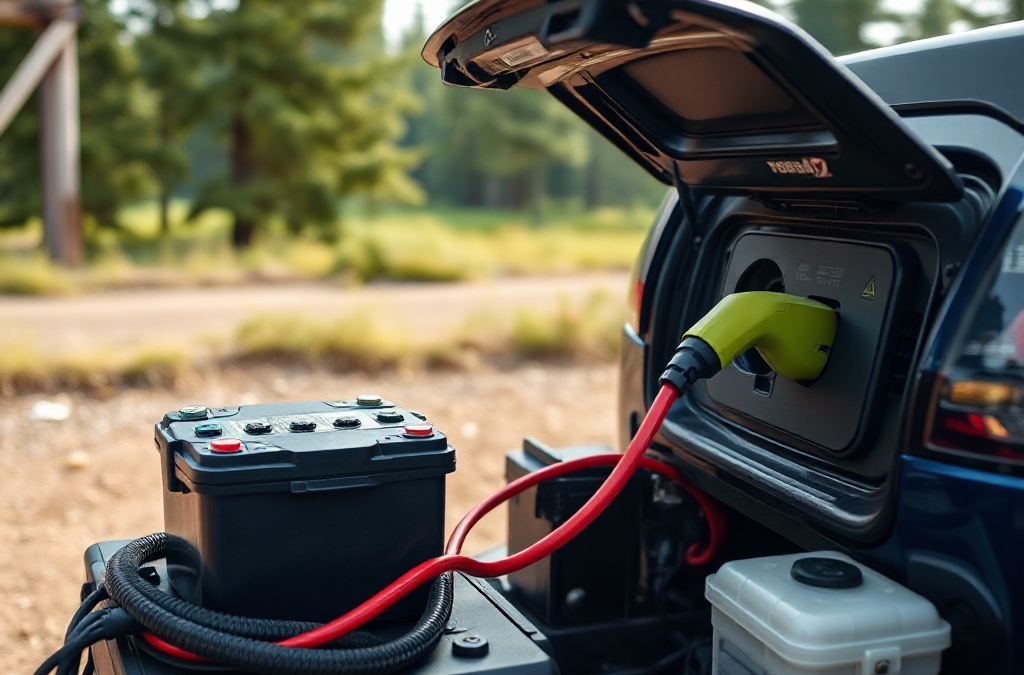
Why Charging Loads Can Leave a Vehicle Unable to Start
Vehicle charging becomes a starting-battery problem when phones, refrigerators, lights, inverters, compressors, or other accessories draw energy while the engine is off. The starting battery is designed to deliver a large burst of current for a short period, not to provide repeated deep discharges. A small device may appear harmless, but several hours of combined loads can reduce the reserve needed by the starter motor, especially in cold weather or when the battery is already aged.
The important distinction is between energy use and charging speed. A USB adapter may draw only a modest amount, while an inverter powering a laptop charger or household appliance can pull much more from the 12-volt system. Inverter losses add to the demand, and the vehicle’s accessory socket, wiring, or fuse may impose limits before the battery itself becomes the obvious concern. A device that works normally at the beginning of the evening can still leave insufficient starting capacity by morning.
Voltage readings also require interpretation. A battery can show a reasonable resting voltage immediately after a load is removed while having little usable reserve under a starter’s heavy demand. Conversely, a running vehicle may show alternator charging voltage without proving that the battery is healthy. A slow crank, clicking starter, dimming interior lights, or repeated need for a jump start is stronger evidence of trouble than a single meter reading.
Consider a parked vehicle running a cooler, two phones, and an inverter overnight. The cooler cycles rather than drawing its maximum continuously, but the total consumption still depends on ambient temperature, insulation, battery condition, and inverter efficiency. Assuming that the alternator will “replace everything later” is risky if the driving period is short. Recharging a depleted starting battery may require more sustained driving than a brief commute provides.
The safer principle is simple: reserve the starting battery for starting and place routine accessory demand on a source intended for cycling. That may mean a power bank for small electronics, a portable power station for larger loads, or an auxiliary battery system for regular vehicle-based use. The right option depends on duration, wattage, weather, and whether the vehicle must remain ready to move.
Charging Options That Keep Starting Power Separate
A portable power bank is usually the lowest-risk choice for phones, radios, cameras, and other small electronics. It stores energy away from the vehicle and avoids leaving a cable connected to the starting circuit. Its limitations are capacity, recharge time, and output compatibility. Check whether it supports the required USB standard and whether its stated capacity reflects usable output rather than only internal cell capacity.
A portable power station provides more capacity and may offer USB, 12-volt, and AC outlets. It is useful for laptops, medical equipment that is approved for portable use, or low-power tools, but its inverter can consume energy even when the connected appliance is idle. Keep ventilation clear, protect it from moisture, and follow the manufacturer’s limits for charging from a vehicle. A large station may need several hours of driving or a separate solar input to recover its charge.
For repeated vehicle use, an auxiliary battery is more suitable. It can be charged through a properly fused isolator or a DC-to-DC charger while keeping the starting battery electrically separate when the engine is off. An isolator may be adequate in simpler systems, while a DC-to-DC charger can provide controlled charging for battery types with different charging requirements. The installation must match the battery chemistry, cable size, fuse ratings, grounding method, and manufacturer instructions.
“Dual battery” does not automatically mean protected battery. Poorly sized cable, an incorrectly placed fuse, a failed isolator, or a manual switch left in the wrong position can connect the two batteries or create an overheating hazard. A professional installation may be appropriate when the auxiliary battery is permanently mounted, placed inside a passenger compartment, or connected to high-current equipment. Batteries also need secure mounting and suitable protection from heat and physical damage.
Solar charging can reduce dependence on engine runtime, but it is not a guaranteed replacement for an alternator or shore charger. Shade, panel angle, weather, and controller losses affect recovery. Solar works best as a supplemental source for a known daily load rather than as an assumption that a battery will always refill before the next departure. For occasional needs, a power bank is simpler; for frequent overnight loads, an isolated auxiliary system is more dependable.
Internal linking can help readers compare the options in using vehicle charging without draining the starting battery with their actual load profile instead of choosing equipment by outlet count alone.
Runtime, Wiring, And Monitoring Limits
Runtime should be estimated from watt-hours, not from battery label voltage alone. Multiply the device’s watts by the hours of operation, then allow for conversion losses and a reserve. For example, a 40-watt appliance used for five hours needs about 200 watt-hours before losses; an inverter-based setup may require more from the battery. A starting battery’s theoretical capacity is not a safe operating target because deep discharge can shorten its life and still leave the engine unable to crank.
Measure the load when possible. A plug-in watt meter, DC monitor, or manufacturer specification can reveal whether an appliance cycles, has a high startup surge, or draws power while apparently idle. A compressor cooler illustrates the difference: its average demand may be moderate, but hot weather and frequent opening can increase duty cycle. A tool charger may consume little after its battery is full, yet the inverter can continue drawing standby power.
Wiring deserves the same attention as capacity. High-current accessories need properly sized cable, secure connections, and a fuse close to the power source. A fuse protects wiring from a short circuit; it does not make an undersized cable safe. Warm connectors, melted insulation, a burning smell, intermittent power, or a fuse that repeatedly opens are stop signals, not inconveniences to bypass.
Monitoring is most useful when it combines several clues. A battery monitor that measures current and accumulated use is more informative than checking voltage during an active load. If using the vehicle’s starting circuit temporarily, set a conservative stopping point, turn off nonessential loads, and allow the engine to run only in an appropriate open-air location. Never run an engine in a garage, enclosed carport, or near openings where exhaust could enter a building.
Charging while driving is not automatically harmless. The alternator may have to supply vehicle electronics before it replenishes an auxiliary battery, and short trips may not restore the energy used. High-demand inverters can also exceed an accessory socket’s rating. Compare the appliance input, inverter output, socket fuse, charger rating, and charging-source capability before connecting them.
A practical warning list includes:
Slow cranking or a starter that clicks instead of turning the engine.
Battery, charging-system, or wiring warning lights.
Unexpected voltage collapse when a load starts.
Hot cables, loose terminals, or damaged insulation.
An auxiliary battery that fails to charge despite a running engine.
Any of these signs calls for disconnecting the load and diagnosing the system rather than continuing until the vehicle stops starting.
A Practical Charging Decision Process
Choose the power source by asking what must be charged, for how long, and whether the vehicle must start immediately afterward. Small electronics usually belong on a power bank. Several low-power devices used during travel may fit a fused USB circuit while driving. Overnight refrigeration, lighting, or communications equipment generally deserves a portable power station or isolated auxiliary battery rather than an unattended starting-battery connection.
Use this sequence before setting up a charging arrangement:
List the loads. Record wattage, expected hours, startup surge, and whether each device needs AC or DC power.
Calculate a conservative energy requirement. Include inverter and charger losses, then retain capacity for temperature changes and uncertainty.
Identify the no-start consequence. If being stranded would be unacceptable, do not use the starting battery as the planned energy reservoir.
Check the complete electrical path. Confirm outlet, fuse, cable, connector, charger, and battery ratings.
Test under supervision. Watch for heat, unexpected shutoff, voltage decline, or charging behavior that differs from the instructions.
A useful comparison is convenience versus isolation. Plugging a device into an existing socket is quick and inexpensive, but it provides little protection if the socket remains live with the engine off. A dedicated auxiliary system costs more and takes installation effort, yet it converts the problem from “remember to unplug everything” into a designed separation between essential and nonessential loads. Automatic low-voltage disconnects may add protection, but they should not be treated as a substitute for correct sizing or a healthy battery.
Engine idling as a charging strategy has its own drawbacks. It may produce less useful charging at low speed, waste fuel, increase noise, and create exhaust exposure. Driving solely to recharge can also fail to restore a heavily depleted battery in a short period. If the starting battery has already been discharged, use an appropriate charger or jump-start procedure according to the vehicle and battery instructions rather than repeatedly attempting to recover it through random idling.
Keep the arrangement easy to inspect. Label auxiliary connectors, secure cables away from pedals and hot exhaust components, and periodically check terminals and fuses. Test the system before a trip, not during the first emergency. Readers comparing equipment can use using vehicle charging without draining the starting battery as a reminder to evaluate isolation, capacity, and failure signs together.
For vehicle-specific charging limits, battery chemistry requirements, fuse placement, and accessory-socket ratings, consult the vehicle owner’s manual, the battery and charger manufacturers’ installation instructions, and documentation from the maker of any inverter or power station. Those sources are more reliable than a universal voltage rule because vehicle electrical systems differ.
Frequently Asked Questions
Can a phone charger drain a vehicle starting battery?
It can if left connected long enough, particularly when the battery is old, cold, partially discharged, or powering other accessories. A power bank removes that risk from the vehicle.
Is it safe to charge devices while the engine is running?
Usually, modest loads within the vehicle's rated outlets are handled while driving, but confirm the socket and charger ratings. Do not use an oversized inverter or ignore hot wiring and warning lights.
Does a second battery always protect the starting battery?
No. Protection depends on correct isolation, fusing, cable sizing, battery compatibility, and installation. A manual switch or failed isolator can still connect both batteries.
How can I estimate charging runtime?
Multiply watts by operating hours to estimate watt-hours, then add conversion losses and reserve. Use measured consumption when an appliance cycles or has a startup surge.
Should I idle the vehicle to recharge accessories?
Idling is an inefficient and potentially hazardous recovery method. Use it only where permitted and outdoors, and prefer an auxiliary battery, portable power station, or suitable charger for planned loads.
Further Reading
Authoritative Sources
Academy of Nutrition and Dietetics eatright.org
Professional nutrition guidance, healthy eating resources, and practical dietitian-reviewed advice.
U.S. Department of Agriculture usda.gov
Official food, nutrition, agriculture, and consumer guidance from the USDA.
NIH Office of Dietary Supplements ods.od.nih.gov
Research-based fact sheets on nutrients, supplements, dietary intake, and safety considerations.
International Society of Sports Nutrition sportsnutritionsociety.org
Evidence-informed sports nutrition resources and position stands for active people and athletes.
Conclusion
Protecting a vehicle’s starting battery begins with treating it as emergency starting capacity rather than convenient general-purpose storage. Match small electronics with a power bank, move larger or repeated loads to a portable power station, and use a correctly fused auxiliary battery system when vehicle charging is a regular requirement. Estimate watt-hours, account for inverter losses, inspect cable temperature and connectors, and test the setup before relying on it away from home. Short drives and engine idling may not restore what accessories consume, while voltage alone may conceal a weak battery. If the vehicle cranks slowly or the electrical system shows warning signs, disconnect the load and diagnose the fault. That approach preserves mobility while making charging more predictable.
Why Repeated Short Outages Create a Different Food-Safety Problem
A refrigerator does not warm at the same rate every time, and a brief outage does not automatically make food unsafe. The difficulty begins when several interruptions allow the cabinet temperature to rise, cool partially, and rise again before anyone can establish what happened. Each cycle depends on room temperature, door opening, food volume, appliance insulation, and whether the compressor had time to restore normal cooling.
A closed, full refrigerator generally holds cold longer than a sparsely stocked one because the food mass changes temperature more slowly. That advantage disappears when people repeatedly open the door to check contents, move items, or search for a thermometer. A small refrigerator in a warm kitchen may also recover differently from a large, well-filled unit in a cool room. The outage label—“only ten minutes”—does not describe the food’s actual temperature history.
Repeated interruptions also create a record-keeping problem. If power failed at 8 a.m., returned at 8:12, failed again at 9, and returned at 9:20, the refrigerator may not have fully returned to its normal operating range between events. Treating every interruption as an independent ten-minute exposure can produce false reassurance. The better question is whether the food remained adequately cold throughout the combined period and whether that can be supported by evidence.
Use safe refrigeration decisions after repeated brief outages as a risk assessment, not a smell test. Spoilage odors and slimy textures can reveal deterioration, but foodborne pathogens may be present without visible or sensory warning. Tasting a questionable item is not a safe test. The most useful immediate action is to stop unnecessary door opening, note the outage timeline, and find the refrigerator thermometer or another reliable temperature clue.
How Temperature, Timing, And Food Type Change the Decision
Temperature evidence is more useful than the outage duration alone. A refrigerator thermometer shows the cabinet environment, although it may not perfectly represent every food item. A thermometer reading taken after power returns can also miss a previous warm period if the appliance has already cooled again. For that reason, the reading should be combined with the outage sequence, door activity, food placement, and any signs that cold storage was interrupted.
Food type determines how conservative the decision should be. Raw poultry, ground meat, seafood, soft dairy products, cut fruit, cooked rice, leftovers, and ready-to-eat meals have different handling risks than unopened shelf-stable foods. A sealed jar of mustard is not evaluated like a container of cooked chicken. Hard cheeses, whole produce, and some condiments may tolerate conditions that would make a raw meat package or cream-filled dessert a poor choice. The goal is not to apply one rule to every item, but to match uncertainty with the food’s vulnerability.
Packaging can mislead. A frozen package that still contains ice crystals may offer more useful evidence than a chilled casserole that merely feels cool on the surface. Conversely, a cold exterior does not prove the center stayed cold. Large containers, tightly packed leftovers, and dense meat packages change temperature slowly, while small containers and foods stored in the door may warm sooner. Door shelves are usually less stable than interior shelves, so their contents deserve closer scrutiny after repeated access.
When an appliance has a display, remember that its number may reflect the sensor location rather than the warmest point. A refrigerator set to a cold target can still experience uneven conditions if air circulation is poor or the door seal is damaged. Avoid assuming that power restoration instantly resets the safety question. If the temperature is unknown and the item is highly perishable, uncertainty itself becomes a reason to choose the lower-risk option.
A useful comparison is between known exposure and unknown exposure. Known exposure lets you apply an established food-safety decision based on time and temperature. Unknown exposure requires more caution because neither a pleasant smell nor a brief stated outage can establish what happened inside the package. Keep a record of which foods were in the refrigerator, where they were stored, and whether they were moved; that simple note may prevent repeated handling and guesswork.
A Practical Inspection Sequence When Power Returns
Begin by preserving evidence rather than immediately rearranging the refrigerator. Record when the latest outage began and ended, estimate how often the door was opened, and check the appliance thermometer before moving food. If the refrigerator is still warm, keep the door closed while deciding whether food can be transferred to a working refrigerator or a properly prepared cooler.
Inspect the coldest and warmest zones separately. Check interior shelves, the door, drawers, and any area near the front where items may have been exposed to warm air. Look for leaking packages, swollen containers, separated sauces, melted ice, or condensation. These signs do not by themselves prove that food is unsafe, but they can reveal that the cabinet or a package experienced a substantial temperature change.
Use this compact sequence:
Establish the timeline: combine the repeated interruptions rather than counting only the latest event.
Check temperature clues: read the appliance thermometer and note whether frozen items remain solid or partly frozen.
Sort by risk: separate raw animal foods, dairy, eggs, leftovers, cut produce, and ready-to-eat foods from lower-risk packaged items.
Prevent cross-contamination: place leaking raw packages in a contained tray and clean affected surfaces according to safe food-handling practice.
Decide before tasting: discard items whose exposure cannot be established and whose risk is high.
The inspection should be orderly, but it should not become an excuse to leave the door open for a long time. A family may reasonably prioritize an unopened beverage or whole apples later, while promptly evaluating cooked leftovers, milk, and raw poultry. If a cooler is available, transfer the most temperature-sensitive items first, using enough ice or cold packs to keep the container cold and a thermometer to verify conditions rather than guessing from touch.
One common failure is mixing newly purchased cold food with older questionable food. That makes later decisions harder and may spread leaks. Another is placing a hot pot into an already stressed refrigerator, which adds heat and slows recovery. Once power is stable, allow the appliance to cool without unnecessary loading, verify that the door closes fully, and check whether a tripped breaker, loose plug, or failing seal is causing the interruptions to continue.
What To Keep, Cook, Move, Or Discard
Keep food when the available evidence supports continuous cold storage and the package remains intact. Move high-risk items to a dependable refrigerator or ice-filled cooler when the home appliance is still cycling unpredictably. Cooking is not a universal rescue method: heat may reduce some living organisms, but it does not make every temperature-abused food choice acceptable, and it cannot reverse all forms of deterioration or contamination.
Discard decisions should be strictest for foods that are highly perishable, ready to eat, or intended for people at greater risk from foodborne illness. Raw meat and seafood, opened milk, soft dairy, egg dishes, cooked leftovers, and prepared foods deserve more caution than unopened shelf-stable products. Do not use appearance, odor, or a small taste to clear an item. A food can look normal while presenting a hazard, and tasting it adds exposure without producing reliable information.
Food location matters when the evidence is mixed. A sealed container stored deep on an interior shelf may have stayed colder than a small carton in the door. A large block of food may remain cold in its center while its edges warm; that does not automatically make the entire item safe. Separate packages that were touching leaking raw food, and discard damaged packaging when its contents may have been contaminated.
Consider a repeated-outage household with a refrigerator thermometer reading cold after power returns. The reading supports recovery, but it does not prove that milk in the door and a shallow container of leftovers remained safe during earlier warm periods. The prudent choice may be to retain lower-risk items and remove uncertain ready-to-eat foods. In another household, a full freezer with solidly frozen food and little door activity may provide stronger evidence for keeping its contents, subject to the condition of each package.
For future events, prepare before the next interruption by keeping a refrigerator thermometer visible, grouping similar foods, maintaining cold packs, and marking leftovers with dates. A simple outage log can include start time, return time, door openings, temperature readings, and items transferred. Use safe refrigeration decisions after repeated brief outages again when the same appliance has several power events; recurring outages may point to an electrical or equipment problem that needs attention beyond food sorting.
When The Appliance Itself Needs Attention
Food safety and appliance reliability are connected. If the refrigerator repeatedly loses power, fails to cool after power returns, develops an unusual operating pattern, or cannot hold a stable temperature, replacing food is only a temporary response. Check the plug, outlet, circuit protection, door gasket, blocked air vents, and condenser-area cleanliness where the manufacturer permits user maintenance. Do not bypass electrical protection or attempt unsafe repairs.
A refrigerator that cools slowly after every interruption may be overloaded, poorly ventilated, or developing a mechanical fault. An appliance placed beside a heat source may struggle more during warm weather. A damaged seal lets cold air escape and allows warm, humid air to enter, increasing both temperature variation and condensation. These causes matter because repeated brief outages can expose a weakness that was not obvious during normal operation.
Compare the cost of preventive action with the cost of repeated uncertainty. A visible thermometer and a cooler with prepared cold packs are relatively simple safeguards, while a service call may be appropriate when temperatures remain unstable despite stable power and a properly closed door. If food must be discarded repeatedly, document the readings and outage times; that record can help a technician identify whether the problem is electrical, mechanical, or related to installation.
Do not pack the refrigerator so tightly that cold air cannot circulate, but do not leave it nearly empty if that makes temperature swings sharper. Store raw foods below ready-to-eat foods and use containers that prevent leaks. These habits will not compensate for a failed appliance, yet they reduce the consequences of a short disruption and make the next inspection more reliable.
Frequently Asked Questions
Does a ten-minute outage automatically spoil refrigerator food?
No. A brief event is not automatically unsafe, but repeated interruptions, frequent door opening, a warm room, or uncertain temperature history can change the assessment.
Should I trust the refrigerator display after power returns?
Use it as one clue, not complete proof. The display may reflect one sensor location and may show recovery after food has already warmed.
Can I smell food to decide whether it is safe?
No. Harmful bacteria may not change smell, taste, or appearance. Sensory checks can identify spoilage but cannot clear questionable perishable food.
Which refrigerator foods deserve the earliest review?
Check raw meat, poultry, seafood, milk, eggs, soft dairy, cooked leftovers, and ready-to-eat prepared foods before lower-risk packaged items.
What should I do if outages keep happening?
Limit door opening, monitor temperature, use a prepared cooler when needed, and investigate the outlet, breaker, door seal, ventilation, or appliance fault.
Further Reading
Authoritative Sources
Academy of Nutrition and Dietetics eatright.org
Professional nutrition guidance, healthy eating resources, and practical dietitian-reviewed advice.
U.S. Department of Agriculture usda.gov
Official food, nutrition, agriculture, and consumer guidance from the USDA.
NIH Office of Dietary Supplements ods.od.nih.gov
Research-based fact sheets on nutrients, supplements, dietary intake, and safety considerations.
International Society of Sports Nutrition sportsnutritionsociety.org
Evidence-informed sports nutrition resources and position stands for active people and athletes.
Conclusion
Repeated brief outages call for a combined review of time, temperature, food type, storage location, and appliance performance. Keep the door closed during interruptions, record the sequence of events, and use a thermometer rather than relying on touch or smell. Prioritize highly perishable and ready-to-eat foods, especially when their exposure history is uncertain; cooking or tasting is not a dependable way to recover questionable food. Transfer the most vulnerable items to verified cold storage when the refrigerator cannot stabilize. After the immediate decision, address the cause of recurring power loss or poor cooling, and keep a thermometer, cold packs, and an outage log ready for the next event.
Choose the Smallest Test That Answers the Question
Emergency plan testing should begin with a defined uncertainty, not with the most disruptive exercise available. A household may need to know whether everyone can receive an alert and identify the meeting place. A workplace may need to verify who authorizes evacuation, who checks an accessible restroom, or how staff account for visitors. Testing testing emergency plans without creating unnecessary disruption means matching the exercise to the decision that needs evidence.
A tabletop exercise is often the least intrusive starting point. Participants talk through a realistic event while remaining at their normal workstations or meeting location. The facilitator can introduce a power loss, severe weather warning, blocked exit, or unavailable contact and ask what happens next. This exposes unclear authority and missing information without moving people through a building or interrupting services.
Other low-impact tests answer narrower questions. A message test checks whether contact details, alert wording, and backup channels function. A call-tree test examines whether each person knows whom to contact and how quickly the chain reaches the final participant. A document walk-through checks maps, supply locations, utility shutoffs, and role assignments. These methods provide less evidence about physical movement than an evacuation, but they are more suitable when a full drill would affect customers, residents, patients, classes, or production.
A common mistake is treating realism as the same thing as quality. An unexpected alarm may produce visible activity while revealing little about the plan itself. A planned, limited exercise can be more useful if observers know what to measure. Define one to three objectives, such as confirming the alternate meeting point, testing a radio channel, or determining whether a supervisor can maintain essential service while another group relocates.
Design Drills Around Real Constraints
Low-disruption testing still needs realistic conditions. A plan may look complete on paper because it assumes normal staffing, open routes, charged devices, available transportation, and immediate access to decision-makers. The exercise should deliberately examine the assumptions most likely to fail, while avoiding hazards that add no useful information.
Build the scenario from ordinary constraints rather than theatrical surprises. For example, a small office could conduct a 20-minute discussion during a scheduled staff meeting in which the primary exit is unavailable and one employee is working remotely. The group must identify an alternate route, confirm who contacts the remote worker, and decide how reception handles visitors. No one needs to leave the building for the exercise to reveal whether the written instructions are actionable.
Different participants should receive only the information they would normally have at that point in an event, but the exercise boundaries must remain clear. A facilitator can say, “This is a planned exercise; no emergency response is being requested,” then provide the scenario. That preserves decision realism without creating confusion for neighbors, emergency services, customers, or other teams.
Use a simple planning sequence:
Set the objective: Name the capability being checked, such as notification, accountability, sheltering, relocation, or continuity of essential work.
Set the limits: State the start and end time, areas excluded, equipment that will not be activated, and actions participants must not take.
Assign observers: Give each observer a short form with time, action, delay, uncertainty, and consequence fields.
Choose the exercise level: Start with discussion or communications before testing movement, equipment, or external coordination.
The weak assumption to avoid is that every plan requires the same test. A family with young children may gain more from practicing a contact card and a departure decision than from repeatedly walking outside. A warehouse may need a controlled route and accountability check, but a live equipment shutdown could create unnecessary operational risk. Select the least intrusive method that can produce credible evidence, then increase complexity only when the earlier result supports it.
Protect Operations, People, and Public Clarity
A drill becomes disruptive when its timing, scope, or communication interferes with essential work or causes people to believe a real emergency is occurring. Protecting normal operations requires scheduling and separation, not simply asking participants to work faster. Divide a large organization into smaller groups, test one shift at a time, or use a tabletop session for roles that cannot leave their posts.
Identify people and functions that need special treatment before the exercise. Employees responsible for patient care, security, equipment monitoring, customer service, transportation, or critical infrastructure may not be able to participate in the same way as office staff. Provide an observer role, a relief person, or a scenario-based discussion instead of requiring them to abandon essential duties. Accessibility also needs practical attention: a drill should not assume that every participant can use stairs, hear an alarm, read small signage, or travel at the same pace.
Notification language should prevent avoidable alarm. Explain who is participating, what will happen, where the exercise applies, and how to identify a real incident during the test. If a building alarm, public announcement system, vehicle, or external message could be mistaken for an actual event, coordinate the exercise through the responsible authority and use an alternative method where possible. Never place a test message on a channel that could reasonably trigger public action without clear authorization.
Consider the tradeoff between announced and unannounced testing. An announced exercise permits staffing adjustments, accessibility planning, and clear public communication, but it may produce more polished behavior. An unannounced test may reveal notification habits under surprise, yet it can create confusion, distress, or unsafe movement. For most households and organizations, a transparent exercise with realistic injects provides better learning at lower risk. Surprise can be limited to the scenario information rather than the existence of the exercise.
Signs of a well-controlled test include uninterrupted essential service, participants who understand the boundaries, no unnecessary contact with emergency responders, and observers who can explain what happened. Warning signs include people leaving assigned posts without coverage, conflicting messages, staff hiding problems to appear prepared, or members of the public asking whether an actual emergency is underway.
Capture Evidence and Improve the Plan
The value of an emergency exercise comes from the decisions and delays it exposes. Record what participants actually did, not what the written plan says they should have done. Useful observations include the time an alert was received, whether the message was understood, which role made the first decision, whether the alternate route was known, and how accountability was established.
Separate a plan flaw from a training flaw and from a resource constraint. If nobody knows who approves relocation, the document or role structure may be inadequate. If the responsibility is clear but participants cannot find the procedure, the issue may be training or document placement. If the procedure is known but the only accessible route is blocked by storage, the corrective action concerns the physical environment. The distinction matters because rewriting a plan will not fix an obstructed doorway.
Hold a short debrief soon after the exercise. Ask participants what they expected, what actually happened, where they hesitated, and which instruction was difficult to locate or interpret. Avoid turning the discussion into a performance review. People are more likely to report a confusing contact number or impractical meeting point when the purpose is correction rather than blame.
Convert observations into assigned actions with an owner and a review date. A useful action might be replacing an outdated contact sheet, adding a backup communication channel, labeling a supply cabinet, revising visitor accountability instructions, or scheduling a mobility-aware route check. Rank items by consequence and ease of correction. A minor wording change that removes hesitation may deserve attention before a costly technology purchase.
Retest the changed element rather than repeating the entire exercise. If a call tree failed because two numbers were obsolete, run another notification check. If the alternate meeting point was unsuitable for wheelchair users, inspect and discuss the replacement route. This focused approach reduces fatigue while showing whether the correction worked. Link the process to testing emergency plans without creating unnecessary disruption by keeping each exercise proportionate to the remaining uncertainty.
Plans also need review after changes in staffing, building layout, technology, suppliers, household composition, or local hazards. A successful drill is not proof that the plan will work everywhere; it is evidence about the specific conditions tested. Record those conditions so future reviewers know what remains unexamined.
Frequently Asked Questions
What is the least disruptive way to test an emergency plan?
A tabletop exercise or controlled communication test is usually the least disruptive starting point. It can examine roles, contact paths, and decisions without moving people or interrupting essential services.
Should an emergency drill be announced in advance?
Announce the exercise when confusion, accessibility, public safety, or operational continuity could be affected. Realism can come from the scenario details rather than from hiding the fact that a test is occurring.
How often should an emergency plan be tested?
Use a regular review cycle suited to the setting, and test again whenever staffing, layout, technology, or hazards change. A focused retest after a correction is often more useful than an infrequent full-scale event.
What should observers record during a drill?
Record received times, decisions, delays, unclear instructions, missed contacts, route problems, accountability gaps, and effects on essential operations. Observations should describe behavior and conditions rather than assign blame.
Can a small household test its plan without alarming children or neighbors?
Yes. Use a calm, scheduled conversation, practice locating supplies, review contact cards, and walk through a meeting-place decision. Avoid activating alarms or contacting outside responders unless the exercise has been coordinated.
Further Reading
Authoritative Sources
Academy of Nutrition and Dietetics eatright.org
Professional nutrition guidance, healthy eating resources, and practical dietitian-reviewed advice.
U.S. Department of Agriculture usda.gov
Official food, nutrition, agriculture, and consumer guidance from the USDA.
NIH Office of Dietary Supplements ods.od.nih.gov
Research-based fact sheets on nutrients, supplements, dietary intake, and safety considerations.
International Society of Sports Nutrition sportsnutritionsociety.org
Evidence-informed sports nutrition resources and position stands for active people and athletes.
Conclusion
Effective emergency plan testing does not depend on creating a dramatic interruption. It depends on asking a precise question, selecting a proportionate exercise, protecting essential duties, and documenting what participants actually encounter. Begin with a tabletop discussion, message check, or route review before introducing movement or equipment. Make boundaries unmistakable, account for accessibility and staffing, and treat confusion as useful evidence rather than personal failure. Afterward, assign each correction to an owner, retest the changed element, and record which conditions remain untested. That sequence produces a plan grounded in observed behavior while reducing the risk that the exercise itself causes avoidable disruption.
Power returning does not necessarily mean that every part of a home is receiving dependable electricity. A utility may restore sections of a network in stages, and damaged lines, loose connections, transformer problems, or continuing weather conditions can cause repeated interruptions and voltage changes. A lamp may illuminate while a motor-driven appliance receives an unsuitable supply for reliable startup.
The risk is different from an ordinary outage. During an outage, equipment is inactive; during unstable restoration, equipment may repeatedly start, stop, and restart. Compressors in refrigerators, well pumps, sump pumps, furnaces, air conditioners, and heat pumps draw a heavier current when starting. Repeated failed starts can create heat and stress components. Electronics may be more vulnerable to abrupt changes, particularly if they are connected through inexpensive or already damaged power strips.
Give the supply time to demonstrate stability before reconnecting nonessential equipment. The appropriate waiting period depends on local utility instructions and the behavior of the service, not on a universal timer. If lights brighten and dim, circuits drop out again, or several appliances reset at once, treat the event as continuing instability rather than successful restoration.
A common mistake is assuming that a functioning ceiling light proves the entire service is safe. Lighting may work while a particular branch circuit, outlet, or appliance has suffered damage. Another mistake is switching on every major load to see what happens. That approach creates a large simultaneous demand and makes it harder to identify which device or circuit is causing trouble.
Use the utility outage page, text alerts, or local emergency instructions when available. Do not use a portable generator to feed house wiring unless a properly installed transfer system and qualified operation are in place. A generator connected incorrectly can energize utility lines and create fatal hazards for workers.
The Inspection Before Any Restart
Inspection should begin at the visible parts of the home and move toward the electrical panel without touching exposed wiring. Look for water near outlets, appliances, extension cords, power strips, the furnace, and the area around the panel. Floodwater or dampness can make equipment unsafe even if it appears undamaged. Keep wet equipment disconnected and arrange an assessment rather than testing it by plugging it in.
Check for burning smells, melted plastic, blackened outlets, crackling, buzzing, unusual warmth, or scorch marks. A breaker that has tripped may indicate overload, a fault, or equipment damage; it is not proof that the problem has resolved. Do not repeatedly reset a breaker that trips again. Repeated resetting can keep a fault energized and increase the chance of overheating.
Separate systems into three groups: essential safety equipment, temperature- or water-sensitive equipment, and convenience loads. Smoke alarms, medical equipment that has an approved backup arrangement, refrigeration, heating, and sump protection may deserve priority, but each has its own operating limits. An essential device that is wet, visibly damaged, or making abnormal sounds is not made safe by its importance.
Power entry and panel: note heat, odor, noise, visible damage, or repeated breaker movement.
Outlets and cords: inspect for moisture, looseness, discoloration, crushed insulation, and overloaded strips.
Appliances: check whether motors, displays, fans, and controls look or sound normal.
Water-related systems: confirm that pumps and nearby electrical connections are dry before considering operation.
Take photographs of damage before cleanup if an insurer or utility requires documentation, but do not delay urgent safety action to preserve evidence. If there is smoke, sparking, a hot panel, or an energized area affected by water, move away and contact emergency services or a qualified electrician as appropriate.
The practical tradeoff is between restoring function quickly and avoiding a second failure. Food may be at risk in a refrigerator, yet plugging in a damaged refrigerator can be more dangerous than temporarily using an approved alternative. Prioritize safe inspection over convenience, and follow manufacturer instructions for equipment that has been exposed to a surge, flood, or generator power.
A Controlled Order for Reconnecting Systems
Reconnect equipment in small groups, beginning with the lowest-risk essential load and allowing each motor or heating element to operate before adding another demand. This controlled approach reduces simultaneous starting current and gives you a chance to notice flicker, odor, noise, overheating, or another outage. Keep sensitive electronics and expensive appliances disconnected until the supply has remained steady.
A practical order is to confirm that the panel and key outlets are dry and normal, then restore one essential system. Next, connect temperature-sensitive equipment such as a refrigerator if it passes inspection, followed by pumps or heating equipment that are dry and known to be serviceable. Add ordinary lighting and small appliances afterward. Leave air conditioners, electric water heaters, clothes dryers, ovens, and other high-demand loads until the service appears reliable and the home wiring can support them.
Do not interpret silence as proof that a system is healthy. A refrigerator may take time before its compressor starts; a furnace may complete an ignition sequence; a sump pump may remain idle until water rises. Observe the equipment through a full normal cycle when feasible. A pump that runs continuously, a furnace that repeatedly attempts ignition, or a refrigerator that clicks without cooling should be switched off and evaluated.
Use separate wall outlets for major appliances rather than daisy-chained extension cords or power strips. Extension cords are temporary tools, not substitutes for household wiring, and their rating must match the load. Surge protectors do not correct low voltage, sustained overvoltage, or a damaged appliance. A protector with a warning light may still leave the connected equipment unsuitable for use.
For a home with a well, septic system, medical equipment, or a basement pump, write down the order before an outage occurs. A prepared restart plan is more useful than hurried experimentation. Include the location of the main disconnect, appliance manuals, utility contact information, and the name of a qualified electrician. Never remove panel covers or attempt electrical repairs unless you are trained and permitted to do so.
One weak assumption is that a whole-home surge device makes every restart safe. Such devices may reduce some transient surges when correctly installed, but they do not replace inspection, proper grounding, utility repairs, or appliance-specific protection. A staged restart remains necessary when the supply itself is unstable.
Warning Signs, Recovery Checks, And Future Protection
Successful restoration looks uneventful: appliances complete normal cycles, lights remain steady, breakers stay engaged, and no equipment produces unusual heat, odor, sound, or repeated resets. Check the refrigerator for normal cooling, confirm that heating or ventilation equipment responds normally, and verify that pumps shut off rather than running continuously. These observations are more useful than simply seeing that a display or indicator light has turned on.
Stop the restart if a breaker trips repeatedly, an outlet becomes warm, a device smells scorched, a motor struggles, lights pulse, or different parts of the home behave inconsistently. A partial-service problem can create unusual conditions across circuits, and flickering that continues after other homes appear normal should be reported to the utility. Do not substitute a larger fuse or breaker, bypass a protective device, or use a damaged cord to keep a system running.
Some damage appears later. A surge may weaken a power supply or control board without causing immediate failure. Record equipment that behaves differently, including clocks that lose time, displays that reset, fans that run intermittently, or motors that cycle unusually. Disconnect questionable equipment and ask the manufacturer or a qualified technician whether inspection is appropriate.
Future preparation should focus on reducing confusion at the next restoration. Label the main panel and major appliance disconnects, keep critical equipment manuals accessible, and store flashlights where the panel can be reached safely. Consider battery backup for communications and carefully selected electronics, but match its capacity and output to the intended device. For refrigeration, avoid opening the door unnecessarily during the outage rather than relying on an immediate risky restart.
A short restart record can also reveal patterns: when service returned, how often it flickered, which circuits tripped, and which devices showed symptoms. That information helps a utility or electrician investigate more efficiently. The objective is not to bring every system online at once; it is to restore necessary functions while preserving the ability to identify a developing electrical problem.
Frequently Asked Questions
Should every appliance be turned on as soon as electricity returns?
No. Wait for stable service, inspect equipment, and reconnect essential loads individually. Delay large motors and heating appliances until flickering and repeated interruptions have stopped.
What should I do if a breaker trips after restoration?
Turn off or unplug the equipment on that circuit and reset the breaker only once if the area is dry and there are no warning signs. If it trips again, leave it off and call a qualified electrician.
Can a surge protector make unstable power safe?
No. A surge protector may address some brief transients, but it cannot correct sustained voltage problems, wet equipment, overloaded circuits, or internal appliance damage.
When should a refrigerator be reconnected?
Reconnect it after the supply is steady and the refrigerator, cord, outlet, and surrounding floor are dry and undamaged. Monitor for normal compressor operation and cooling rather than relying only on the interior light.
Is flickering power after restoration a utility issue?
It may indicate a utility-side problem, a service connection issue, or a home electrical fault. Report persistent flickering and seek professional help if the panel is hot, noisy, damaged, or affected by water.
Further Reading
Authoritative Sources
Academy of Nutrition and Dietetics eatright.org
Professional nutrition guidance, healthy eating resources, and practical dietitian-reviewed advice.
U.S. Department of Agriculture usda.gov
Official food, nutrition, agriculture, and consumer guidance from the USDA.
NIH Office of Dietary Supplements ods.od.nih.gov
Research-based fact sheets on nutrients, supplements, dietary intake, and safety considerations.
International Society of Sports Nutrition sportsnutritionsociety.org
Evidence-informed sports nutrition resources and position stands for active people and athletes.
Conclusion
Restoring home service safely is a controlled process, not a race to switch everything back on. Treat flickering, repeated interruptions, water exposure, heat, odor, and unusual equipment behavior as reasons to pause. Inspect the panel, outlets, cords, and appliances first; then reconnect dry, undamaged essential systems individually and observe their normal operation before adding heavier loads. Keep damaged equipment disconnected, avoid repeated breaker resets, and use qualified help for panel problems or uncertain conditions. A written restart order, labeled disconnects, accessible manuals, and reliable utility contacts make the next recovery more orderly. The safest result is dependable operation with no unexplained symptoms, not merely a house full of illuminated displays.
An evacuation decision should be reassessed when a fact that influenced the original choice changes. The relevant change may be a new evacuation order, a shifting fire front, rising water, a damaged road, worsening air quality, a medical issue, a loss of power, or a new ability to leave. Begin by writing down the original reason for staying or departing. Then identify the exact new fact rather than relying on a general feeling that conditions seem different.
Separate hazard conditions from travel conditions. A wildfire may still be several miles away while smoke, falling ash, or a closed bridge makes the planned route unusable. Conversely, a brief burst of heavy rain may look alarming but have little effect on a route that remains open and elevated. The decision depends on the interaction between the threat, the location, the route, the people traveling, and the time required to reach a safer destination.
Use a short comparison rather than trying to predict the entire event:
Hazard: Is the threat moving toward the area, becoming less predictable, or producing secondary dangers?
Exposure: Would staying increase contact with smoke, heat, floodwater, contaminated air, or falling debris?
Mobility: Can everyone leave safely, including children, older adults, people with disabilities, and pets?
Time: Is there enough daylight, fuel, communication, and road capacity for the trip?
Alternatives: Is there a confirmed destination or a safer route if the original plan fails?
A common mistake is treating the original decision as a commitment that must be defended. It was based on earlier information and may no longer fit the situation. The opposite mistake is changing plans because of one unverified message. A useful reassessment requires at least one reliable update about the hazard and one direct check of the practical ability to move or shelter.
Recheck Official Information and Route Conditions
Official information should anchor the reassessment, but it does not replace local judgment about a specific street, building, or travel group. Check the emergency management agency, fire or law-enforcement authority, weather service, transportation agency, and any official alert system relevant to the event. Look for the publication time, affected boundaries, evacuation level, shelter information, and instructions for people who need assistance.
Read the actual wording carefully. An evacuation warning, recommendation, order, road closure, shelter-in-place instruction, and all-clear message do not carry the same practical meaning. A social-media post may accurately describe a nearby problem while still being too old or too incomplete to guide departure. If sources conflict, favor the newest instruction from the responsible authority and avoid taking a route based only on an unverified shortcut.
Route checking needs more than a map showing a blue or red line. Confirm bridges, low-water crossings, tunnels, fuel availability, traffic direction, roadblocks, smoke visibility, flood depth, and whether emergency officials are directing traffic. A route that is technically open may be unsuitable for a vehicle with limited clearance or for someone who cannot drive in dense smoke. If the primary route is lost, use a previously identified alternative only after checking that it is open and leads to a genuinely safer area. The related evacuation reassessment process should include destination confirmation, not just route selection.
Do not enter moving water, pass barricades, or drive toward visible flames, heavy smoke, downed wires, or debris. A delay caused by stopping to verify information is different from a delay caused by repeatedly seeking certainty while conditions deteriorate. Set a practical information limit: gather the latest official update, verify the route, communicate the plan, and then act unless a new credible instruction changes the choice.
Compare Leaving Now With Remaining Temporarily
The safest option is the one that produces the lower foreseeable exposure, not automatically the one that feels more active. Leaving can reduce exposure to a moving hazard, but departure also creates risks from congestion, poor visibility, crashes, fuel shortages, missed turns, and separation from family members. Remaining can be reasonable only if the building is suitable, official instructions support it, essential supplies and medications are available, and a usable exit remains available.
Compare both options across the same time window. Ask what the next hour may require, not just what is comfortable at this moment. If leaving now takes 45 minutes but waiting could make the trip take several hours because roads are filling or visibility is declining, the apparent inconvenience of early departure may be the safer tradeoff. If all outbound roads are closed and officials direct residents to shelter, attempting to drive may create greater danger than staying in a prepared, defensible location while monitoring instructions.
People often use the current appearance of the sky, water, or road as a substitute for hazard information. That can mislead. Floodwater may rise after rainfall upstream, and a fire may change direction with wind. A temporary lull can be a better time to leave rather than evidence that the threat has ended. Conversely, visible smoke alone does not establish that every route is unsafe; official closure information and local visibility matter.
Make the comparison concrete by recording:
the safest confirmed destination and estimated travel time;
the condition of the primary and alternate routes;
fuel, battery, medications, water, identification, and communication needs;
the person responsible for driving, navigation, and contacting relatives;
the specific condition that would make departure impossible or remaining unsafe.
For example, a household with a full tank, a reliable vehicle, and a confirmed destination may have more options than a household that needs medical transport and depends on a road already under traffic control. The comparison must account for those constraints rather than applying a universal rule. If you are still uncertain, consult the official emergency line or local authority instead of asking an unverified online group to make the decision for you.
Set the Next Review Point and Act on Clear Triggers
A reassessment is useful only if it leads to a defined next action. Once you choose to leave, shelter, or wait briefly, set a review time and identify the event that will end the waiting period. Examples include a new evacuation order, a road closure, a change in wind direction, rising water near an access road, loss of communications, worsening breathing conditions, or a transportation problem affecting someone in the group.
Waiting should never be an open-ended state. Assign one person to monitor official alerts while another prepares the vehicle, documents, medications, mobility equipment, pet carriers, and essential supplies. Keep keys, phones, chargers, and shoes accessible. If the plan is departure, place everyone in a position to move without searching through rooms or packing from scratch. If the plan is temporary shelter, move away from windows or flood-prone lower areas as appropriate, maintain ventilation decisions consistent with the hazard, and keep an exit path clear.
Use a simple decision record with four lines: current threat, confirmed route or shelter, next trigger, and deadline for review. This prevents memory from becoming the decision system during a stressful event. It also makes handoffs easier if another adult must take over. Recheck that the destination remains accepting people and that the route has not changed before starting a late departure.
Failure signs include repeatedly refreshing rumors without checking official sources, packing while the road is already becoming impassable, splitting the group without a communication plan, or assuming a phone alert will arrive in every location. Carry a written address, charger, and contact information when practical. The broader decision plan should include what happens if the car breaks down, a family member cannot travel, or the preferred shelter is full.
Do not wait for perfect certainty. Emergency decisions are made with incomplete information, so the goal is to preserve safe options, reduce avoidable exposure, and respond to authoritative changes quickly. Reassessment should make the plan more specific, not endlessly postpone action.
Frequently Asked Questions
When should an evacuation decision be reassessed?
Reassess after any new official order, route closure, hazard movement, major weather change, loss of essential services, or change in a traveler’s ability to move safely.
Should a temporary lull be treated as permission to stay?
No. A lull may provide a safer departure window, while hazards such as wind-driven fire or upstream flooding can worsen later. Check official updates and route status.
What if the original evacuation route is closed?
Do not improvise through barricades or hazardous areas. Confirm an official alternate route and destination, or follow shelter instructions if no safe route is available.
How can a household avoid waiting too long?
Set a review deadline and predefine triggers such as an evacuation order, worsening visibility, rising water, fuel concerns, or loss of communication.
Is staying ever safer than leaving?
It can be when roads are closed or hazardous and officials direct people to shelter, provided the location is suitable and the group can continue receiving instructions.
Further Reading
Authoritative Sources
Ready.gov ready.gov
Official household preparedness guidance, emergency plans, and supply checklist resources.
FEMA fema.gov
Federal emergency management information, disaster planning resources, and recovery guidance.
American Red Cross Emergency Preparedness redcross.org
Practical emergency preparation, safety, and response guidance for households.
CDC Emergency Preparedness and Response cdc.gov
Public health guidance for disasters, emergency response, and recovery conditions.
Conclusion
Changing conditions call for a fresh comparison, not automatic loyalty to the first evacuation choice. Identify what changed, verify official instructions, check both primary and alternate routes, and compare the risks of travel with the risks of remaining. Give special weight to travel time, daylight, fuel, medical needs, mobility, pets, communication, and the availability of a confirmed destination. A brief pause can be useful when it has a deadline and a clear trigger; indefinite waiting removes options as roads fill, visibility falls, or services fail. Record the current plan and the condition that will change it, then continue monitoring authoritative updates. The strongest decision is the one that preserves a realistic path to lower exposure for everyone involved.