by Preparation Call Editorial Team | Jul 31, 2025 | Preparedness
Stay Informed and Educated about Weather Conditions
Understand Weather Terminology
It’s super important to get a grip on weather terminology. When you hear a weather alert, do you know what a “flash flood watch” means compared to a “warning”? I started paying attention to these terms, and what a game changer! Knowing the difference can help you prioritize your response. A ‘watch’ means to be prepared, while a ‘warning’ is the time to act.
Before I learned this, I would just brush off the alerts. But once I had a better understanding, I realized how vital it is to stay updated. Educate yourself on common weather phenomena specific to your area, whether it’s hurricanes, tornadoes, or snowstorms. Make a mental note—knowledge is power!
Ultimately, don’t just rely on the news. Apps and local alerts keep you in the loop throughout the day. I downloaded a few reputable weather apps, and let me tell you, it’s worth the space on my phone!
Follow Trusted Sources for Updates
One of the biggest lessons I learned during unexpected weather events is to follow trustworthy sources. Social media can be super misleading, and we don’t want to get caught up in the panic. Find local meteorologists on Twitter or Facebook who provide accurate and timely updates. Building that trust is key!
Don’t hesitate to get weather notifications sent straight to your phone. I have alerts set up to ping me when severe weather is approaching, and it’s been a real lifesaver. Being notified instantly means I can act quickly!
Also, check out local government websites for emergency plans and community resources. Often, they publish helpful guides about what to do before, during, and after a disaster. Being prepared makes all the difference.
Participate in Community Preparedness Events
Getting involved with your community during preparedness events is a blast! I’ve joined local emergency preparedness meetings and trainings, which gave me insight into local hazards and community response strategies. Plus, you meet some great people who think like you—future survivalists!
These events often provide hands-on training, like how to use an emergency kit or what to include in an evacuation plan. The experience is invaluable, and you gain confidence knowing you can handle a tough situation.
Trust me on this one—community bonds help in times of crisis. You can share resources, experiences, and even group networking in case you need help during bad weather.
Create a Disaster Preparedness Plan
Assess Your Household’s Needs
First things first, take stock of your household’s unique needs. This isn’t a one-size-fits-all situation. I personally sat down with my family and discussed what we would need during a disaster. That includes food supplies, medications, and special items for little ones or pets.
At the end of the day, knowing what everyone needs helps reduce stress in high-pressure moments. Plus, you can avoid the scramble at the last minute when everyone realizes they need something vital!
Compiling a list of necessary items for different scenarios can be a smart move, helping you stay organized. It doesn’t have to be complicated; you can keep it simple but effective!
Develop an Evacuation Plan
Your evacuation plan is your life jacket when things go south. For my family, this means knowing multiple routes out of town just in case. I cannot stress enough how crucial it is to have alternate paths in mind—traffic during evacuations can be a nightmare!
Make sure everyone in your household knows the plan. Whether it’s kids or grandparents, everyone should be informed about what to do and where to go. Practice makes perfect, so why not have a little drill? It can be fun and educational at the same time!
Don’t forget to consider transportation, too. If you only have one vehicle, plan who drives it and what to do in case of emergencies. Having a clear strategy is a huge weight off your shoulders when disaster strikes.
Compile a Go-Bag with Essentials
Talking about a go-bag gets me excited, honestly! I put together an emergency bag with all the essential items my family might need in a hurry. Think of non-perishable snacks, water bottles, flashlights, and a first-aid kit. It’s kinda like a survival care package!
Don’t forget cash! ATMs may not function during a disaster, so having some bills on hand is a lifesaver. Also, pack copies of important documents—IDs, insurance info, you name it. Keeping everything together can save you a ton of stress later on!
Lastly, remember to refresh your go-bag occasionally. I tend to swap out old snacks and check the expiration dates regularly. It’s the simple things that can make a big difference when you need to act fast!
Establish Communication Protocols
Identify Emergency Contacts
Communication is key during a disaster. Identify trusted emergency contacts that your family can reach out to if you’re separated. I made a list stored on everyone’s phones and printed a few copies for the fridge. It’s great for peace of mind!
You’ll want to choose a mix of local and long-distance contacts. Sometimes the cell networks are down, and it might be easier to get in touch with someone outside the area. Whoever it is, make sure they’re on board, too, and understand they’ll be your go-to.
Don’t forget to establish a meeting point if everyone gets split up. It should be somewhere familiar and accessible—like a local park or community center. Having a plan protects you from panic later!
Use Multiple Communication Channels
Relying solely on your phone isn’t the best idea. I learned that the hard way! You never know when signals may drop or when you might lose power. It’s important to have multiple ways to communicate. Use social media, landlines, or even walkie-talkies!
Encourage family and friends to share their locations using location-sharing apps. It may sound a bit dramatic, but it can really come in handy when every moment counts. Keeping tabs on each other shouldn’t add stress, so use tech to your advantage!
Also, consider having a family group chat as a backup for real-time updates. Keeping everyone in the loop can alleviate fears and uncertainties when things go wrong.
Educate Family on Communication Plans
Here’s a fun one: make your communication plan a family affair. Sit down and involve everyone—no matter their age. This builds understanding and reduces anxiety when it’s time to put the plan into action.
Run through scenarios where you might need to execute your plan. This way, people will know exactly what to do without being flustered in the heat of the moment. I remember the first time we did a mock drill. Everyone was so much calmer during the actual storm!
Keep it interesting with role-playing or games to teach young kids about safety precautions and routes during an emergency. They’ll not only learn, but they’ll remember the lessons, too!
Stock Up on Emergency Supplies
Build a Comprehensive Emergency Kit
Hello, emergency kit! What’s inside matters more than you might think. I always recommend keeping basics like non-perishable food, first-aid items, and hygiene products. But don’t forget the pet essentials if you have furry family members!
When I first assembled my kit, I focused on food and water. But then I thought about comfort too—things like blankets, a battery-operated radio, and even board games for the kids! It was eye-opening to think of all the needs that could arise.
Regularly checking and updating the emergency kit is crucial. Changing out stale food or expired supplies ensures you’re always ready to go. It’s one less thing you have to worry about when disaster strikes!
When to Restock Supplies
Make it a habit to restock your emergency supplies—maybe set a reminder on your phone or jot it down in your planner. Every few months, review what you have and what might need refreshing. Keeping track will transform a typically daunting task into an easy routine.
I had no idea how quickly supplies could dwindle until I forgot to check my kit. That was a real wake-up call! I found expired items and bare minimums sitting there. Now, I treat my emergency stock like a monthly grocery shopping trip—only for safety!
Being proactive saves time and ensures that you’re never caught with your pants down when an emergency hits. It’s all about staying ahead of the game!
Sourcing Alternative Supplies
Don’t forget to think outside the box when assembling supplies! Local supermarkets might be low on certain items during emergencies. That’s why diversifying your sources is smart—try local co-ops or farms for fresh food options.
I found that reaching out to community groups can help find emergency items. People often share resources and tips on where to score food and supplies. Talk to your neighbors; they might have insights you wouldn’t have thought of!
Creating a network can make a world of difference when everyone is trying to get the same resources. Building community and connections will be beneficial not just in emergencies but in daily life too!
FAQ
1. What should be included in an emergency kit?
An emergency kit should include non-perishable food, water, a first-aid kit, flashlight, batteries, personal hygiene items, cash, and any necessary medications. Don’t forget comfort items for kids or pets!
2. How can I stay informed about weather conditions?
Follow trusted sources such as local meteorologists and official government weather services. Download apps that send real-time alerts to keep you informed on developing weather situations.
3. Why is having an evacuation plan important?
An evacuation plan helps you act swiftly in emergencies. Knowing routes, meeting points, and transportation arrangements in advance can save precious time and reduce panic when every second counts.
4. What types of communication methods should I use?
Utilize multiple forms of communication like phone calls, text messages, social media, and even community bulletin boards. Ensure everyone knows how to reach each other during a disaster.
5. How often should I check my emergency supplies?
It’s recommended to check and restock your emergency supplies every few months. Regular reviews will ensure your kit is up-to-date and ready for anything life throws at you.
by Preparation Call Editorial Team | Jul 31, 2025 | Preparedness
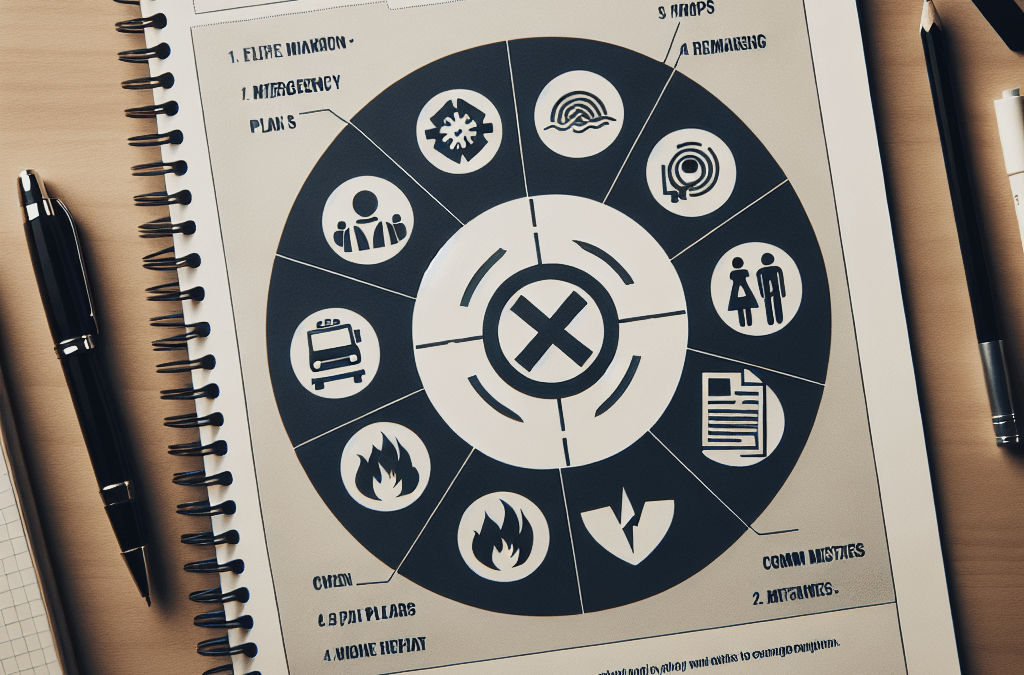
When it comes to emergency preparedness, many individuals and families often fall into common traps that can jeopardize their safety during a crisis. While the idea of having an emergency plan may sound simple, the execution requires careful thought and attention. Here are some misconceptions and mistakes you should avoid to ensure your family remains safe when disaster strikes.
One of the first missteps is ignoring the importance of a communication plan. In times of chaos, especially during natural disasters, maintaining contact with loved ones becomes crucial. Yet, many people assume that everyone will simply know where to go or what to do without clear instructions. This isn’t the case! Establishing a designated meeting place, sharing emergency contacts, and utilizing multiple forms of communication—like text messages or social media—can make all the difference if traditional phone lines are down. Be proactive: discuss your plan with family members regularly.
Another prevalent error is neglecting to update your emergency kit. It’s easy to throw together supplies and forget about them until an actual emergency arises. However, this complacency could be detrimental. Over time, food items can expire, batteries lose their charge, and medical supplies may need refreshing. Aim for a seasonal check-in on your kit; include essentials like non-perishable food, water (one gallon per person per day), first-aid materials, flashlights, and necessary medications. Keeping everything fresh not only ensures you have what you need but also fosters peace of mind.
Underestimating the risks associated with natural disasters is another dangerous pitfall. Whether it’s hurricanes in coastal regions or earthquakes in fault-prone areas, each locale has its own unique risks that should not be overlooked. Ignorance can lead to a lack of preparation; therefore, staying informed about potential threats in your area is paramount. Research historical data on local disasters and identify warning signs associated with them—this knowledge will empower you to react quickly when faced with uncertainty.
Equally important is involving all family members in planning discussions and preparations. When only one person takes charge of creating an emergency plan or kit, others may feel uninformed or unprepared when disaster strikes. Encourage open dialogue by holding regular family meetings focused on safety planning; involve children by assigning them small roles such as gathering supplies or practicing evacuation routes together. By fostering teamwork within your household regarding emergencies, you’ll create unity and confidence among all members.
Lastly, don’t overlook local resources and community support systems available during emergencies! Many towns provide helpful services like shelters or local response teams ready to assist residents in crisis situations. Familiarize yourself with these resources ahead of time so that you can take advantage when needed most confidently. Connecting with neighbors through community programs can also foster mutual assistance; after all, it’s easier to weather storms together than alone.
All in all, effective emergency preparedness goes beyond just having a plan—it demands constant evaluation and involvement from everyone involved while recognizing external resources available for support during crises. By avoiding these common mistakes outlined above and embracing proactive strategies instead, you will enhance your family’s ability to stay safe no matter what life throws at you!

by Preparation Call Editorial Team | Jul 31, 2025 | Preparedness
Layering Essentials: The Foundation of Survival Clothing
Understanding Base Layers
When preparing for extreme weather, the first thing I learned is the importance of base layers. These are the garments that sit closest to your skin, and they play a crucial role in moisture management. Materials like merino wool or synthetic fibers are great choices because they wick away sweat while keeping you warm. I’ll never forget the first time I trudged through snow in a synthetic base layer—it kept me dry and cozy throughout the day.
Choosing the right thickness is also key. I usually opt for lighter weight layers for milder conditions, while heavier options come out for frigid temperatures. You want your base layer to fit snug but not too tight; the last thing you want is restricted movement when you’re on an adventure. Trust me, comfort is everything.
And don’t forget about the importance of color. Dark colors absorb heat, while lighter shades reflect it. For winter adventures, I like to go with darker tones for that extra bit of warmth and insulation. Once you get the hang of layering correctly, you’ll find it drastically changes your outdoor experience.
Insulation Layers: The Shield from the Cold
Next up is the insulation layer. This is where the magic happens when it comes to keeping your body heat intact. I love down jackets for their incredible warmth-to-weight ratio. They’re perfect for cold hikes or camping trips. However, if it’s going to be damp, synthetic insulation is the way to go because it still retains warmth when wet.
Finding the right balance between insulative properties and packability is essential. Over the years, I’ve learned that a jacket that compresses well for carrying will often be my best friend when space is limited, but it still needs to pack a punch when it’s time to cozy up.
Also, consider your activity level! On days when I’m more active, I choose lighter and less bulky insulation materials to prevent overheating. This layered approach means you can always add or remove layers depending on your energy output, keeping you safe and comfortable no matter the weather.
Protective Outer Layers: Braving the Elements
The final piece of the survival clothing puzzle is the protective outer layer. A good waterproof and windproof jacket is essential if you’re caught in the elements. I’ve learned the hard way that just a little rain can ruin a day if you’re not prepared. Look for jackets that have taped seams, as they provide extra protection against moisture.
Don’t skimp on features like hoods and adjustable cuffs, either! A decent hood can save you from an unexpected downpour, and snug cuffs help keep that icy wind at bay. I always look for jackets with ventilation options too; it’s a lifesaver when things start heating up.
All in all, don’t forget about the breathability factor. You want something that works with your body rather than against it. Always check for reviews on breathability, as I’ve suffered from sweating and feeling gross because of a poorly ventilated outer layer.
Choosing the Right Fabrics: Function Meets Comfort
Natural vs. Synthetic
When diving into the world of outdoor clothing, fabric choice can often feel overwhelming. I used to think that natural fibers like cotton were the best! But after one fateful hiking trip, I realized that synthetic materials outperform them in moisture management. I swear by polyester blends nowadays. They dry quickly and breathe better than cotton, which holds onto moisture.
Bamboo fabrics have also popped up on my radar recently; they’re soft, moisture-wicking, and environmentally friendly too. As I’m aiming to be more sustainable in my choices, exploring these options is a win-win.
In extreme cold, you can never go wrong with merino wool. It keeps you insulated and is odor-resistant, so even after a long day outdoors, I don’t end up smelling like I’ve spent a week living in the wild!
Water-Resistant Treatments
Investing in water-resistant materials can save your day. Many brands offer fabrics with DWR (Durable Water Repellent) treatments. I’ve learned that even if my jacket looks dry on the outside, it’s the water-resistant interior that makes all the difference between a comfortable trek and a soggy, cold mess.
It’s crucial to keep in mind that these treatments can wear down over time, especially after countless washes. When I notice my gear isn’t performing as it should, I simply reapply a DWR treatment to bring my jacket back to life.
Keep in mind that while some materials are naturally water-resistant, such as certain types of wool, blending them with synthetics can give added benefits. Mixing and matching can often yield the best results in keeping you dry and comfortable.
Breathability and Comfort
Lastly, you can’t overlook breathability. As someone who enjoys extended outdoor adventures, I know how crucial it is to have clothes that can handle fluctuations in body temperature, especially during high-energy activities. Gore-Tex is a popular option for its breathability and waterproof qualities. It allows sweat to escape while keeping water at bay.
Additionally, features like mesh panels and zippers in jackets allow for ventilation, keeping airflow going when I start to feel too hot. I’ve found myself unsnapping a jacket mid-hike just to keep things cool; these features can be lifesavers!
Lastly, don’t forget about comfort! Test your clothes before heading out into nature. I’ve made many mistakes by wearing clothes that seemed comfortable in-store but were a nightmare during long hours outdoors. Always go for a fit that allows for motion without any constriction.
Accessories to Complete Your Kit: Don’t Leave Home Without Them
Hats and Gloves
When it comes to accessories, hats and gloves have become my best companions. On cold days, I wear a thermal beanie that keeps my head warm while being breathable. It’s surprising how much heat is lost through the head, so be sure to cover up!
Gloves are also crucial. I prefer layers here too—a thin liner glove under an insulated outer glove can keep my hands toasty without sacrificing dexterity. I’ve even added touch-screen compatibility for my liners, so I can snap photos without freezing my fingers off.
If you’re heading into truly extreme conditions, I suggest selecting gloves with a waterproof shell. I know from experience that sitting in camp with cold, wet hands is the last way to enjoy the wilderness.
Footwear Matters: Stay Grounded
Let’s not forget about footwear! Having the right shoes can make or break your experience outdoors. I learned the hard way that those pretty hiking boots look great but aren’t always what you need for tough terrain. Ankle support is key, and I always make sure to break my boots in before a big trip.
Breathable, waterproof boots are my go-to, especially if I’ve got a chance of encountering snow or mud. Ensuring that they fit well will save you from blisters, which are no fun at all when you’re on a multi-day trek. Choose wisely!
Don’t just focus on boots. I also keep an extra pair of moisture-wicking socks handy. Wet feet lead to cold feet, and trust me, that’s a mood killer when you’re out in the wild.
Balancing Style and Functionality
Let’s be honest; while functionality is my priority, I like to look good too! There are plenty of brands that balance style and function nowadays. Finding those pieces that can go from an outdoor adventure to a casual day out is a game changer. I often select clothes that look great but are still practical for outdoor use.
Remember, layers can also add style. I love to mix and match colors and textures, but I always ensure everything fits well and allows freedom of movement. Shopping can be a chore, but I enjoy selecting versatile pieces that won’t just sit in my closet.
In closing, don’t be afraid to accessorize. A funky scarf or a stylish outdoor vest can brighten an otherwise lackluster outfit while providing that extra layer of warmth. Just because you’re in survival mode doesn’t mean you can’t have a little fun with your wardrobe!
Making the Investment: Quality vs. Price
Prioritizing Your Needs
When it comes down to it, budgeting for survival clothing can feel daunting. In my experience, I’ve learned to prioritize needs over wants. I often remind myself that spending a bit more on quality gear is better than skimping on something that will wear out or fail when I need it the most.
Each piece of gear I invest in has to meet my personal standards and fit my adventure style. If I’m going to be exposed to extreme weather, I want clothing that is built to withstand those conditions and has a solid warranty to back it up.
Keep in mind, shopping for durable clothing can be done gradually. I’ve amassed my outdoor gear over a few years, picking up key items during sales events, so I recommend not breaking the bank all at once.
Researching Brands
Doing a little homework on brands has saved me so much time and hassle down the road. I often check online reviews and forums dedicated to outdoor enthusiasts. It’s amazing how many insights you can get about product longevity and performance from like-minded adventurers who have actually put these pieces to the test.
I also focus on reputable outdoor experts who recommend certain brands. Those insights can really guide my purchasing decisions. Don’t forget social media as well; following outdoor influencers can provide real-time feedback on gear, and they’ve helped me discover amazing new products!
In closing, I advise you to keep an eye out for innovative brands that offer lifetime warranties. A solid warranty can give you peace of mind; knowing that the company stands behind its products is worth every penny.
Value for Money
Ultimately, it’s all about value for money. In my years of outdoor exploration, I’ve learned that cheaper options lead to replacements that can cost more in the long run. Investing in versatile, quality pieces that serve multiple purposes saves both money and space.
Think about how many outfits you can mix and match for different activities. I’ve built a wardrobe that works whether I’m mountain climbing, heading to brunch, or just hanging out around the house. This multipurpose approach not only keeps the packing light but allows for spontaneity in my adventures!
So, before you pull the trigger on cheaper gear, ask yourself if it truly meets your needs. Always aim for clothing that can withstand the elements while keeping you looking and feeling great.
FAQs about Survival Clothing for Extreme Weather
1. What should I prioritize when choosing survival clothing for extreme weather?
Always prioritize layering, choosing appropriate fabrics, and ensuring breathability. Comfort and fit are also crucial, enabling freedom of movement during your activities.
2. Are natural fabrics better than synthetic ones for outdoor clothing?
Not necessarily! While natural fabrics like wool have benefits, synthetic materials often outperform in moisture management and drying time, which are critical for extreme conditions.
3. How do I maintain the water-resistant qualities of my jackets?
You can maintain these qualities by regularly cleaning your gear with a gentle detergent and applying a DWR treatment when you notice water is no longer beading off the surface.
4. How important are accessories like hats and gloves?
Accessories are crucial! They help retain heat and protect against the elements, making them just as important as your clothing layers when braving the outdoors.
5. Should I buy all my outdoor clothing at once?
It’s wise to build your wardrobe gradually. Prioritize key items for your immediate needs and then invest in versatile pieces as you grow into your outdoor adventures.