by Preparation Call Editorial Team | Jul 30, 2025 | Preparedness
Understanding Your Community’s Needs
Assessing Vulnerabilities
Alright, let’s dive into the heart of the matter. Before you get all gung-ho about forming a community disaster response team, you really need to take a good look around your neighborhood. What are the biggest risks you face? Floods, earthquakes, maybe wildfires? Get the scoop on what your community’s actually dealing with so you can tailor your plan to meet those specific needs.
Talking to locals is a great way to gain insight. Organizing informal meetings can help you identify concerns that may not be on your radar. Plus, you get to bond over your shared experiences and maybe even a few laughs—because, let’s face it, a little humor goes a long way in addressing serious topics.
Once you’ve gathered all this info, create a comprehensive list of vulnerabilities. This will be your starting point. It’s like having a map before embarking on a great adventure. You need to know where you’re headed and what you might encounter along the way.
Recruiting the Right Volunteers
Identifying Skills and Roles
Alright, so now that you know what you’re up against, it’s time to rally the troops! You’ll want to enlist a diverse group of people because different skills will be crucial during a disaster. Think about doctors, nurses, firefighters, teachers—each bringing something unique to the table.
Once you’ve got your crew interested, it’s worthwhile to identify who can take on what roles. Maybe one person can handle communications while another oversees supplies. Just imagine the chaos if no one knows who’s doing what! Establishing roles helps create a sense of order and accountability within your team.
Don’t forget to keep the atmosphere upbeat as you recruit. A little enthusiasm goes a long way, and if people feel like they’re part of an exciting mission, they’re likely to stick around. So, throw in some fun team-building activities while you’re at it!
Training and Drills are Key
Setting Up Training Sessions
Let’s get real—having a plan means nothing if no one knows how to execute it. That’s why setting up consistent training sessions is essential. Grab some experts in the field who can guide your team through necessary skills like first aid, emergency response protocols, and even how to manage stress during crises.
Mix it up! I’ve found that a combination of theory and practical exercises makes for learning that really sticks. Get everyone involved, role-playing different disaster scenarios to encourage quick thinking and decisive action. The more hands-on, the better! Plus, you’ll get to see who naturally steps up in tense situations.
Don’t underestimate the power of reflection either. After each training, gather your team to reflect on what went well and what could be better. It not only reinforces learning but also fosters communication and trust within the group—critical components when the going gets tough.
Establishing Communication Protocols
Creating a Communication Plan
So, one of the biggest challenges during a disaster is keeping everyone in the loop. That’s why it’s super important to create a solid communication plan ahead of time. Think of it as your team’s lifeline during a crisis. You’ll want to cover everything from how information is shared to who communicates with whom.
Consider using various platforms for communication. Maybe some folks are best reached via text, while others prefer social media or even old-school phone calls. It’s all about ensuring no one gets left in the dark when things go crazy!
Another tip? Set up a run-through before disaster strikes. Simulating a serious scenario will help everyone practice using the communication plan and allow for adjustment where needed. You’ll be so grateful you took the time when the adrenaline is pumping for real!
Building Partnerships with Local Organizations
Teamwork Makes the Dream Work
Ultimately, let’s talk about building connections with local organizations. No one goes it alone in emergencies, especially not in our awesome communities. Seek out partnerships with local fire departments, hospitals, and non-profits. They can provide the expertise and support that will enhance your team’s capabilities.
It’s also wise to build connections with neighboring communities. Sharing resources and experiences can be incredibly beneficial. Plus, you create a larger safety net for everyone involved! If disaster strikes in one area, collaboration can dramatically improve response efforts in others.
Regularly meeting with these partners can help forge strong relationships and ensure that everyone is on the same page regarding roles and responsibilities in times of crisis. Let’s be honest—knowing who’s got your back makes all the difference when push comes to shove.
FAQs
1. Why should we assess community needs before forming a response team?
Understanding community needs ensures your team is properly equipped to handle the specific types of disasters that could impact your area. It tailors your training and preparation efforts to make the team as effective as possible.
2. How can we effectively recruit volunteers for the team?
Start by communicating the importance of the team to your community. Organize interest meetings, share your vision on social media, and even host fun events to get people excited about joining the effort.
3. What types of training should our team undergo?
Your team should focus on essential skills like first aid, emergency response protocols, crisis management, and even soft skills like communication. The more well-rounded your training, the better prepared you will be!
4. What tools can we use for communication during a disaster?
Utilize a mix of tools like group texts, social media updates, and possibly even walkie-talkies for real-time communication. This ensures everyone can stay connected, no matter what happens.
5. How can partnerships with local organizations enhance our response efforts?
These partnerships can provide additional resources, expertise, and support. Collaboration strengthens your emergency response, ensuring a more comprehensive approach to handling disasters when they occur.
by Preparation Call Editorial Team | Jul 30, 2025 | Preparedness
Understanding Water Contamination
Types of Contaminants
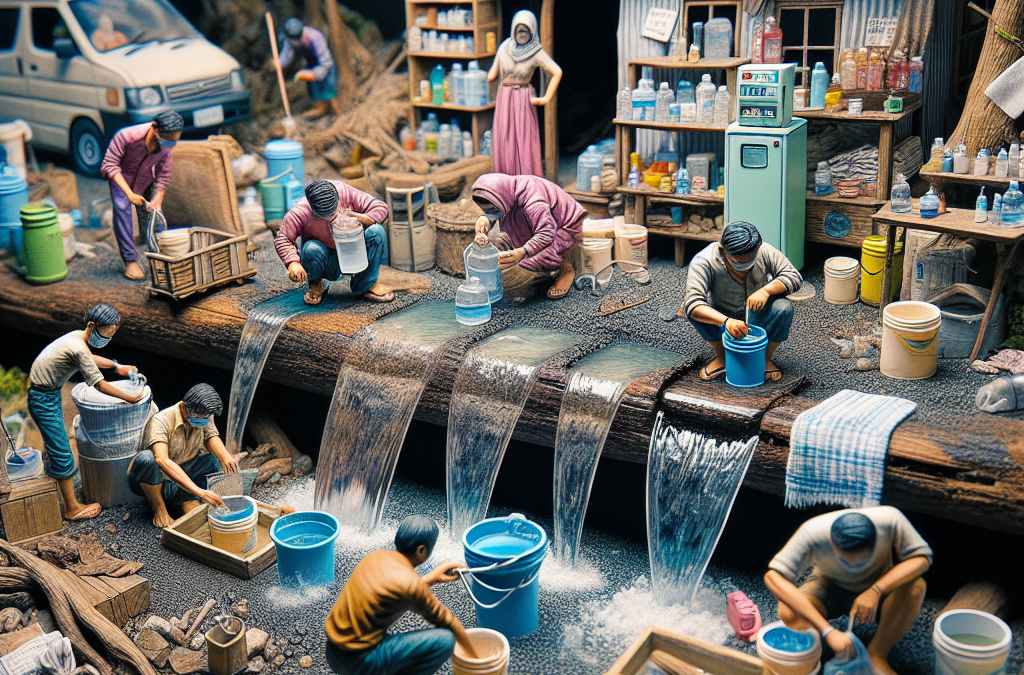
When it comes to water contamination, knowledge is power. There are various types of contaminants that can affect water sources, such as microbes, chemicals, and heavy metals. Microbes like bacteria and viruses are often the biggest concern during emergencies, especially in natural disasters where the infrastructure might be compromised.
Chemical pollutants can also find their way into our water supply due to agricultural runoff or industrial processes. Heavy metals, such as lead and arsenic, may leach into water supplies from corroded pipes or contaminated soil. Understanding these types of contaminants helps us prioritize our water purification methods effectively.
Always remember: if your water looks or smells odd, it’s a red flag. Filter your water as best as you can until you can confirm it’s safe for consumption.
Why Purification is Essential
During emergencies, safe drinking water is not a luxury; it’s a necessity. Contaminated water can lead to serious health risks, including gastrointestinal illnesses and other diseases that can severely impact recovery efforts. You want to ensure that you and your loved ones stay healthy and safe.
There are countless stories of folks who underestimated the importance of clean water. I remember a particularly harrowing experience during a storm when we lost power. We relied on a makeshift filtration system that had a lasting impact on our health and well-being. It was a wake-up call for me to take water purification seriously.
So, when faced with an emergency situation, never overlook the importance of purifying your water. Trust me; your body will thank you later!
Assessing Water Sources
First off, you need to figure out where your water is coming from. If it’s from a municipal supply, clarity on the situation can often be confirmed online, especially if there’s a water crisis. If you’re using a natural source, like a river or a lake, exercise caution. They can be beautiful but deceptive in their purity!
Next, it’s crucial to evaluate the surrounding environment. If the water source is near industrial areas or has visible debris floating around, it’s likely contaminated. If it’s possible, always go for moving water over stagnant water, as running water is usually less likely to harbor dangerous pathogens.
Ultimately, gathering information about your water source will inform your purification strategy. Knowing what you have to deal with is half the battle, right?
Water Purification Methods
Boiling
Boiling water might sound old-school, but believe me, it’s one of the most effective methods out there. Bringing water to a rolling boil for at least one minute (or three minutes at higher elevations) kills off most pathogens that might be lurking in there.
Honestly, it’s simple. Just pour some water into a pot, heat it up, and wait! One little tip I learned the hard way: always let it cool down before trying to drink. Trust me; you don’t want to scald your tongue!
Additionally, I like to store some boiled water in a clean container for later use. Just make sure that it’s covered and kept cool. It feels good knowing I have some safe drinking water ready to go when emergencies strike!
Filtration
Water filters come in all sizes and shapes, and picking the right one can make a huge difference. Whether it’s a personal filter straw or a larger family-sized system, these gadgets are designed to physically remove contaminants through various types of filters. I always keep a portable filter handy in my emergency kit—just in case.
However, don’t be fooled into thinking all filters are created equal. Some might only filter out big particles but let through smaller, nasty germs. Remember to check the specs before relying on a filter. You want something that can handle bacteria, protozoa, and other annoying pathogens.
Choosing the right filter takes some research, but it pays off in peace of mind. I can’t tell you how reassuring it is to pull out my filter knowing I can drink crisp, clean water during an emergency.
Chemical Treatment
If you’re in a pinch and boiling or filtering isn’t an option, chemical treatments can be lifesavers. There are various tablets or drops that can disinfect water by killing pathogens. I always keep a stash of water purification tablets in my kit for those unexpected situations.
While it’s effective, you’ve got to follow the instructions to a T—how long to let it sit, how many to use per liter, etc. If you rush this step, the water might still be contaminated. It’s like following a recipe: if you skip steps just because you’re in a hurry, you might ruin the outcome!
However, be mindful that chemical treatments may leave an aftertaste. If you’re not used to it, this can be a little off-putting. Just chug it down; your health is worth the momentary discomfort!
Storing Purified Water
Choosing the Right Containers
When storing purified water, using the right containers plays a massive role in maintaining its safety. Always use clean, food-grade containers. I’ve made the mistake of using something that wasn’t fully clean, and let’s just say it ruined the batch!
I prefer using BPA-free plastic or glass containers. Glass, in particular, keeps water tasting fresh, while certain plastics can sometimes leach chemicals back into the water. Just keep a close eye on what you’re reusing for storage!
Also, don’t forget to label your containers and rotate them. It’s easy to forget when you store water for emergencies, but keeping an inventory helps ensure nothing expires without you knowing!
Location Matters
When it comes to storing your water, find a cool, dark place that’s away from direct sunlight. Heat and light can break down the quality of your water over time. I once thought I could just stash some bottles on a sunny shelf and forgot about them. Spoiler alert: they didn’t taste too pleasant after a few months!
A good spot, like a basement or cupboard, can be ideal. It’s also vital to avoid areas likely to experience flooding or contamination during crises. Trust me; having your water ruined just when you need it most is a massive bummer!
Also, think about the accessibility of your water stores during an emergency. If it’s not easily reachable, you might find yourself scrambling when time is of the essence. Keep it close, folks!
Regular Maintenance
Storing water isn’t a “set it and forget it” task. Regularly checking on your containers and replacing older water is key. I make it a habit to do this every six months or so, making sure everyone in my household is aware of this routine.
If you notice any strange odors or discoloration, it’s best not to take any chances. Always err on the side of caution and throw it out. Your health isn’t worth a few bucks!
Maintenance can also include cleaning your containers every couple of months. I usually run mine through the dishwasher or rinse them with a mixture of vinegar and water. Keeping things clean and safe is always a priority!
Preparing for Emergencies
Emergency Kits
Every household should have an emergency kit ready to go, and water purification supplies are essential. Pack essentials like filters, purification tablets, or even a small stove for boiling water.
When I first started prepping, I didn’t think much about water. But after a couple of close calls with storms, I realized it was crucial. Luckily, I’m now much better prepared to handle unexpected situations!
Regularly check your kit and ensure all items, especially anything with expiration dates (like tablets), are still good to go. I like to keep a checklist of everything I need to stock up on so that I’m always ready.
Staying Informed
Keeping yourself updated on local emergency protocols and water advisories is just as important as having supplies. This can help you react promptly when disaster strikes. Community alert systems are excellent resources for receiving notifications about water safety.
Social media can also be a helpful tool during emergencies. Following local news channels allows you to get real-time updates, especially if there’s a risk of contamination from natural disasters or industrial accidents.
Staying informed not only helps you react better but can provide peace of mind during chaotic times! I often share tips with friends and family on where to find reliable information in emergencies.
Community Preparedness
Encouraging community preparedness can make a significant difference during emergencies. Organize neighborhood meetings to discuss water safety and purification methods. Sharing what we know can empower everyone!
We’ve even put together a community kit that includes purification supplies we can all access. This collaboration ensures that no one in the area is left without access to safe drinking water in a crisis.
Building strong community bonds through preparedness activities makes a whole world of difference. Isn’t it lovely to know we can count on each other when life gets tough?
Conclusion
Water purification in emergency situations is a skill set that everyone needs to familiarize themselves with. Understanding what contaminants are in your water, the best purification methods, how to store your clean water, and being prepared for emergencies can help significantly during tough times. Remember, your health and safety are the top priorities!
FAQ
1. What are the most common water contaminants in emergencies?
The most common water contaminants include bacteria, viruses, chemicals, and heavy metals. Always source your water carefully and be mindful of your surroundings.
2. How long should I boil water for purification?
You should boil water for at least one minute, or three minutes if you are at high elevations to ensure that it is safe to drink.
3. Can I use my tap water during an emergency?
It depends on the situation. Always check your local advisories about water contamination. If there’s any doubt, consider filtering or boiling your tap water before consumption.
4. How can I store purified water safely?
Use clean, food-grade containers, store them in a cool and dark place, and regularly check and rotate the water to ensure it remains safe to drink.
5. What should I include in an emergency water kit?
Your emergency water kit should include purification tablets, portable filters, a small stove or boiling pot, and clean containers for storing water.

by Preparation Call Editorial Team | Jul 30, 2025 | Preparedness
Essential Urban Skills
Situational Awareness
One of the first things I learned in my urban survival journey is the importance of situational awareness. You’ve got to be tuned into your surroundings. Whether you’re walking down a busy street or sitting in a park, always be conscious of who’s around you. Is anyone acting strangely? Are there potential hazards nearby? Being aware can help you avoid trouble before it even starts.
I recommend practicing this skill regularly. Try walking around your neighborhood and actively observing your environment. Notice the people, the vehicles, the noises. This not only sharpens your instincts but also boosts your confidence in handling unexpected situations.
Remember, awareness isn’t about paranoia; it’s about being smart. Trust your gut feelings. If something feels off, it’s okay to change your path or seek safety. Urban survival is a lot about trusting your instincts and being prepared for the unexpected.
Basic First Aid
Let’s talk about first aid. You don’t have to be a paramedic to save a life, but knowing a few basics can really make a difference. For example, do you know how to treat a burn or stop bleeding? These are simple yet crucial skills that can be learned quickly with a little practice.
I always keep a small first aid kit with me—band-aids, antiseptic wipes, and even some ibuprofen. Make sure you familiarize yourself with its contents. It’s not just about having the gear; it’s also about knowing how to use it in an emergency. There are tons of great online resources and courses to get you started.
One of my favorite resources is the American Red Cross. They offer first aid courses that are quick and effective. Plus, there’s nothing quite like the peace of mind that comes from knowing you can help yourself and others in a pinch.
Self-Defense Techniques
Sometimes, you need to be ready to physically protect yourself. Learning self-defense techniques isn’t all about being Bruce Lee; it’s about standing your ground and knowing how to escape a bad situation. I took a few classes at my local community center, and let me tell you, it was eye-opening.
What I found most helpful were techniques that focused on escaping rather than fighting. Learning to break free from a hold or disengage quickly can be life-saving. Plus, it builds your confidence, which is key in any survival situation.
Even if you don’t join a class, consider watching online tutorials. Just make sure they’re by credible instructors or organizations. Practicing with a friend or family member can also help you get comfortable with movements. You never know when these skills might come in handy!
Necessary Gear for Urban Survival
Everyday Carry Essentials
Your everyday carry (EDC) gear is what you have on you at all times. It’s like your personal survival kit! I always carry a small multi-tool, a flashlight, and a portable charger in my backpack. These items are super practical and can be utilized in a variety of situations.
Multi-tools are incredible because they combine several tools into one compact design. You can use them for everything from opening cans to making repairs. It’s about being resourceful! And as for the flashlight, it doesn’t just light up your way; it can also draw attention if you’re in a bind.
Don’t forget to customize your EDC based on your needs. If you live in a colder climate, maybe you need a space blanket or extra warm gloves. Think ahead about your daily life and what might come in handy in unexpected scenarios.
Emergency Kit for Home and Car
I can’t stress enough how important it is to have an emergency kit both at home and in your vehicle. You never know when something might happen—power outages, severe weather, or even a breakdown. I spent a weekend putting together kits for both, and it was one of the best decisions I ever made.
In your home kit, ensure you have essentials like water, non-perishable food, first-aid supplies, and a battery-operated radio. For your car, think about including jumper cables, a flashlight, and perhaps even a blanket. You can buy pre-made kits, but I found it’s more satisfying to tailor it to your specific needs.
Refresh your kits regularly. Check the expiration dates on food and medicine, and swap out seasonal items, like warm clothes for your car in the winter. Knowing you’re prepared can ease a lot of worries, trust me!
Self-Care Items
Survival isn’t just about physical gear; it also involves mental and emotional well-being. I make sure to include self-care items in my survival prep. This might be something as simple as a journal or a stress ball, but these tools can vastly improve your resilience in tough situations.
Don’t overlook the importance of mental health during emergencies. Keeping a calm mindset can drastically influence your decision-making. Meditating or practicing mindfulness whenever you can is hugely beneficial and can be a few moments of peace amidst chaos.
Consider adding a book or a game to your emergency kit. Engaging your mind helps to keep you calm when faced with unexpected events. Remember: survival is about adapting, and a clear mind is a powerful ally.
Community Connections
Building a Support Network
Being prepared for anything is good, but having a strong support network can make all the difference in urban survival. Forming connections with neighbors and like-minded individuals creates a sense of community. I began attending local neighborhood meetings and offering to help others during community projects, and it truly paid off.
Your support network can serve as a resource in times of need. Whether it’s someone sharing information about local emergencies or pooling together supplies, the people around you become invaluable. It’s about building trust and accountability.
Don’t underestimate social media as a tool for connecting. There are numerous online groups focused on urban survival strategies. Share experiences, ask questions, and learn from one another. The more voices, the better the knowledge base!
Practicing Together
Once you’ve built your network, practice scenarios together. Organize drills or workshops where everyone can contribute skills and knowledge. Even something simple, like having a fire drill or practicing how to use emergency supplies, can prepare everyone better than individual efforts.
Learning together makes it more enjoyable and reinforces the knowledge. I’ve had so much fun and laughter during these practice sessions, all while feeling more prepared for whatever might happen.
Keep it light but serious enough to emphasize the importance of the subject. Community survival is a shared responsibility, and when everyone is on the same page, it creates a safer environment.
Staying Informed
Ultimately, always stay informed about local resources and services. Whether it’s knowing your local emergency services contact numbers or being updated on city plans for dealing with emergencies, this knowledge is crucial. I make it a habit to keep local emergency apps on my phone for easy access.
Subscribe to local news channels or community newsletters to stay updated on events or potential threats. This way, you’re not just informed, you’re also prepared. Being proactive rather than reactive is the name of the game.
Connect with local public safety organizations to understand their strategies and responses to various emergencies. Not only will this keep you informed, but it will also strengthen your community ties and enhance your personal survival strategy.
FAQ
What should I include in my everyday carry items?
Your everyday carry items could include a multi-tool, flashlight, portable charger, first aid supplies, and anything specific to your daily needs. Make sure it’s practical for your lifestyle!
How often should I check my emergency kit?
It’s a good idea to check your emergency kit at least every six months. Refresh any expired items and swap out seasonal gear as needed.
Where can I learn self-defense skills?
Local community centers, gyms, and even online tutorials offer self-defense classes. Just make sure to choose credible instructors to ensure effective learning.
Why is community connection important for survival?
Building a community network can provide emotional support, share resources, and improve preparedness. Having trustworthy neighbors can be invaluable during emergencies.
How can I stay informed about emergencies in my area?
Subscribe to local news outlets, download emergency apps, and follow community social media pages. Keeping updated can help you respond effectively when needed.