by Preparation Call Editorial Team | Jul 30, 2025 | Preparedness
1. Preparedness for Emergencies
Understanding the Unexpected
You never know when an emergency might strike. I remember a time when my friend cut himself pretty deep while we were out hiking. Luckily, I had my first aid kit with me, and we were able to manage the situation effectively. In a situation like that, being prepared can make all the difference between a minor incident and a major crisis.
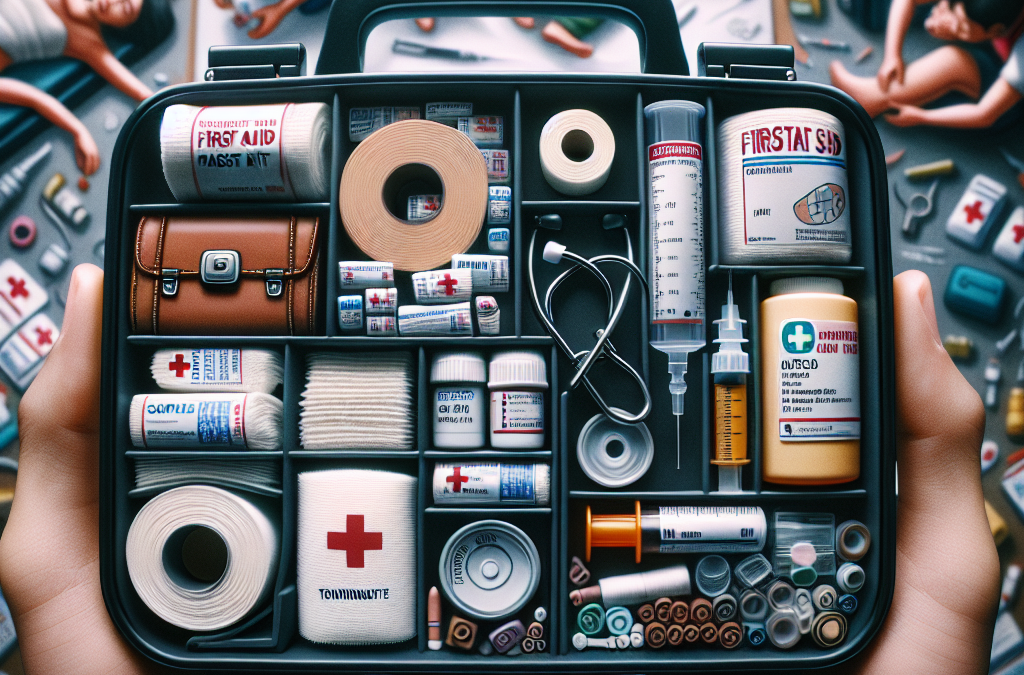
Having a complete first aid kit means you’re ready for a variety of situations—from treating cuts and scrapes to more serious injuries. Emergencies can happen anywhere, so it’s essential to be equipped, especially if you’re a parent, traveler, or outdoor enthusiast.
Moreover, preparedness gives you a sense of confidence. Knowing that you have the necessary tools to handle minor injuries or medical emergencies allows you to act swiftly and think clearly during a stressful situation.
Minimizing the Severity of Injuries
In my experience, having the right supplies at hand can greatly reduce the severity of injuries. For instance, if you have bandages, antiseptics, and gauze readily available, you can immediately address wounds before they become infected or worsen. Quick action is crucial.
When we help a person immediately after they’ve sustained an injury, it can significantly minimize pain and complications. A complete first aid kit contains items like cold packs to reduce swelling and pain relief options, which can be invaluable in those first minutes post-injury.
Realistically, not all injuries are severe, but failing to address even minor ones can lead to bigger issues later. A first aid kit lets you take control of the situation right away and keeps things from escalating unnecessarily.
Building Confidence and Knowledge
Investing in a complete first aid kit isn’t just about the supplies; it’s also about empowering yourself with knowledge. I took a basic first aid course after buying my first kit, and it was a game-changer! Understanding how to use the items effectively gives you confidence in emergencies.
Furthermore, certain kits come with pamphlets or manuals that guide you through various procedures. With this knowledge, you’re not just equipped physically but mentally prepared to help those in need.
Having this skill set is something I believe everyone should invest in. You can be a source of comfort and support when someone needs it most, and that’s powerful.
2. Comprehensive Coverage of First Aid Needs
The Essentials of a Complete Kit
A complete first aid kit means you have a wide range of supplies to cover various injuries and ailments. Think about it: band-aids, antiseptics, gauze, medical tape—they all serve different purposes. When I put my kit together, I made sure to think about everything I might need in common scenarios.
Also, consider that not all injuries require the same treatment. Having access to a variety of supplies enhances your ability to respond appropriately. There’s nothing worse than reaching for a bandage only to find out you’re out of it!
A thorough first aid kit caters to different situations, making it much more effective than just a few random supplies thrown in a bag. When you’re prepared, you can act swiftly and effectively, which is incredibly reassuring during an emergency.
Specific Items for Unique Situations
In addition to the basics, I’ve found that thinking ahead about potential unique situations can be really helpful. For instance, if you’re an avid hiker or camper, consider including specific items like splints for fractures or snake bite kits.
Even more, if you travel often, including medications for allergies or stomach upsets makes sense. I always carry a few over-the-counter meds in my personal kit—it’s a lifesaver! These specific items ensure that you are truly ready for any eventuality.
By tailoring your first aid kit to your unique needs, you’re not only better prepared but you also feel more in control. You can’t predict every emergency, but you can make educated guesses based on your lifestyle and needs.
Family-Specific Needs
When considering a first aid kit, think beyond yourself. If you have kids, elderly relatives, or pets, your first aid kit should cater to their specific needs as well. For instance, my daughter has very sensitive skin, so I always pack hypoallergenic bandages.
Moreover, if you know someone in your family takes particular medications, it’s wise to have a plan in place. Keeping spare medications or specific treatments in your kit ensures you’re prepared to handle health issues as they arise.
Ultimately, having a family-oriented first aid kit gives you peace of mind, knowing you’re equipped to handle kid-related scrapes or the unique needs of older family members. It’s a must if you want to ensure everyone feels safe and looked after.
3. Enhancing Home Safety
Proactive Safety Measures
Investing in a complete first aid kit at home is an excellent proactive safety measure that can prevent serious health crises. Imagine the peace of mind you would feel knowing that you’re prepared at home for anything that might happen. I actually keep a well-stocked kit in my kitchen and another one in the living room.
By having a kit close at hand, you’re more likely to take swift action during a small emergency—whether it’s a burn from a hot pot or a scrapped knee from falling off a bike. Timely response can make a world of difference!
Creating a family safety plan around your first aid kit also helps everyone understand its importance. I often hold mini-trainings with my kids on how to use the kit properly—they love it! It becomes a fun family activity rather than a daunting task.
Encouraging a Culture of Safety
Having a first aid kit at home encourages a culture of safety. When you invest in the right supplies, you send a strong message to your family that safety matters. I often talk about safety with my family, and it’s refreshing to see my kids take an interest in being safe.
This culture doesn’t stop at home. It spills over into schools, outings, and other environments where your family exists. By instilling the importance of safety in the early years, you’re teaching them to look out for themselves and others.
There’s something empowering about knowing you can help in an emergency. When your family is on board with this idea, it fosters responsibility and an overall mindset of care for each other, which is something I genuinely cherish.
Creating a Safe Environment
Lastly, let’s not forget that having an organized first aid kit is actually part of creating a safe environment. I have to admit, I used to have a chaotic kit filled with half-used supplies, and it did more harm than good. Now, I regularly check the contents and make sure everything is accessible and well-labeled.
This organization means I can find precisely what I need when an emergency arises, whether it’s a swift bandage application or grabbing some ointment for a sunburn. I can’t stress enough how essential it is to keep your supplies in check!
Moreover, organizing your kit can be a fun little project. My kids help me with it every few months, and they actually enjoy sorting through supplies. It’s a hands-on way to keep safety on everyone’s mind!
4. Cost-Effectiveness in the Long Run
The Price of Preparedness
When I first looked at the price of a complete first aid kit, I thought, “Do I really need to spend this much?” But then I realized the cost of an injury or illness without proper supplies could be much higher. This perspective shift showed me how effective investing in a first aid kit can be.
Let’s say you don’t have the necessary items during an emergency—you may end up spending way more on doctor visits for something you could have handled at home. That realization alone made me a firm believer in investing in good supplies!
Additionally, many kits contain items that are specialized or hard to find elsewhere. Think about how much time and energy you’d waste trying to piece together supplies from various stores in a panic. Investing upfront saves you from that chaos!
Long-Term Use of Supplies
Another consideration is that the supplies in your first aid kit can last long-term if stored correctly. With the right maintenance, items such as bandages and antiseptic wipes have a viable shelf life, so you’re not just throwing money away. I keep an eye on expiration dates and restock as needed, and it’s been a game-changer.
The prolonged utility also means that you save in the long run since you’re prepared over years rather than just months. Plus, a well-maintained kit can handle the unexpected, so you’re less likely to find yourself scrambling for supplies.
This method of cost-effectiveness is practical and intelligent. Imagine how much stress you could avoid simply by having your kit stocked and ready rather than having to make an emergency run to the pharmacy.
Peace of Mind Equals Value
Ultimately, let’s not overlook the value of peace of mind. Knowing I have a complete first aid kit helps me relax more, whether I’m hosting a party or going on a camping trip. It’s worth every penny to eliminate that worry!
When I’ve got my kit ready, it changes how I approach activities with my family. I’m there to enjoy quality time rather than constantly fretting over what could go wrong. It’s about enhancing the experiences and being genuinely present.
In the end, the cost of a complete first aid kit is a small price to pay for that sense of security. It’s an investment in health, safety, and happiness, allowing you to focus on making memories rather than worrying about the “what-ifs.”
5. Encouraging Community Awareness
Being a Resource for Others
One of the most rewarding aspects of having a complete first aid kit is the opportunity to help others in need. I can’t count how many times my neighbors have come by, whether it was for a scraped knee from a bike accident or a child complaining of allergies at a playdate. I’m always happy to share resources!
This willingness to share encourages others to think more about safety and preparedness, too. When people see you taking action, they’re more likely to step up and follow suit. It’s all about creating a ripple effect in the community.
Also, teaching others about first aid resources can foster a greater sense of safety within your neighborhood or even at the workplace. Who knows, you might inspire someone else to create their first aid kit, and before long, everyone is looking out for each other!
Hosting First Aid Workshops
If you’re feeling ambitious, consider hosting a first aid workshop in your community! I’ve done a couple of these sessions where I walked folks through assembling a first aid kit and demonstrated how to use the supplies effectively.
These workshops can be engaging learning experiences and a great way to bring people together. Plus, I was pleasantly surprised by how many people wanted to learn! It turns into a communal effort where we can all become more aware and knowledgeable about health and safety.
The sense of camaraderie that comes with teaching someone else is powerful. You’re not only helping individuals but contributing positively to a community culture that prioritizes health and safety.
Building a Culture of Preparedness
Lastly, encouraging community awareness helps establish a culture of preparedness. Just like we look out for our families, we can extend that same care to those around us. When emergencies arise, we often lean on one another for support, and knowing our neighbors are trained and prepared is a tremendous relief.
By creating a community that values readiness, we’re also creating a safer space for everyone. It’s a win-win situation where we all can thrive together, knowing we’ve got each other’s backs!
Investing in a complete first aid kit ultimately fosters a connected and aware community. It starts with individuals and can create a ripple effect, making your neighborhood or workplace a safer place for everyone!
Frequently Asked Questions
1. Why is a complete first aid kit better than a basic one?
A complete first aid kit contains a wide range of supplies that prepare you for various emergencies, while a basic kit might only have a few essentials. Having complete coverage can make all the difference in a critical situation.
2. What items should I include in my first aid kit?
A well-rounded kit should include bandages, antiseptic wipes, gauze, medical tape, scissors, tweezers, and over-the-counter medications, among other supplies. Tailor it to your lifestyle and family needs for maximum efficacy.
3. How do I maintain my first aid kit?
Regularly check your kit for expired items and restock any supplies that are running low. I recommend doing this every few months to ensure you have what you need when it’s crunch time.
4. Can first aid kits be customized?
Absolutely! You can customize your first aid kit based on personal needs, activities, or family members’ specific health requirements. Adding unique items can enhance preparedness based on your lifestyle.
5. What’s the best way to educate my family on using the first aid kit?
Hold family training sessions where you go over the contents of the kit and how to use each item. Keeping it interactive and engaging makes it fun, and it empowers everyone to be prepared in emergencies!
by Preparation Call Editorial Team | Jul 30, 2025 | Preparedness
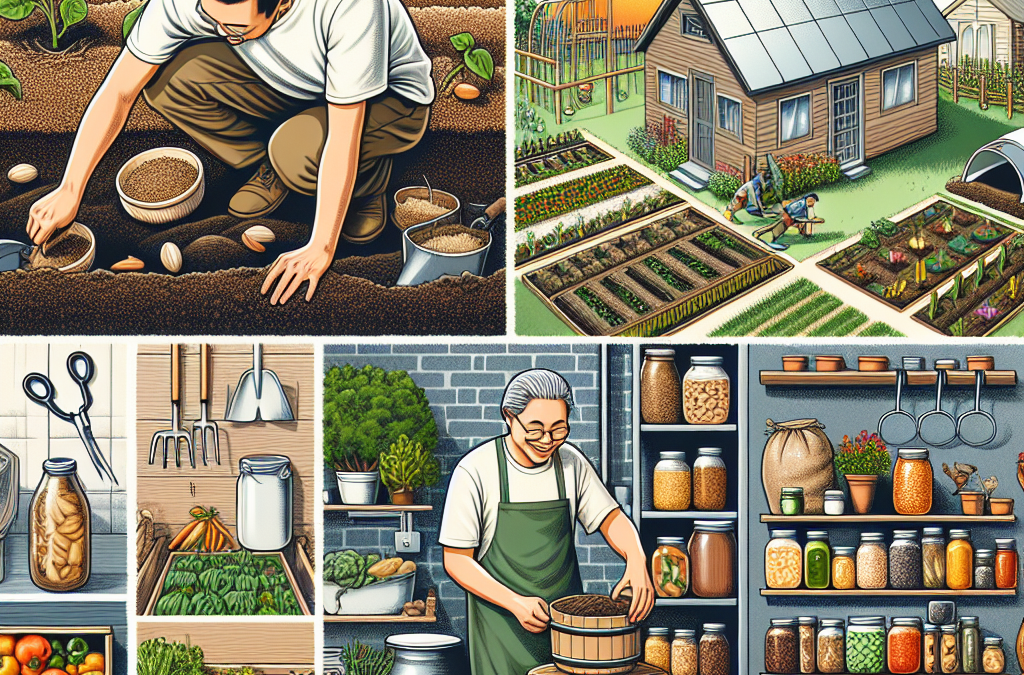
Hey there! So, you’re interested in becoming more self-reliant with your food supply? That’s awesome! There’s nothing quite like knowing where your food comes from and being able to grow it yourself. After diving into this journey myself, I’ve found five key areas that can really help you on your path to food independence. Let’s break it down together!
1. Planning Your Garden Space
Understanding Your Environment
The first thing I did was to take a good look around my property. Every garden’s success relies heavily on understanding its environment. Consider factors like sunlight, soil quality, and water availability. You want a spot that gets plenty of sunshine without drastic winds, and that usually means observing how the sun charts its arc across the sky throughout the day.
Then, test the soil pH! This step can make a big difference in your garden’s health. There are simple kits available at gardening stores. If your soil is too acidic or basic, you can easily amend it with specific products to create a healthy growing environment.
Lastly, prepare for challenges like pests or weeds. It’s always easier to set up barriers before issues arise rather than trying to fix them later. This proactive approach can save you a ton of hassle down the road.
Choosing What to Grow
Next up, you’ve got to decide what crops to grow. In my experience, starting with a mix of easy-to-grow veggies and herbs is key. Tomatoes, cucumbers, and basil were my first choices—they’re user-friendly and versatile for various dishes!
Consider what you and your family actually eat. It can be tempting to grow things just because they look cool, but if no one’s going to enjoy the produce, what’s the point? Tailoring your garden to your tastes will ensure you have a sustainable supply of food you love.
Lastly, think about growing perennials—a bit more work upfront, but they come back year after year! Plants like asparagus and rhubarb can be low-maintenance once established.
Using Companion Planting
I discovered that companion planting can really optimize space and boost plant health. Certain plants have unique relationships that can deter pests or enhance growth when grown together. For example, planting marigolds alongside your veggies can help keep harmful bugs at bay.
Another benefit is maximizing your garden’s output. Tall plants like corn can provide shade for shorter crops like lettuce, while beans can add nitrogen to the soil, which is great for their leafy buddies.
Believe me, it’s like a little gardening symphony! When these plants work together, they create a thriving ecosystem that benefits all the participants involved. It’s pretty neat to watch your garden flourish through partnership!
2. Soil Health and Nutrition
Composting Basics
Where do I even start with composting? It felt kind of intimidating at first, but trust me, it’s totally manageable. Composting is essentially recycling organic materials, and it’s one of the best things I did for my soil. Seriously, it’s like gold for your garden!
To kick it off, I gathered kitchen scraps (think veggie peels and coffee grounds) and yard waste (like grass clippings and leaves). Just make sure to avoid meat and dairy products, as they can attract unwanted critters.
Then, I set up a simple compost bin—something you can DIY with pallets or even purchase ready-made. I kept it turned and moist, and in just a few months, I had rich compost to mix into my garden soil. It’s rewarding to see that waste transform into something so resourceful!
Understanding Fertilizers
While compost is fantastic, understanding which fertilizers to use is crucial too. All plants have unique nutrient needs. At first, I was clueless! However, I learned that a good balance of nitrogen, phosphorus, and potassium (the big three) was essential for healthy growth.
I experimented with both organic and synthetic fertilizers, but I quickly realized that organic options—like worm castings or fish emulsion—provided not just nutrients but also improved soil health over time.
Don’t forget to read the labels and follow instructions closely. Over-fertilizing can burn your plants. Less can often be more, so start small and monitor how your plants respond!
Crop Rotation
Crop rotation became a game changer for my garden! I learned that rotating different plant families each season helps prevent diseases and promotes soil health. It’s like a mini holiday for your soil, allowing it to replenish certain nutrients while deterring pests.
For instance, legumes can fix nitrogen back into the soil after pulling up something like tomatoes that may have depleted it. Just keep a chart to track where you’ve planted each crop year after year. It might take a bit of planning, but it’s so worth it for the sake of your garden’s vitality.
Give it a try! After implementing crop rotation, I noticed healthier plants, higher yields, and less time battling pests. It’s a win-win!
3. Water Management
Smart Watering Techniques
Now let’s talk about one of the most crucial elements of gardening—water! Initially, I thought just sprinkling water here and there would be enough. Boy, was I wrong! I learned that early morning is the best time to water; that way, plants absorb it before the sun saps it away!
Drip irrigation was another cool tip I stumbled across. By investing in some simple tubing and drip emitters, I managed to deliver water directly to my plants’ roots, avoiding waste and reducing the likelihood of fungal diseases.
Another trick is mulching. Not only does it help retain moisture by preventing evaporation, but it also suppresses weeds. Plus, organic mulches gradually break down and enrich the soil!
Rainwater Harvesting
Harvesting rainwater was a revelation! I set up a rain barrel, and honestly, it became one of the best ways to water my garden sustainably. I can collect gallons of free, chemical-free water—nature’s gift!
Plus, using rainwater is also better for the environment. It reduces runoff and can lower water bills. Talk about a win-win! Just ensure you’re monitoring the barrel for any debris or contaminants, and you’ll have a great supply for all those hot summer days.
It feels satisfying to know I’m conserving water while also hydrating my garden. It’s a small change that makes a huge difference!
Understanding Plant Needs
Each plant has unique water needs, and that became clearer as I experimented. I discovered that some plants like cucumbers are thirsty, while herbs tend to do better with less. Learning about these differences helped me develop a more effective watering routine.
I even found out about the “soak and dry” method—where you allow the soil to soak up water for longer but then let it dry out in between waterings. This method encourages deep root growth, leading to stronger, healthier plants.
As I adapted my approaches based on each plant’s requirements, I started to notice healthier and more resilient crops. It’s all in the details, my friends!
4. Pest Control Strategies
Organic Pest Solutions
Pests—oh boy! They can be the bane of any gardener’s life. But instead of reaching for harsh chemicals, I learned the value of organic pest control methods. For example, neem oil or insecticidal soap can effectively tackle common culprits without harming beneficial insects.
I also started creating my own garlic spray. Mixing water, garlic, and a few drops of dish soap can deter many pests while being completely safe for my plants. It’s super easy and leaves my garden feeling fresh, not toxic!
Implementing these natural solutions helped me feel more in tune with my garden and the environment, reducing my carbon footprint while keeping pests in check.
Encouraging Beneficial Insects
While pests can cause chaos, I learned that beneficial insects can help keep the ecosystem balanced. Ladybugs, lacewings, and predatory wasps are the tiny heroes that munch on aphids and other critters. It felt great to attract them by planting flowers like yarrow and marigolds.
I even set up a little “insect hotel.” It’s amazing how providing shelter can encourage beneficial insects to stick around and do their jobs. I loved watching them zoom around my garden—it felt like creating my little wildlife sanctuary!
It’s all about embracing a balanced approach—finding harmony rather than declaring war on all creepy-crawlies. Trust me, it brings you closer to nature!
Physical Barriers
Sometimes, a simple physical barrier is the best defense. Row covers and netting can protect your crops from specific pests, and they’re usually easy to set up. I used them for my young plants, and I can’t tell you how much easier life got!
Plus, creating a diverse garden layout can confuse pests. Instead of planting all your tomatoes in one line, scatter them around. It keeps pests guessing and helps maintain your harvest!
Over time, I learned that vigilance pays off. Regularly checking for signs of pests or diseases meant I could act quickly before they devastated my plants. It’s all about being proactive and protective!
5. Harvesting and Preservation
Knowing When to Harvest
Harvesting might seem straightforward, but timing is everything! Picking produce at its peak flavor not only makes for delicious meals but also encourages continued production. I learned to check for color, size, and even feel for ripeness.
Some crops, like zucchini, should be harvested young for the best taste, while others, like tomatoes, can continue to ripen off the vine. It’s like having a conversation with your garden, figuring out what they need and when!
Documenting your harvests helped me track which varieties did well and when they produced best. It’s an educational journey that I love sharing with fellow gardeners!
Preserving Your Bounty
After all that hard work, preserving your harvest is so rewarding! I explored various methods like canning, freezing, and drying, and each has its unique charm. Canning my tomatoes became a tradition I cherish, and it’s a great way to have summer flavors in the winter.
Freezing is easy—just wash, chop, and pop those veggies in bags. I’ve even started preserving fruits for smoothies later. There’s something delightful about enjoying the fruits of my labor when the snow is flying outside!
Don’t forget to share! Whether it’s trading produce with a neighbor or gifting a jar of homemade jam, community makes this journey even more worthwhile. Building those connections is part of the joy!
Planning for Next Season
Once the harvest wraps up, I take some time to reflect. What worked? What didn’t? It’s all about learning and improving each year. I started keeping a garden journal to jot down my thoughts and plans for the upcoming season. It’s like having my plant diary!
Consider planning a crop rotation schedule to keep things fresh. This prep work sets you up for success, and I find it gives me something to look forward to during the winter months.
One of my favorite parts is browsing seed catalogs during the colder seasons. I feel excitement, imagining what I’ll grow in my garden next year. It’s a never-ending journey of growth—for both the plants and me!
Frequently Asked Questions
1. How long does it take to start a garden?
Starting a garden can take anywhere from a few weeks to several months, depending on your planning and what you choose to grow. Some crops, like lettuce, can be ready within a month, while others, like tomatoes, may take a bit longer. The best thing is to enjoy the process and have fun with it!
2. What are the best vegetables for beginners?
Some great starter veggies include radishes, lettuce, beans, zucchini, and tomatoes. They tend to be hardy, quick-growing, and forgiving if you’re just mastering your gardening skills!
3. How can I manage pests without chemicals?
There are plenty of natural solutions like neem oil or garlic spray. Plus, encouraging beneficial insects and using physical barriers can help you manage pests organically!
4. Can I garden in small spaces?
Absolutely! Container gardening, vertical gardening, or raised beds work wonders for smaller spaces. You don’t need a huge yard to grow your food; you just need creativity and a bit of planning!
5. How can I preserve my harvest effectively?
Canning, freezing, and drying are all excellent methods for preserving your harvest. Each has its unique benefits, so it depends on your preferences and what you’re preserving!

by Preparation Call Editorial Team | Jul 30, 2025 | Preparedness
1. Assess Your Property
Check Your Roof and Gutters
First off, I can’t stress enough how important it is to check your roof. You’d be surprised by how many people ignore this until it’s too late. I like to climb up there myself—safely, of course—and look for any missing shingles or damage. A sound roof is your first line of defense against rain and wind. If I see anything suspicious, I’ll usually call in a pro to handle it.
Gutters are equally crucial. They direct water away from your property. I make it a point to clean my gutters regularly to avoid any blockages that could lead to overflow during a storm. Trust me, a clogged gutter can cause some serious water damage!
And while you’re at it, make sure that downspouts direct water at least 5-10 feet away from your foundation. I use extensions to help with this. It’s all about keeping the water where it won’t do harm!
Evaluate Windows and Doors
Next on my list are the windows and doors. If they’re old and drafty, it’s time for an upgrade. I’ve made the switch to double-paned windows, and let me tell you, it has made a world of difference. Not only do they provide better insulation during winter, but they’re also tougher against strong winds.
Don’t forget about sealing any gaps! A quick run of caulk can do wonders. I also like to invest in storm doors as an additional layer of protection. It might seem like a small thing, but it makes me feel safer during those crazy storms.
Lastly, consider the idea of impact-resistant glass if you’re in a high-risk area. It’s a bit of an investment, but it pays off when the weather gets rough! I’ve actually become quite the afficionado in storm-proofing after going through a few nasty hurricanes.
Landscape Wisely
Believe it or not, your landscaping plays a pretty big role in your home’s preparedness for extreme weather. I’ve made a habit of trimming back any trees that seem a little too close for comfort. Overhanging branches can become deadly projectiles if things get nasty.
It’s also a good idea to plant things that are resilient to harsh conditions. I prefer native plants that can withstand heavy rains or droughts without requiring too much fuss. Plus, they look great too! Round it off by creating some good drainage around your garden beds to avoid any flooding issues.
One more thing—make sure to check the slope of your yard. Ideally, it should slope away from your house to direct any runoff further down. Working on my yard has definitely given me peace of mind during storms.
2. Reinforce Structural Integrity
Invest in Storm Shutters
When I first moved into my house, I didn’t think much of storm shutters. But after a few intense weather events, I realized these bad boys are a game-changer! They protect windows from flying debris and can be a real lifesaver.
I’ve opted for accordion-style shutters because they’re easy to use and don’t stick out like a sore thumb when closed. Plus, they’re pretty durable. You know I love anything that requires minimal upkeep!
If storm shutters are a no-go for you, consider plywood as a backup plan. Just measure your windows, get the right thickness, and store them for emergencies. Just don’t wait until the last minute to put them up!
Secure Your Garage and Outdoor Items
Speaking of outdoor items, I’ve learned the hard way that securing everything outside is a must. Anything loose or movable is a potential projectile during high winds. I make it a point to bring in patio furniture and store my garden tools in a secured shed or garage.
If you have a garage, make sure it’s properly secured. A strong wind can easily shove open a weak door. I’ve added an extra padlock for peace of mind, and I also keep it organized. It sounds ridiculous, but a clutter-free garage makes it easier to grab essentials when you need them.
Consider anchoring large outdoor structures like sheds or gazebos as well. I’ve seen them get tossed around like they’re nothing during a storm. You can use tie-down straps or even concrete blocks to keep them in place!
Consider Flood Insurance
This next one isn’t about physical preparation but financial. Flood insurance is something I always recommend to friends in at-risk areas. Regular homeowners’ insurance often doesn’t cover flood damage, so it’s worth checking into.
Make sure you understand what’s covered and what’s not. I found it helpful to have a chat with my insurance agent to clarify any doubts. It’s better to be safe than sorry, right?
And remember, getting coverage before you need it is key. Most policies have a waiting period, so don’t wait until a storm is on the horizon. You don’t want to be caught without a safety net when you need it the most!
3. Prepare an Emergency Kit
Essential Supplies
This might sound a bit cliché, but an army marches on its stomach! I make sure my emergency kit is stocked with all the essentials: water, non-perishable food, a first aid kit, and any necessary medications. I like to keep enough supplies to last at least a week, just in case.
Don’t forget about a flashlight and extra batteries. I can’t tell you how many times I’ve been caught without light during a blackout, and trust me, it’s not fun! A portable charger for my phone is also on my must-have list.
All in all, remember to rotate those supplies every six months. I’ve made it a routine to check my kit when I change the clocks for daylight saving time, ensuring everything is fresh and usable.
Communication Plan
Part of being prepared is having a communication plan in place. I always make sure my family knows how to reach each other in case of separation during an emergency. You never know when a storm might hit and potentially disrupt cell service.
We’ve also established a meeting spot outside of town, just in case things get really chaotic. It gives each of us peace of mind knowing we have a plan. I recommend keeping written lists since not everyone is glued to their smartphones—especially in a crisis.
Don’t forget to update your contacts with emergency numbers and local disaster services. I keep a hard copy tucked in my emergency kit for easy access.
Have a Plan for Pets
For those of us with furry family members, don’t forget about them when you’re prepping your emergency kit. I always include pet food, medications, and copies of their medical records. I won’t lie, the thought of leaving my doggo behind during an emergency is enough to keep me up at night!
Make sure you have a leash and carrier ready to go. In instances of evacuations, having a safe way to transport your pets is vital. I encourage folks to practice loading their pets up so they get used to the hustle.
And don’t forget to keep identification on your pets—collars with tags and microchips. God forbid they get lost in the chaos.
4. Stay Informed and Connected
Weather Alerts and Apps
In my experience, knowledge is power when it comes to extreme weather. I can’t tell you how many times a simple weather alert saved me from being caught off-guard! I’ve loaded multiple weather apps on my phone to stay updated real-time, especially during storm season.
Local news stations are also a go-to resource. I make it a habit to check in regularly for updates and warnings. It’s comforting to have reliable information and know what to expect in case a storm is approaching.
Another tip is to set alerts for your nearby areas, not just your own. Sometimes storms can shift quite unexpectedly, so having a wider safety net helps in the long run!
Community Resources
Sometimes our communities are the best resource for information. I often connect with my neighbors to stay in the loop about local preparedness activities or shelters. It’s like having your own little support system!
Many towns have emergency management services that provide updates regarding road closures or community shelters. I make sure to follow those channels to stay informed.
If you get a chance, consider joining local preparedness groups. They often hold events and encourage hands-on learning about how to stay safe. Plus, you meet some pretty awesome people!
Emergency Services Information
All in all, knowing how to contact your local emergency services is key. I keep a list of numbers handy, including the fire department, police, and medical services. I’ve clearly labeled this and placed it in my emergency kit and on the fridge.
In addition, familiarize yourself with local evacuation routes. In case you need to leave quickly, knowing the best way out can save you precious time. I even plotted mine out and practiced driving them during clear days.
And remember, staying calm during a storm can make all the difference. The last thing you want is to panic and make rash decisions!
5. Create a Financial Plan
Emergency Fund
Now, knock on wood, but one thing I always recommend is having an emergency fund. You don’t want to be scrambling to cover unexpected costs like repairs or temporary housing. I aim to set aside about three to six months’ worth of expenses, which provides me with some serious peace of mind.
Having this cash reserve makes it easier to bounce back after a disaster. I like to have a mix of savings accounts and cash easily accessible in case the power is out for a while. You never know how long services might be disrupted!
Keeping track of these expenses in a budgeting app not only helps during crises but also teaches good financial habits overall!
Document Important Information
Speaking of finances, I’ve learned the hard way that documenting important information is key. I keep scanned copies of necessary documents—like insurance policies, personal IDs, and property deeds—both on my computer and securely in my kit. You never know when you might need these!
Having all your information in one place saves time and stress when you’re dealing with an emergency. Plus, it helps to speed up claims later, should you need to file one.
Keeping these files up-to-date is necessary, too. I recommend reviewing everything annually, especially if you’ve made any changes to your home or policies.
Insurance Review
To wrap up, take some time to review your insurance policies. I do this every year to ensure I’m adequately covered for whatever Mother Nature throws my way. Sometimes, life changes, and what was sufficient coverage might not be enough anymore.
I encourage folks to compare different providers or seek advice from an insurance broker who can provide tailored coverage options. It’s like doing a yearly check-up for your home—so important!
Ultimately, being financially prepared adds to your overall safety net when the weather gets rough.
Frequently Asked Questions
1. What is the most important step in preparing for extreme weather?
Assessing your property is crucial. Make sure your roof, gutters, windows, and doors are all in good condition and secured properly.
2. How can I make sure my home doesn’t flood?
Invest in proper drainage systems, landscape wisely to direct water away, and consider flood insurance for additional peace of mind.
3. What should I have in my emergency kit?
Your kit should include essentials like water, food, first-aid supplies, flashlights, batteries, and any medications you may need.
4. How often should I update my emergency plan?
I recommend reviewing your emergency plan at least once a year or whenever there are significant changes in your household or community.
5. Is flood insurance really necessary?
Yes! Many homeowners’ policies don’t cover flood damage, so having separate flood insurance can protect you financially if a disaster strikes.