A useful property record establishes what was present, where it was located, and what condition it was in at a particular time. That makes documenting property conditions before leaving during a fast evacuation different from taking a few memorable pictures of the house. The record should help someone who was not there understand the property later, whether that person is a household member, contractor, adjuster, landlord, or emergency responder.
Begin with the broad condition of the property rather than expensive objects. Capture the street-facing exterior, each side of the building when safely accessible, the roofline from ground level, fences, gates, driveways, sheds, decks, parked vehicles, and visible utility equipment. Interior wide-angle images should show each room from a doorway or corner, including floors, ceilings, walls, windows, major appliances, and furniture. Wide shots provide context; close-ups alone may show damage without proving its location.
Pay special attention to conditions that may change while the property is empty. Photograph open or closed windows, doors, garage doors, water or gas shutoff positions if you can reach them safely, electrical panels, sump pumps, generators, and visible leaks. Do not enter smoke, floodwater, unstable structures, or areas affected by active hazards merely to improve the record. A photograph is never worth delaying evacuation or creating an exposure risk.
High-value belongings deserve a second layer of detail. Photograph identifying marks, serial numbers, model labels, distinctive damage, and the surrounding room. A television photographed on its own is less useful than a wider image showing it in the living room followed by a close-up of its model label. For collections, tools, electronics, and outdoor equipment, a simple inventory note can connect the images to an item description.
The common failure is confusing quantity with coverage. Hundreds of nearly identical images may omit the one hallway, roof edge, storage room, or utility setting that later matters. A short route through the property, repeated in the same order each time, is more reliable than improvising under stress.
A Fast Photo And Video Sequence
A fixed sequence reduces hesitation when an evacuation notice leaves only a few minutes. Choose one starting point and move through the property in a predictable direction. Record a spoken introduction at the beginning of the video with the address, date, approximate time, and current conditions, then pan slowly through the exterior and interior. Video supplies continuity, while still photographs provide sharper detail for labels and small defects.
Use the fastest safe version of this order:
Establish location: capture the address, street view, building exterior, and visible surroundings without exposing yourself to traffic, fire, or other hazards.
Cover spaces: move room by room, making wide images from doorways before close-ups.
Record systems: photograph utility controls, appliances, alarms, pumps, and other equipment that may be relevant later.
Document valuables: capture distinctive features, labels, and approximate locations for priority items.
Finish with departures: photograph vehicles, gates, exterior locks, and any action taken before leaving, such as closing a valve.
The order can be shortened when conditions deteriorate. If an official warning says to leave immediately, record only a quick exterior video and the most important rooms from safe entry points. If several household members are present, one person can document while another gathers essential medication, pets, identification, and communication equipment. Dividing roles is more effective than having everyone photograph the same room.
Phone settings matter, but they should not become a technical project. Keep location services and automatic date information available when practical, use the original camera files, and avoid filters or annotations on the original images. If the phone is nearly full or the battery is low, prioritize coverage and high-value evidence over decorative composition. A blurry image of a serial label may be less useful than a clear written note, while a wide room image may be adequate even if it is not aesthetically pleasing.
A weak assumption is that video automatically proves everything. Fast camera movement, poor lighting, reflections, and blocked views can make video difficult to interpret. Pause briefly at doorways and labels, and narrate what the camera is showing. Do not film through dangerous smoke, drive while recording, or return to the property after leaving because an area looks different on a later map or social-media post.
Evidence Quality, Storage, And Privacy
The value of documentation depends on traceability. Preserve original files with their filenames and metadata, and keep a short log explaining when the recording was made, who made it, and what was observed. A note such as “living room window intact at approximately 6:40 a.m.; evacuation order received shortly afterward” gives context that a camera file alone may not provide. Avoid altering the originals; if you need to mark an image for discussion, create a copy and retain the untouched version.
Back up the record before leaving when the network and battery allow it. A cloud upload, a trusted household member’s device, or a removable drive can provide redundancy. Do not assume an upload completed because a thumbnail appeared; check the service’s sync status or send a small test file. If connectivity is unreliable, keep the phone and any local copy protected from heat, water, and loss, then upload when a safe connection becomes available.
Organize files so another person can locate them quickly. A folder named with the property address and date can contain subfolders for exterior, rooms, systems, vehicles, and valuables. A simple inventory spreadsheet or note can list item, room, brand, model, serial number, and image filename. This approach is more useful than relying on a stream of photos whose order becomes unclear after multiple evacuation events.
Privacy requires restraint. Images may reveal alarm panels, keys, documents, children’s belongings, medication labels, or security weaknesses. Do not post the full record publicly while the property is vacant. Share only what a legitimate recipient needs, and obscure sensitive information in copies intended for general discussion. Keep proof of ownership, receipts, and personal records in a separate secure location rather than leaving all evidence on the device that could be lost with the property.
Comparison helps explain the tradeoff. A cloud-only record is convenient but depends on connectivity and account access; a phone-only record works offline but can disappear with the device. A local-and-remote pair is stronger when feasible, though it takes extra seconds. The practical standard is not perfection. It is a readable, safely created record that remains accessible after the evacuation.
Common Mistakes And Priority Decisions
The first priority is departure safety, followed by irreplaceable personal needs. Documentation belongs in the remaining time, not ahead of evacuation instructions, mobility assistance, pets, medication, identification, or required communication. A property record cannot compensate for a missed evacuation window. If authorities or emergency personnel direct you to leave, stop recording and go.
Several mistakes repeatedly reduce usefulness:
Photographing only possessions: without room and exterior context, later reviewers may not know where an item was or whether surrounding damage existed.
Skipping ordinary areas: garages, attics, utility rooms, patios, and storage spaces often contain equipment and conditions not represented in living areas.
Using screenshots or edited copies: these may remove metadata or make the timing and original state harder to establish.
Failing to describe pre-existing defects: a cracked pane, old roof stain, or dented fence should be noted rather than left ambiguous.
Returning for a better angle: changing conditions, blocked roads, structural damage, and airborne contaminants make this an unsafe trade.
Pre-existing damage deserves especially careful wording. Do not claim that an event caused a condition when you do not know that it did. Record what is visible and when it was observed: “stain visible on ceiling before departure” is more accurate than assigning a cause. If a new condition is discovered later, document it separately with the discovery time and the circumstances of access.
When time is severely limited, use a priority ladder: exterior and address, rooms with known valuables or vulnerable systems, visible hazards or leaks, utility controls, and close-ups of priority property. When more time is available, add inventory detail and duplicate the files. The right choice depends on evacuation speed, lighting, battery, connectivity, and whether the property can be entered safely. A partial but honest record is preferable to a comprehensive record created after conditions become unsafe.
Using The Record After Evacuation
After reaching a safe location, do not rush to compare the property record with rumors, aerial images, or incomplete reports. First confirm that the original files are preserved and backed up. Add a dated note describing when the household left, which areas were not inspected, and any uncertainty in the images. Those limitations make the record more credible because they distinguish observation from assumption.
If the property can later be accessed lawfully and safely, create a second record using the same route and viewpoints. Matching a pre-departure image of a fence, appliance, roof edge, or room with a later image makes differences easier to identify. Keep the two sets separate and label them by date. Do not clean, move, or discard damaged property before documenting it unless immediate action is needed to prevent further harm or protect people.
Share copies with the appropriate parties rather than sending every file to everyone. A property manager may need room and exterior images; a repair professional may need equipment labels and damage close-ups; an insurer may request particular forms or supporting records. Their requirements can vary, so ask what format and documentation they accept. Photographs support a report, but they do not by themselves establish ownership, cause, coverage, or a final repair decision.
Review the record once conditions stabilize. If the video is too fast, a room is missing, or labels are unreadable, update the household’s evacuation documentation routine for the future. Store a compact checklist with the phone charger, emergency contacts, and important documents so the next event does not depend on memory. The goal is a repeatable record made safely under pressure, not an elaborate media archive.
Frequently Asked Questions
Should I photograph the property or record a video first?
Use a short video for rapid overall coverage, then take still images of labels, serial numbers, damage, utility controls, and other details that need sharp resolution.
What if there is only a minute or two before leaving?
Capture the address and a quick exterior or interior walkthrough only if it is safe. Leave immediately when instructed, and never re-enter to complete the record.
Should I edit or add text to my evacuation photos?
Keep original files unchanged. Make annotated copies if needed, but retain the original image and its available date and metadata information.
How should I record pre-existing damage?
Photograph it clearly and describe it as an observed condition with an approximate date or time. Avoid claiming that an evacuation-related event caused it unless that is independently established.
Where should the property record be stored?
Keep the originals on the phone or a local device and make a secure remote backup when possible. Protect the files from public exposure because they may show security details and personal information.
Further Reading
Authoritative Sources
Ready.gov ready.gov
Official household preparedness guidance, emergency plans, and supply checklist resources.
FEMA fema.gov
Federal emergency management information, disaster planning resources, and recovery guidance.
American Red Cross Emergency Preparedness redcross.org
Practical emergency preparation, safety, and response guidance for households.
CDC Emergency Preparedness and Response cdc.gov
Public health guidance for disasters, emergency response, and recovery conditions.
Conclusion
A strong evacuation record is organized, time-specific, and created without putting anyone in danger. Cover the property broadly before focusing on valuable items, use wide images for location and close-ups for identifying detail, and note utility positions, visible hazards, and pre-existing defects without guessing at causes. Preserve original files, verify a backup, and keep sensitive images private. When time is short, reduce the scope rather than delaying departure: address and exterior, major rooms, vulnerable systems, and priority belongings are more useful than a rushed attempt to capture everything. Afterward, retain the record for comparison and share only the material requested by appropriate professionals or property representatives.
Multi-night disruptions create a different problem from a single uncomfortable night. A person may manage an early outage, evacuation delay, storm, or communications failure competently, then make poorer choices as sleep debt accumulates. Short sleep can reduce sustained attention, working memory, emotional control, and the ability to compare alternatives. The danger is not limited to feeling tired; the person may also overestimate alertness and fail to notice that judgment has deteriorated.
Emergency decisions often require several mental steps at once: interpreting an alert, checking a fuel or water level, remembering a household member’s needs, and deciding whether a risk is changing. Fatigue makes it easier to miss one step. For example, someone checking a generator at dawn may remember to inspect fuel but forget ventilation, load limits, or the location of other people. Someone monitoring a weather threat overnight may repeatedly check unreliable information while becoming less capable of distinguishing a meaningful update from noise.
Sleep disruption also changes risk tolerance. Some people become impulsive and choose the fastest option; others become unusually cautious, postpone a necessary action, or keep repeating a familiar task because new reasoning feels difficult. Neither response should be treated as a character flaw. The practical issue is recognizing that a tired brain may prefer immediate relief over a sound longer-term choice.
Weak assumptions make this worse. Caffeine may temporarily increase alertness but does not reliably restore judgment, and bright screens can keep a person engaged when a sleep opportunity is available. “I have done this before” is not a useful measure of fitness when the current disruption includes several nights of fragmented rest. A better approach is to treat sleep as an operational resource alongside batteries, water, medication, and communication capacity.
The internal resource sleep and decision quality during multi-night emergency disruptions is especially relevant when a household must decide who monitors conditions, who drives, and who handles equipment. The goal is not perfect sleep; it is enough protected recovery to keep high-consequence decisions away from the most impaired periods.
How To Protect Rest When Conditions Remain Unstable
Protected sleep works best when the household separates genuine monitoring from anxiety-driven checking. Before lying down, identify the specific event that would require waking, the reliable source that will announce it, and the person responsible for responding. Without those boundaries, every sound or phone notification can become a reason to interrupt rest.
A practical sleep period may require a quieter room, an eye covering, ear protection that still permits important alarms, and a comfortable temperature within the limits of the shelter. Keep water, essential medication, footwear, and a light within reach so a sleeping person does not need to search in darkness. These small arrangements reduce both sleep interruption and the chance of a rushed mistake when getting up.
Not every person needs to sleep at the same time. A staggered arrangement may suit a household that must maintain a brief watch, but it should be written down rather than improvised. If two adults alternate, record the handoff time, current hazards, communication status, and any task that remains unfinished. A vague verbal exchange at 3 a.m. is easy to misremember; a short written note gives the next person a reliable starting point.
There is a tradeoff between continuous coverage and deeper recovery. Watching a harmless indicator all night may feel responsible, yet it can leave everyone less capable of handling a real development the next day. Conversely, turning off all alerts during an evolving hazard may remove needed information. Choose monitoring based on consequence and probability: a clear official warning or known medical need deserves stronger coverage than a routine equipment reading that can be checked at planned intervals.
Food, fluids, and stimulants also affect the night. Regular meals with protein, carbohydrates, and familiar foods may be easier to manage than large heavy meals or alcohol, which can fragment sleep and impair judgment. Caffeine taken late in an intended sleep period may extend wakefulness even when the person feels exhausted. Use it as a limited alertness aid, not as a substitute for recovery or permission to perform hazardous work.
Assigning Duties And Using Safer Decision Controls
Duty assignment should follow current alertness, not habit or seniority. The person who handled the first night may no longer be the best choice for driving, equipment inspection, navigation, childcare, or interpreting complex information. A simple check at the beginning of each shift can ask: When did you last sleep? Are you having trouble keeping your eyes open? Have you made a repeated error? Do you feel unusually confused, agitated, or indecisive?
These questions are not a medical diagnosis, but they can expose a fitness problem before a serious incident. If someone has slept very little and must choose between two consequential options, another rested adult should review the decision. The review should focus on facts, alternatives, and the next reversible step rather than criticism. Fatigue often makes disagreement personal; a fixed review process keeps it operational.
Written controls are valuable because they reduce reliance on memory. A compact emergency decision sheet might include:
Current hazard, location, and time of the last verified update.
People requiring assistance, transportation, medication, or direct contact.
Equipment status, including fuel, battery, ventilation, and shutdown conditions.
The next decision deadline and the person authorized to act if communication fails.
A stop point requiring a second person to review the choice.
The list should be short enough to use when tired. A ten-page plan may contain more information but be less useful at 4 a.m. than a single page with clear action thresholds. For example, “leave if official evacuation instructions apply or the shelter becomes unsafe” is more usable than a broad instruction to “monitor conditions closely.” The specific threshold reduces repeated debate while preserving room for new information.
One common failure is assigning everyone multiple roles. A person responsible for radio monitoring may also be expected to cook, supervise children, track supplies, and inspect electrical equipment. Each interruption increases the chance of an omitted step. Concentrate demanding tasks in short blocks, then hand them over deliberately. Routine tasks can be combined, but safety-critical work should not be squeezed between competing duties.
Use sleep and decision quality during multi-night emergency disruptions as a planning criterion before the emergency, not only as a reaction afterward. A household can decide in advance who is a backup driver, where the written log stays, which alerts matter, and which tasks may be postponed. That preparation protects scarce attention when sleep is already compromised.
Recognizing Declining Performance And Recovering Function
Performance decline is easier to manage when it is defined by observable behavior. Repeating the same question, misreading a familiar control, forgetting a completed task, drifting during conversation, dropping objects, or becoming unable to follow a short sequence are practical warning signs. Irritability and unusual confidence also matter because a fatigued person may reject help while making more errors.
When these signs appear, remove the person from driving, climbing, generator work, weapon handling, complex navigation, and other tasks where a brief lapse could cause serious harm. Move the duty to someone more rested, simplify the environment, and offer a protected sleep opportunity. If no one is rested, reduce the number of active tasks and seek outside assistance through available emergency or community channels when the situation warrants it.
A short nap may improve alertness for a limited period, but it should not be treated as proof of full recovery. Waking abruptly can produce temporary grogginess, and a person may still have substantial sleep debt. Give the individual time to orient, drink water if appropriate, review the written handoff, and confirm the next task before returning to responsibility. Do not wake someone for a nonessential update merely because the household feels uneasy.
Recovery after the disruption should include a return to regular sleep timing where conditions allow. Avoid turning the first quiet night into an opportunity to catch up on every postponed chore. Light activity, normal meals, and reduced evening stimulation may make the transition easier, while persistent severe sleepiness, confusion, breathing problems during sleep, or inability to function safely merits medical attention. Emergency stress can expose or intensify an existing sleep or health problem, so a continuing issue should not be dismissed as ordinary fatigue.
Another misconception is that a person who can describe the plan is ready to execute it. Verbal recall and reliable performance are not identical. Test the handoff with a simple task: ask the person to identify the current hazard, next deadline, equipment constraint, and escalation point. If the answers are incomplete or contradictory, delay assignment of a demanding role. This quick check is more useful than asking whether someone “feels fine.”
For a household refining its procedures, sleep and decision quality during multi-night emergency disruptions can be reviewed after each event or drill. Note which interruptions were necessary, which duties created repeated errors, and whether the handoff log helped. Improvement comes from changing the schedule or control, not from expecting exhausted people to show more discipline.
Frequently Asked Questions
How does several nights of poor sleep affect emergency decisions?
It may reduce attention, working memory, emotional control, and the ability to recognize personal errors. The person may feel capable while overlooking a critical step.
Should everyone stay awake to monitor an unfolding emergency?
No. Assign monitoring to a specific person or schedule when possible, and protect sleep for others unless a credible alert or immediate hazard requires broader coverage.
Can caffeine replace sleep during a disruption?
Caffeine may temporarily increase alertness, but it does not reliably restore judgment or coordination and may interfere with the next sleep period.
When should a tired person stop handling safety-critical tasks?
Repeated errors, confusion, drifting attention, unsafe driving, or difficulty staying awake are reasons to hand over the task and reduce responsibilities.
What should a shift handoff include?
Record the current hazard, verified information, people needing assistance, equipment status, unfinished tasks, next review time, and conditions requiring escalation.
Further Reading
Authoritative Sources
Academy of Nutrition and Dietetics eatright.org
Professional nutrition guidance, healthy eating resources, and practical dietitian-reviewed advice.
U.S. Department of Agriculture usda.gov
Official food, nutrition, agriculture, and consumer guidance from the USDA.
NIH Office of Dietary Supplements ods.od.nih.gov
Research-based fact sheets on nutrients, supplements, dietary intake, and safety considerations.
International Society of Sports Nutrition sportsnutritionsociety.org
Evidence-informed sports nutrition resources and position stands for active people and athletes.
Conclusion
During a multi-night emergency, sleep should be managed as part of the safety system rather than treated as a luxury. Protect one meaningful rest period, define which alerts justify waking someone, and transfer demanding duties before errors become visible hazards. Written handoffs, short checklists, and second-person reviews compensate for the memory and attention problems that sleep loss can create. Do not let caffeine, familiarity, or a person’s confidence determine whether they drive, inspect equipment, or interpret critical information. Watch for repeated mistakes, confusion, and inability to stay awake; those signs call for a quieter role and a real recovery opportunity. After conditions stabilize, restore normal sleep gradually and address persistent impairment through appropriate medical support.
Build a Fuel Log That Reflects Actual Generator Use
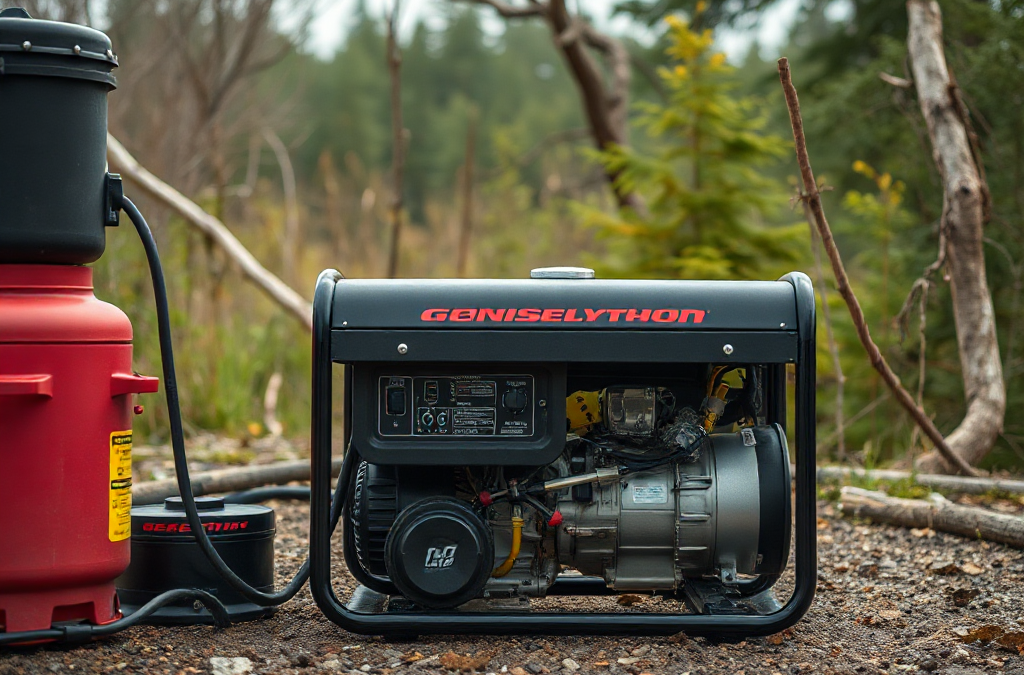
Accurate fuel tracking begins with a repeatable record, not a guess based on the tank gauge. Before a long operating period, note the fuel level, hour-meter reading, generator model, fuel type, connected equipment, and the time the unit begins supplying power. At each refill, record the quantity added and the new hour-meter reading. A simple log makes it possible to distinguish fuel consumed by the engine from fuel that was spilled, transferred to another container, or left in an uncertain starting level.
The basic calculation is straightforward: fuel used divided by operating hours equals average fuel consumption per hour. If a generator uses 8 gallons during 10 hours of operation, its measured average is 0.8 gallons per hour. That number is useful only when the starting and ending measurements are credible. A partially filled tank, an inaccurate gauge, or a refill rounded to the nearest gallon can distort a short test.
For extended operation, use the same measuring method each time. A marked fuel container or a documented pump reading is generally more useful than estimating from a translucent tank. Record unusual events such as a shutdown, transfer switch change, extended idling period, or load being added. These details explain why two apparently similar shifts may show different results.
A common mistake is logging only the total number of hours. Runtime without fuel volume cannot reveal whether consumption is changing. Another weak assumption is treating the manual’s maximum runtime as a guaranteed operating figure; published runtime often depends on a stated load, a new engine, and favorable conditions. Your own log should become the primary planning reference, while the manual remains a technical baseline.
Measure Consumption Across Different Electrical Loads
Electrical load is usually the most important operating variable in a fuel-consumption record. A generator powering a refrigerator, lights, communications equipment, and a pump will not use fuel at the same rate as the same unit running a heater, compressor, or large well pump. Track the approximate wattage or amperage of connected equipment when possible, and record when major loads start or stop.
Load does not always rise in a perfectly linear relationship with fuel use. Engines have a baseline fuel demand whenever they are running, so a lightly loaded unit may consume a substantial amount of fuel while producing little useful power. At higher loads, fuel use normally increases as the engine supplies more energy, but operating near the generator’s continuous rating can create heat, voltage, and maintenance concerns. The useful comparison is not simply “low load versus high load”; it is measured gallons per hour alongside the work the generator is actually doing.
Consider a household that runs a freezer and battery charger for several hours, then briefly operates a sump pump and microwave. The average load may look modest, yet the pump’s starting surge can affect engine speed and cause a short period of higher fuel use. A separate record for steady loads and intermittent heavy loads gives a clearer picture than a single daily average.
Power meters, generator displays, or a properly installed energy monitor can improve the record, but they are not mandatory for useful tracking. A practical approach is to create three operating categories: standby or light load, normal essential load, and heavy or surge-prone load. Measure each category over enough time to smooth out brief starts and stops. Do not add loads merely to make a test convenient; prioritize equipment the generator is intended to support.
Light load: record idle-like operation and note whether the generator is cycling equipment.
Normal load: represent the appliances and circuits normally needed during the outage.
Heavy load: document large motors, heating elements, pumps, or simultaneous starts separately.
Linking tracking fuel consumption during prolonged generator operation to load conditions prevents a misleading conclusion such as “the generator suddenly became inefficient” when the actual cause was a newly connected appliance.
Turn Fuel Records Into Reliable Runtime Forecasts
A runtime forecast should use measured consumption plus a deliberate fuel reserve. Start with the usable fuel available, not the tank’s advertised capacity. Some fuel may remain below the pickup point, and operating until the tank is empty can introduce air into the fuel system or stop power at an inconvenient moment. Divide usable gallons by the observed gallons-per-hour figure for the relevant load category.
For example, if 12 usable gallons remain and the generator consumes 0.65 gallons per hour under the current essential load, the theoretical runtime is about 18 hours. That is not a promise. A cautious forecast should account for changing loads, weather, imperfect measurements, and the need to refuel before the tank is nearly empty. If a pump or heating appliance may be added later, use the higher measured rate rather than the light-load rate.
Separate short-term forecasting from supply planning. Short-term forecasting answers when the next refill may be needed. Supply planning asks whether the available fuel will cover the expected outage, whether fuel can be obtained safely, and whether storage arrangements are suitable for the fuel and location. A spreadsheet can calculate both, but the inputs must be updated after every meaningful change in use.
Forecasts become unreliable when users average together unrelated conditions. A six-hour low-load test should not be used to predict a night when a well pump, refrigerator, and space heater will cycle. Likewise, a brief heavy-load test may overstate the fuel needed for a mostly quiet overnight period. Keep separate rates for distinct operating patterns and label each figure with the load, temperature, and maintenance condition when those details could matter.
A useful refill trigger is based on time and reserve, not only on the gauge. For instance, schedule a check when the calculated remaining runtime reaches the next practical refill window, then verify the estimate against the physical fuel level. The gauge is a warning instrument, while the log supplies the trend. Comparing both helps expose a faulty sender or an unexpectedly changing consumption rate.
Spot Consumption Changes Before They Become Failures
A rising gallons-per-hour figure deserves investigation, especially when the electrical load has not changed. Engines may consume more fuel because of restricted airflow, poor maintenance, fuel-system problems, overloading, excessive idling, or operating conditions that differ from the original baseline. The record matters because it shows whether the change occurred suddenly after an event or gradually over several operating periods.
Begin by checking the simple explanations. Confirm that the hour meter is working, the refill amount was measured correctly, and the connected equipment has not changed. Inspect for fuel leakage, unusual exhaust, unstable engine speed, difficult starting, or visible damage. Review the air filter, oil level, cooling airflow, and service schedule according to the manufacturer’s instructions. Do not bypass guards or open hot components while the generator is running.
A scenario illustrates the value of trend data. Suppose a unit normally uses 0.7 gallons per hour at its ordinary load but records a higher rate during two consecutive shifts. If the load monitor shows the same demand, the owner can investigate maintenance and leakage before the tank empties unexpectedly. If the increase began when a refrigerator and pump began cycling together, the apparent fault may instead be a changed duty cycle.
Low consumption is not automatically good news. A generator that is producing less power because a circuit has tripped, an appliance has disconnected, or the engine is failing to carry load may use less fuel while also failing its purpose. Compare fuel data with output, voltage behavior, engine sound, and the equipment actually operating. Consumption should be interpreted as part of a performance record, not as a standalone score.
Keep a dated baseline after maintenance and after any major change in connected equipment. Link each abnormal entry to what happened next, such as cleaning the filter, removing an unnecessary load, correcting a leak, or arranging professional service. That history is more useful than a vague note that the generator “seemed thirsty.”
Refill Decisions, Storage Limits, And Operating Safety
Fuel records are most valuable when they change behavior before a shortage or hazardous refill. Set a personal minimum reserve based on the generator’s measured rate, the importance of the connected loads, and the time required to obtain more fuel. A unit supporting a sump pump during severe weather may justify a larger operational buffer than one serving only occasional lighting, because an unplanned shutdown could have greater consequences.
Refueling requires a cooled, shut-down generator in a suitable outdoor location, with ignition sources controlled and the fuel container handled according to its labeling and local requirements. Never store fuel in an occupied living area or treat a generator fuel tank as a long-term storage solution. Follow the generator and fuel-container instructions for fuel type, stabilizer use, inspection, and disposal of degraded fuel. Carbon monoxide safety remains separate from fuel tracking: operate the generator outdoors and away from doors, windows, and ventilation openings as directed by official safety guidance.
Use a compact operating checklist before a prolonged run:
Record the hour-meter reading and measured starting fuel.
Confirm the connected load and identify equipment with motor-start surges.
Inspect for leaks, blocked airflow, loose connections, and warning indicators.
Log every refill, shutdown, load change, and unusual engine behavior.
Recalculate the next refill window using the latest load-specific rate.
Do not confuse a large reserve with unlimited readiness. Fuel ages, containers require inspection, and a generator may need service before the stored supply is consumed. A smaller, well-rotated supply with reliable records can be more useful than a larger quantity that is poorly labeled or has an unknown age. The practical goal of tracking fuel consumption during prolonged generator operation is dependable decision-making: knowing how much fuel is usable, how fast it is being consumed, and when continued operation should give way to maintenance or a controlled shutdown.
For equipment-specific fuel rates, maintenance intervals, fuel specifications, and operating limits, consult the generator manufacturer’s current owner’s manual. For fire, carbon monoxide, and generator placement guidance, use official information from agencies such as the U.S. Consumer Product Safety Commission, the U.S. Environmental Protection Agency, or local fire authorities rather than relying on an unofficial runtime chart.
Frequently Asked Questions
What is the simplest way to calculate generator fuel consumption?
Measure the fuel added during a known operating period, then divide gallons used by hours run. Record the electrical load because the result applies only to similar conditions.
Why can a generator use more fuel than its runtime estimate suggests?
Runtime estimates may assume a particular load and operating condition. Added appliances, motor-start surges, poor maintenance, leaks, cold weather, or inaccurate fuel measurements can raise actual consumption.
Should fuel use be tracked at light and heavy loads separately?
Yes. Separate load-specific rates are more useful than one average because a generator’s baseline engine demand and changing appliance cycles can make fuel use vary considerably.
How much reserve fuel should be kept?
Keep enough usable fuel to cover the next practical refill opportunity plus a margin for changing loads and measurement uncertainty. The exact reserve depends on access to fuel, generator demand, and the consequences of shutdown.
What does a sudden rise in fuel consumption indicate?
First verify the refill measurement, hour meter, and connected load. If those are unchanged, inspect for leaks, airflow restrictions, overload, poor engine performance, or other maintenance issues before continuing a long run.
Further Reading
Authoritative Sources
Investor.gov investor.gov
SEC investor education resources for evaluating financial products and risk.
FINRA Investor Insights finra.org
Investor education, broker-check tools, and financial decision resources.
Consumer Financial Protection Bureau consumerfinance.gov
Consumer guidance on credit, debt, lending, and financial products.
Internal Revenue Service irs.gov
Official tax guidance, forms, and compliance information.
Conclusion
Reliable generator fuel planning comes from measured operating data, not a gauge reading or a single number in a manual. Record fuel volume and hours together, separate light, normal, and heavy-load conditions, and update the forecast whenever appliances or operating patterns change. Treat rising consumption as a diagnostic clue, but compare it with electrical output and engine behavior before assuming a mechanical fault. Refuel early enough to preserve a practical reserve, and keep fuel handling, ventilation, storage, and maintenance requirements separate from the arithmetic. After the next operating period, review the log for a usable gallons-per-hour baseline and mark the refill point that fits your actual access to fuel. That small record can prevent both an avoidable shutdown and an unnecessary overestimate of supply needs.