by Preparation Call Editorial Team | Jul 30, 2025 | Preparedness
1. Enhanced Physical Resilience
Understanding Physical Resilience
When I think of physical resilience, it’s all about your body’s ability to withstand stress and recover from it. In a survival scenario, this is paramount. Whether you’re hiking in harsh terrains or facing unexpected weather changes, the stronger your body, the better you can handle those challenges. It’s like giving your body an upgrade, preparing it to take on whatever comes your way.
One key aspect of resilience is conditioning, which revolves around building muscle strength, endurance, and flexibility. Just think about it: being able to lift heavy objects when building a shelter, or running for a great distance to find help can be life-saving. The more we train, the more we enhance our capacity to deal with physical challenges.
Moreover, resilience isn’t just physical—it’s also about mental toughness. In times of severe stress, our bodies need to keep functioning optimally while our minds work through issues. I’ve often found that a solid fitness routine boosts my mental clarity and focus, which is invaluable when I need to make quick decisions under pressure.
Building Strength and Endurance
Strength and endurance are the bread and butter of physical fitness in survival situations. Practical exercises like weightlifting, running, and even bodyweight workouts contribute to building that essential strength. Picture this: getting trapped or having to scale cliffs. A well-conditioned body means less chance of injury and a higher likelihood of escape.
Endurance training, on the other hand, prepares you for long-duration activities. Whether you’re trekking miles in the woods or swimming across a river, the ability to keep going when fatigue sets in can determine your survival. Honestly, I find that combining both strength and endurance workouts keeps me prepared for any situation.
Consistency is key! I try to follow a balanced routine that targets both these areas weekly. It’s not just about pushing hard for one session; it’s about showing up and putting in the work repeatedly, making it a habit and part of my lifestyle.
Flexibility and Injury Prevention
When discussing physical fitness, flexibility often doesn’t get the credit it deserves. However, in survival, it’s super important. Good flexibility can help prevent injuries, and let me tell you, nobody wants to deal with an injury out in the wild where medical help is far away.
Incorporating yoga and stretching into my routine has really opened up my range of motion and kept my muscles ready for unpredictable movements. I always feel much more agile and less prone to pulls or strains thanks to my flexible body.
Remember, it’s about balance. A balanced approach to fitness makes you not just stronger, but smarter about how you move. So, I make sure to dedicate time to flexibility workouts because being able to move freely is key to surviving any situation.
2. Increased Mental Clarity and Focus
Fitness Boosts Brain Function
We often overlook how physical fitness connects with mental sharpness. But let’s face it: in survival situations, your mind is just as important as your body. When I work out, I feel that rush of endorphins, which not only uplifts my mood but also clears my mind. It’s like hitting a reset button!
Scientific research backs this up too! Regular exercise improves cognition and can boost our ability to make quick decisions. It’s easy to get overwhelmed in stressful situations, but regular physical activity helps me stay sharp. It’s about being prepared mentally as much as it is physically.
So, I encourage folks to incorporate activities like running or cycling into their routine as a way to enhance clarity. You’ll be amazed at how much more focused and alert you can be in tough situations just by hitting the gym or taking a jog outside!
Stress Management
Survival situations are a breeding ground for stress, and how we handle it can make a big difference. I have noticed that staying fit helps me deal with stress way more effectively. Exercising brings down those anxiety levels, allowing me to think more clearly when my heart is racing.
Finding healthy outlets for stress, like hitting the gym or going for a hike, can transform your entire approach to challenges. Instead of panicking when facing adversity, I’m able to channel that energy into physical exertion, which often leads to better decision-making.
Additionally, activities like meditation or breathing exercises paired with physical fitness can be a game-changer. They offer a holistic approach to maintaining both physical and mental well-being, ensuring that I’m ready to face whatever comes my way without succumbing to panic.
Problem-Solving Under Pressure
In survival, it’s not just about muscle power; you need to think strategically too. Regular fitness routines help sharpen my capacity for problem-solving. When I put my body under stress through exercise, I train my mind to stay calm and tackle problems effectively. It’s almost like a rehearsal for when things go south.
Engaging in various forms of training, such as team sports or obstacle courses, teaches you how to adapt and find solutions on the fly. In the face of obstacles during fitness, I’ve learned to think quickly and maintain composure—skills that are invaluable during real-life survival situations.
So, I always remind folks to engage in activities that challenge their mind and body simultaneously. This training creates a seamless integration of fitness and critical thinking that we can all benefit from.
3. Enhanced Metabolism and Energy Levels
Boosting Metabolism
Fitness doesn’t just make you strong; it catapults your metabolism too! When I keep active, my body becomes more efficient at burning calories, even while at rest. This isn’t just great for keeping in shape, but it also contributes to having those necessary energy reserves when adventure strikes!
An improved metabolism helps your body recover quicker after strenuous activities, meaning you can go longer and harder during survival situations without crashing. Plus, the more active I am, the more I find I want to maintain healthy eating habits too. It becomes a natural cycle of energy management.
It’s super beneficial for survivalists because it allows you to maximize the energy from whatever food you can scavenge or hunt. I find that by maintaining an active lifestyle, I can make the most of what I consume. It’s all part of the circle of survival!
Stamina for Adverse Conditions
It’s one thing to be fit and another to possess the stamina to endure tough conditions. In survival situations, you often face long days filled with physical labor without adequate rest. Having built up my stamina through consistent training is what keeps me going when things get hairy.
Interval training has worked wonders for my endurance. By mixing high-intensity bursts with lower intensity activities, I equip my body to handle variable stress. This is super useful when you need to sprint away from danger or hike out of a rough spot and you’re running on fumes.
Additionally, it’s essential to recognize your body’s limits during extended physical activity. I’ve learned to listen to my body and pace myself when necessary; knowing when to push and when to conserve energy is all part of mastering stamina.
Overall Well-Being
The impact of fitness on well-being goes beyond just physical aspects. It shapes your mental and emotional state as well. Staying fit can improve your mood and overall outlook on life. In survival situations, maintaining a positive attitude can be half the battle!
Physical activity releases biochemical substances that enhance our mental state, making us more resilient. I’ve experienced this firsthand—when I feel good physically, I naturally feel empowered and ready to take on challenges, even in less-than-ideal conditions.
Being in great shape means you’re likely to handle hardships with a clear mind and a determined attitude. It contributes to finding joy and positivity even when facing daunting scenarios. I can’t emphasize enough how vital it is to sustain that overall well-being through fitness!
4. Improved Social Connections
Teamwork Through Fitness
Survival isn’t just about the individual; it’s often a team effort! Engaging in group fitness activities fosters camaraderie and trust among participants. I truly believe that keeping fit together can strengthen social bonds that are crucial in challenging situations.
Sweating it out together through a boot camp or a sports team creates connections that go beyond physical fitness. It’s a shared experience where you learn to rely on each other. Trust and communication developed in these settings become invaluable when you’re all working together for survival.
Moreover, these shared experiences help build problem-solving teams. In the face of adversity, knowing you have each other’s backs prepared with what you physically trained for makes all the difference. The connections formed during fitness efforts create a support system that you can rely on in tough times.
Sharing Knowledge and Skills
In fitness communities, it’s easy to learn from one another. I find that sharing knowledge not only helps improve personal skills but also encourages collective growth. When you know how to prioritize physical fitness, you can also share techniques on staying safe, building shelters, or other survival skills that elevate the group’s readiness.
Many of the skills we learn in fitness translate well to real-life situations. Team workouts often come with challenges and tasks that mimic situations we might face in survival. You can swap tips, strategies, and techniques, enhancing everyone’s capabilities in the process.
Plus, this knowledge-sharing builds a repository of collective experiences that we can all lean on later. The friendships and mentorships born from fitness can create a wealth of knowledge about survival tactics that can help you during crunch time!
Community Support
Having a robust support system from your fitness community gives you a solid base. Surviving tough times often requires the motivation and encouragement of others around you. Whether it’s through motivation in workouts or emotional support during rough patches, that community can be your lifeline.
Fitness classes or local clubs often create an environment where everyone is rooting for one another. This shared encouragement leads to overall stronger bonds, and when it comes down to survival, having people ready to rally together can greatly improve your chances of overcoming adversity.
In times of crisis, you discover what someone is made of. Building those connections in fitness can lead to stronger allies when you’re dealing with survival situations. It’s genuinely uplifting to know there’s a tribe behind you when you need it most.
5. Access to Resources and Training
Finding Survival Skills Through Fitness
Fitness isn’t just about lifting weights or running marathons. Many fitness programs offer survival training, and this is a fantastic resource! I’ve participated in workshops that combine elements of fitness with practical survival skills like navigation and first aid, which can be valuable in dire situations.
These trainings equip you with the knowledge to handle a variety of survival challenges. Whether it’s learning about edible plants or how to build a makeshift shelter, these skills can directly translate into real-life survival capabilities. Plus, they keep you physically active as you learn!
Moreover, connecting with survival experts through fitness classes or workshops opens doors to further training opportunities. This continuous learning contributes to increased readiness when faced with adversity.
Access to Essential Gear and Equipment
Many fitness communities focus on hiking, rock climbing, or outdoor activities that require specialized gear. Gaining access to quality equipment not only helps improve your training but also prepares you for survival scenarios. I’ve been part of groups where we shared recommendations on gear that became essential for my outdoor adventures.
This access to information ensures I’m making informed decisions about the best tools to carry in emergency situations. Good equipment can make a substantial difference in survivability, and being part of a fitness community means you are often in the loop on the latest and greatest gear.
Additionally, attending fitness expos or related events can lead to discovering new products that can enhance your survival toolkit. The more knowledge you have about available resources, the better prepared you will be.
Creating Emergency Plans
Lastly, one of the invaluable aspects of fitness communities is the environment where we can strategize. Having accessibility to discussions about emergency plans in a group setting leads to greater preparedness altogether. I’ve participated in fitness meetups that included safety planning, which was eye-opening!
Discussing potential scenarios helps everyone envision what might happen and plan accordingly. Knowing how to react when faced with different challenges can significantly enhance your chances of survival. It’s not just theory; we actually practice drills that can be applied to real situations!
Together with others, we create a support system that works diligently to ensure we’re all prepared. This collaborative planning fosters emotional resilience, making it easier to handle sudden challenges when they arise.
Frequently Asked Questions
1. Why is physical fitness important for survival?
Physical fitness enhances your strength, endurance, mental clarity, and overall well-being, which are critical in emergency situations. Being fit prepares your body and mind to handle unexpected challenges with confidence.
2. What types of exercises should I focus on for survival situations?
A balanced mix of strength training, endurance activities (like running or hiking), and flexibility exercises (such as yoga) will prepare you for a variety of physical challenges during survival scenarios.
3. How can fitness improve my mental resilience?
Regular exercise increases the release of endorphins, which enhances mood and reduces stress. This mental boost helps maintain focus and clarity, which is vital when under pressure in a survival situation.
4. What role does team fitness play in survival training?
Participating in group fitness activities fosters teamwork and communication skills, building relationships that can enhance your chances during difficult survival scenarios.
5. How can I access resources for learning survival skills through fitness?
Look for fitness communities or workshops that emphasize outdoor training and survival skills. Engage with local groups, attend classes, and participate in activities that combine physical fitness with survival education.
by Preparation Call Editorial Team | Jul 30, 2025 | Preparedness
1. Choosing the Right Containers
Assessing Your Needs
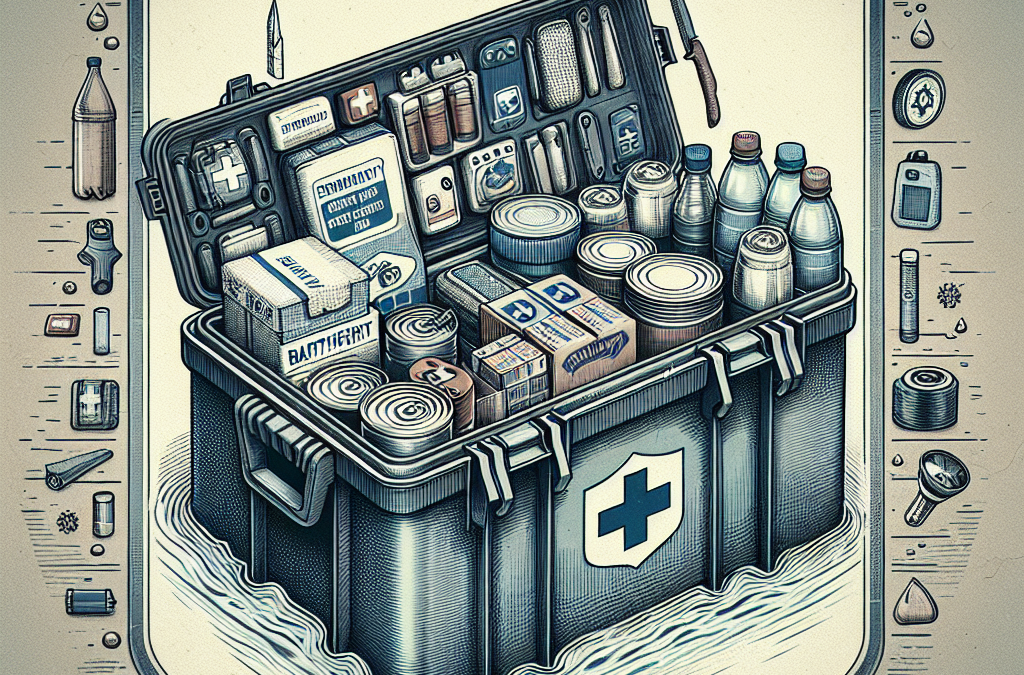
When it comes to emergency supplies, the first thing I learned is that the choice of containers can make a world of difference. You want something that’s durable, breathable, and ideally waterproof. Think about the specific supplies you have—medications, food, gear—and how much protection each type requires.
For instance, if you’re storing items like batteries or electronics, a container with a good seal is key. Moisture can wreak havoc on these items, so I personally prefer hard plastic boxes that are designed for heavy-duty storage. They’re easy to stack, keep stuff organized, and keep moisture at bay.
Also, don’t forget to label everything! I’ve spent way too much time rummaging through unmarked boxes. A simple label maker or a permanent marker can save you from that chaos later on.
Material Matters
The material of your containers is just as important as the design. I’ve tried everything from cardboard to heavy-duty plastic, and let me tell you, plastic wins every time. It’s waterproof, resistant to pests, and can handle a bit of roughhousing during transport.
Metal containers are another option, especially for long-term food storage, but they can rust unless they’re coated. I learned the hard way to avoid fabric bags for anything other than light items. They soak up moisture and lose structural integrity over time.
Lastly, consider using vacuum-sealed bags for smaller items. They take up less space, and moisture is the enemy when you’re stocking up for emergencies. Anything I can minimize in terms of space that’s also moisture-proof is a win in my book!
Organizing Containers
It’s not just about having the right containers; it’s also about how you organize them. From my experience, it helps to have one container for each category: food, first aid, tools, etc. This way, when something goes down, you’re not playing hide and seek with your supplies.
I use clear containers whenever possible. This allows me to see what’s inside without opening them, which is a lifesaver when time is of the essence. Store similar items together and consider placing the most frequently used supplies on top, so they’re easy to grab.
Regularly go through your supplies to check expiration dates and ensure everything is in working order. This has saved me more than once from showing up to an emergency unprepared. No one wants to deal with expired band-aids or dead batteries!
2. Proper Storage Locations
Avoiding Damp Areas
Back in the day, I made the rookie mistake of storing my emergency supplies in the basement. It seemed logical until I realized it was prone to flooding and moisture buildup. Now, I keep my supplies in a dry, cool place—like a closet on the main floor or even a spare room.
Humidity is the number one enemy of emergency supplies. Areas like attics can get hot, while basements can get soggy. Find a happy medium that’s also protected from direct sunlight since UV rays can affect the integrity of your supplies.
If you must use a basement or cellar, invest in some moisture-absorbing products, like silica gel packs or a dehumidifier. Trust me, it’s better than replacing soggy supplies!
Accessibility Matters
As much as I want my supplies to be safe, I also need them to be easily accessible. I learned that this balance is crucial. After all, during an emergency, quick access can be the difference between calm response and chaotic panic.
Consider placing supplies in a location that everyone in your household knows about. I even made a little map and put it on the fridge. That way, if I’m not home, my family can still grab what they need quickly.
In addition, keep an emergency kit in your car, especially if you live in an area prone to natural disasters. I made it a point to have tools and snacks easily reachable in case I ever get stranded.
Temperature Control
Extreme temperatures can damage certain supplies, so I always consider climate control for my emergency kits. For example, batteries can leak in heat or cold, and food supplies may spoil or lose integrity.
I recommend keeping non-perishable foods and items like batteries inside your home rather than in the garage. Garage temperatures can fluctuate dramatically over the seasons and aren’t ideal for sensitive supplies.
If you’re in a particularly hot area, consider investing in insulated containers. They can protect against extreme temperatures while still being lightweight and easy to maneuver.
3. Regular Maintenance
Periodic Checks
Let me tell you, regular checks are a must! I learned the hard way that just stashing supplies and forgetting about them isn’t the way to go. Set a reminder on your phone every six months to go through your stuff.
During each check, I assess the condition of my containers and the supplies within them. Any outdated items get tossed, and I take note of what needs to be replenished. It keeps things from getting stale—literally and figuratively!
Seeing everything laid out also gives me peace of mind. I’ve made this a family activity, getting everyone involved so we all understand where things are and what we might need in the future.
Updating Supplies
As I go through my supplies, I often find that some things need upgrades. Maybe I’ve found better items that are lighter or more durable since the last time I stocked up. Each review session is a chance for me to improve what I’ve got.
Keep an eye out for seasonal items. For example, during winter, I make sure my kit has extra blankets and warm clothing. In the summer, it might be better hydration options. It’s all about adapting to the environment you’re in.
Don’t only focus on physical supplies! If you’ve learned new emergency techniques or first-aid methods, make sure to update your knowledge. Maybe even take a quick refresher course with your family. It’s a great way to bond and prepare at the same time.
Replacing Expired Items
One of the biggest pitfalls I encountered was not keeping an eye on expiration dates. I cannot stress enough how important it is to regularly replace expired items. Nothing worse than needing a first-aid kit only to find out the supplies inside haven’t been viable for years.
I usually keep a checklist handy that notes what we have on hand and when it expires. A simple spreadsheet does wonders. Time flies, and it’s easy to lose track of which items need replacing.
Make replacing expired items a part of your routine checks. This not only ensures everything is fresh, but it also gives you peace of mind knowing you’re truly prepared.
4. Keeping Supplies Clean
Hygiene Practices
In my experience, maintaining cleanliness in emergency supplies is often overlooked. But let’s face it: dirt and germs have no place in a kit meant to aid us in difficult times. I regularly wipe down my containers and check that everything inside is clean.
Especially with food items, hygiene matters a ton. I always ensure hands are washed before I restock supplies. If you’re putting fresh items inside, even better—everything should be as sanitary as possible to avoid contamination.
Additionally, don’t forget to clean your tools. Whether it’s a multi-tool or a set of flashlights, keeping them clean not only preserves their function but also extends their lifespan. It’s the little things that make a big difference!
Sealing Food Properly
Food storage is another key area where I recommend taking extra precautions. I’ve gotten into the habit of using sealable bags or vacuum-sealed containers for all perishable items. This helps keep ambient moisture and pests at bay.
This practice has saved me from many instances of moldy food. Nothing ruins your day faster than pulling out emergency supplies and finding they’re spoiled! I also try to use Food-Safe containers to ensure it won’t leach harmful chemicals.
Labeling is also super important here. I write down the purchase or expiration dates directly on the bags! That way, I can quickly know what to toss without digging through everything.
Mold Prevention
I cannot stress enough how dangerous mold can be, especially in emergency supplies. I’ve encountered it before and learned to be vigilant. Ensure your containers are completely dry before sealing them and always check your stored supplies regularly.
Use moisture absorbents inside your containers, especially when storing food. Silica gel packs or activated charcoal are great for keeping things dry. Remember, a little precaution goes a long way when it comes to preventing mold growth.
Don’t underestimate the power of ventilation either. I store some items in a well-ventilated room to deter any moisture buildup, which surely cuts down the chances of mold craving your supplies.
5. Planning for the Unexpected
Conducting Drills
I’ve found that planning for emergencies isn’t just about having supplies, but knowing how to use them! I conduct regular drills with my family to ensure everyone knows where the supplies are and how to handle different situations.
During these drills, we practice scenarios like power outages, natural disasters, or any situation where we might need to rely on our emergency supplies. It’s actually been pretty fun—kind of like a practice adventure!
Realistic scenarios give everyone the chance to get familiar with emergency protocols. And to ensure anyone can utilize the supplies effectively, we discuss the contents of our kits. Knowing how to act calmly is just as important as having the right stuff!
Understanding the Use of Supplies
Just having supplies isn’t enough; understanding how to use them is crucial. For instance, I took the time to learn how to use a tourniquet correctly and practice what steps to take in case of injury. These aren’t just gimmicks; they save lives!
I recommend keeping an instruction manual or guideline with your supplies. It doesn’t hurt to have a visual reference to follow, especially under pressure. Sometimes just reading something while in a chaotic moment can bring clarity.
Moreover, I try to gather resources like first-aid guides and emergency contact numbers and make sure everyone can read through them. Sharing knowledge is a major part of being prepared!
Updating Your Plan
In closing, I realized that as life changes, so should our emergency plans. Check in on your emergency plan periodically, especially if you’ve moved houses, added family members, or changed your lifestyle in some way.
This might mean updating contact lists or re-evaluating the supplies you have on hand. I found that making adjustments helps in keeping everything relevant, which is key when the unexpected happens.
Think ahead and anticipate potential challenges you could face in the future. Keeping flexibility in your plan ensures readiness for whatever might come down the road!
Frequently Asked Questions
1. How often should I check my emergency supplies?
It’s a good idea to check your emergency supplies every six months. This helps ensure everything is fresh and functional. During these checks, make sure to replace expired items.
2. What type of containers are best for storing emergency supplies?
Durable, waterproof plastic containers are usually the best. They protect against moisture, pests, and are easy to stack for organized storage. Make sure to label them, so you know what’s inside!
3. Can I store emergency supplies in my basement?
It depends. If your basement is prone to moisture, it’s better to keep supplies elsewhere to avoid water damage. If you do store them in the basement, consider using moisture-absorbing products.
4. What should I do with outdated food and supplies in my kit?
Outdated food and supplies should be discarded immediately. Replace them with fresh items to ensure you’re always prepared. This should be part of your regular check-ups.
5. How do I plan for emergencies with my family?
Conduct drills with your family and discuss your emergency plan. Make sure everyone knows where supplies are kept and how to use them. Reinforce learning through realistic scenarios and keeping guidelines handy!

by Preparation Call Editorial Team | Jul 30, 2025 | Preparedness
Understanding the Importance of a Community Support Network
Why Community Matters in Emergencies
When emergencies hit, it’s often the community that rallies together to provide support. Personal connections are crucial; they create a web of trust and shared resources that can help in times of distress. Drawing on my own experience during a local disaster, I witnessed how neighbors came together to check on each other, share supplies, and provide emotional support. It’s like having an extended family that’s there for you when you need it the most.
The emotional impact of having a supportive community cannot be overstated. You don’t just have physical resources at your disposal; you have people who understand what you’re going through. This empathy can be a powerful healing tool, as I’ve seen friends help each other through rough patches, whether it’s simply listening or stepping in with meals and supplies.
Building this network takes time and effort, but the payoff, especially in emergencies, is worth it. The peace of mind knowing that you’re not alone, that there’s a whole group of folks ready to pitch in, can be immensely comforting. This sense of belonging fosters a resilient community that can withstand crises.
Identifying Key Community Members
Who Can Be Your Lifeline?
Starting to build your support network means thinking about who around you has valuable qualities and resources. Look for individuals who are natural leaders, caregivers, or those with specialized skills, like medical training. In my neighborhood, we have a retired nurse who often organizes health check seminars. It’s amazing how such people can be the backbone of a support system.
Also, consider diverse perspectives. A variety of backgrounds and skills can enrich your support network. I’ve befriended a local engineer, a teacher, and a stay-at-home parent who collectively bring a wealth of knowledge, from logistics to child care, which can all be invaluable in an emergency.
Don’t forget about the quieter members of your community. Sometimes it’s the ones who seem shy or reserved who have amazing skills or resources. I’ve learned that reaching out and encouraging everyone to share their strengths really opens up the network. It makes for a vibrant community ready to support one another!
Creating Communication Channels
Establishing Clear Lines of Communication
In an emergency, having effective communication can make all the difference. I’ve found that using various platforms helps reach everyone. From social media groups to text chains or even a simple community bulletin board, it’s essential to keep everyone in the loop. Often, knowing how to contact someone quickly can save precious time in a crisis.
Make sure to establish a point person or two who can disseminate information effectively. In my experience, working with a couple of volunteers to lead these efforts lightens the load and ensures clarity. Plus, it’s helpful to assign different topics or areas of concern, such as medical needs or food distribution, so that communication remains organized.
And hey, don’t forget the importance of regular check-ins! Even outside of emergencies, keeping the lines of communication open strengthens those bonds. I like to set up casual meet-ups or community potlucks, which not only allow for planning but also just being around each other to create that lasting camaraderie.
Resources and Training for Community Preparedness
Investing in Your Community’s Skills
When I first started focusing on my community’s emergency preparedness, I realized how beneficial training sessions could be. Whether it’s CPR training or disaster response Simulations, knowing what to do in a crisis empowers community members and builds confidence. I organized a few workshops with local experts, and the enthusiasm was contagious!
Offering shared resources, like a first aid kit that everyone knows where to access, is another great way to be prepared. It’s just practical, right? We’ve also looked into creating a list of resources available in our area, whether that’s shelters, clinics, or food banks, so everyone knows where to go when things get tough.
Continuous education is key here. I’ve found that regularly updating your community with new skills can extend beyond formal training. For instance, sharing experiences or lessons learned after an emergency can prepare us better for future situations, creating a growing knowledge base that reinforces our community’s resilience.
Fostering a Sense of Community Spirit
Engaging Everyone in Support Activities
To really have a robust support network, it’s vital that everyone feels included and engaged. I like to promote activities that encourage a sense of belonging, from community service days to fun social events. Creating a shared purpose can make folks feel like they’re part of something larger during both good times and bad.
Encouragement goes a long way! I often share stories from community members who have lent a helping hand, amplifying that positive energy. Recognizing individuals for their efforts builds morale and motivates others to step up. I’ve seen firsthand how a few positive shoutouts can inspire others to engage and contribute their skills to the community.
Lastly, celebrating successes is a major morale booster! After we successfully set up a community response plan, I threw a small neighborhood party. Nothing fancy, but seeing everyone relaxed, smiling, and chatting reminded me why we do this work in the first place. It’s about building and nurturing the connections that make our community strong.
Frequently Asked Questions
1. How can I start building a community support network?
Begin by talking to your neighbors and identifying key individuals in your area. Building relationships and knowing the strengths of those around you is an essential first step!
2. What types of training should community members consider?
Consider first aid and CPR training, disaster response techniques, and even basic resilience workshops. These can equip your members with the skills they need to respond effectively.
3. What are the best methods for communication during emergencies?
Using multiple platforms such as group texts, social media groups, or community forums can be very effective. Designate individuals to manage communication to keep things organized.
4. How can I keep everyone engaged in community activities?
Create a variety of social and service activities, recognizing individual contributions and celebrating successes. This fosters a sense of belonging and encourages ongoing participation.
5. What can be done to maintain connections in non-crisis times?
Regular check-ins, community gatherings, and spontaneous get-togethers help keep those bonds strong. It’s important to maintain those relationships even when there’s no immediate need for support.
by Preparation Call Editorial Team | Jul 30, 2025 | Preparedness
Understanding Off-Grid Communication Needs
Assessing Your Environment
So, the first step I took was really getting a feel for my environment. Living off-grid means you’ve got to know your surroundings. Are there mountains, valleys, or dense forests? These can all impact signal strength and route options for communication. Spend some time observing how different weather conditions affect the area too.
Next, think about where the closest neighbors are and how far apart you’ll be communicating. If it’s just you, go for a longer-range system. But if you have neighbors within a few miles, you might want to stick with something simpler, like walkie-talkies or a local repeater.
Lastly, don’t forget about the flora and fauna! Yes, I mean the trees and animals. Believe it or not, they can obstruct signals, so it’s worth narrow-scaling where you’ll set up your primary communication unit.
Determining Specific Communication Needs
Next up, I dug into exactly what I needed in terms of communication. Are you just trying to send simple messages, or do you need voice calls? Maybe you want something like satellite internet? Knowing what you want to achieve is crucial.
Also, consider your power source. If you’re going solar, you’ll need to take energy usage into account. Some systems require a lot of power, and if you’re relying strictly on solar energy, you don’t want to be running out of juice too quickly.
Lastly, think about what kind of emergencies you might face. Having a backup plan for when things go haywire is a must, so I always recommend having more than one method of communication. Better safe than sorry, right?
Budgeting for Off-Grid Communication
Now, let’s talk dollars. Setting up an off-grid communication system can range from cheap to, well, not so cheap. It’s crucial to set a budget before diving in. What you base that on is personal, but try to avoid impulse buys!
I found it helpful to list out what devices you think you’ll need, and then do a little comparison shopping. There are great deals out there, especially if you keep a keen eye on second-hand markets. Many folks sell gently used equipment after upgrading, so don’t sleep on that!
Ultimately, don’t forget to factor in any ongoing costs. Monthly fees for satellite internet, or replacement batteries for your devices add up over time, so keep that in check to avoid future surprises.
Selecting the Right Communication Equipment
Types of Communication Devices
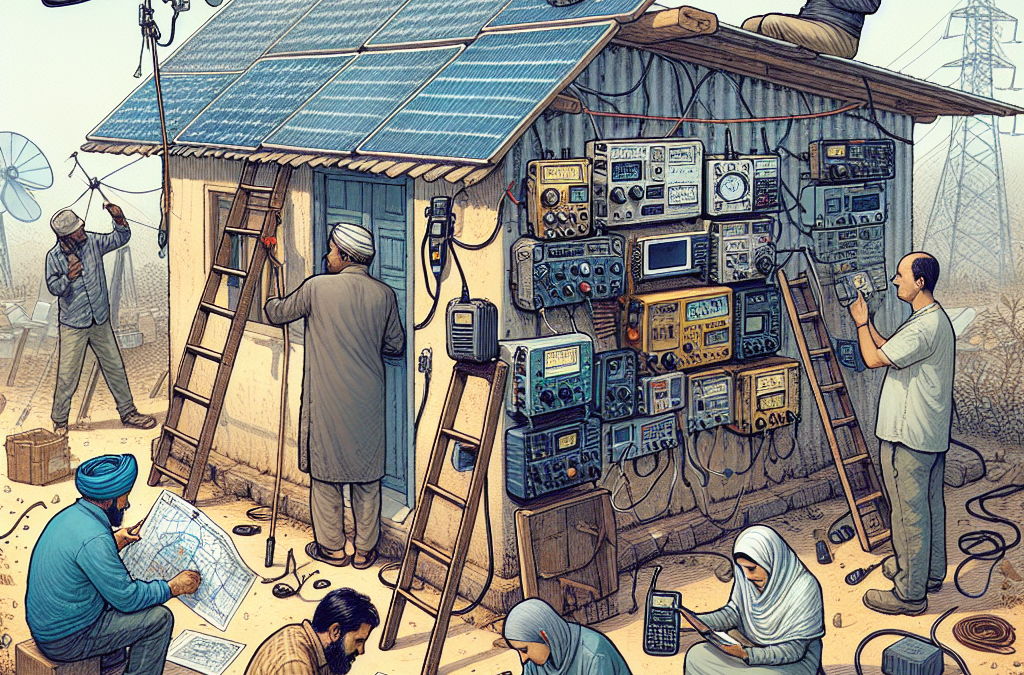
Alright, so let’s break down the options. I personally think a mix of devices is the way to go. You’ve got your walkie-talkies, which are great for short-range communication. Super easy to use and affordable.
If you’re thinking bigger, consider ham radios. They’re more complex but give you far better range and more reliability. Just remember, you might need a license depending on where you are, so check that out first!
Lastly, satellite phones and internet connections are fantastic for when you need to be able to reach out globally. They can be pricey, but when you’re far off the grid, you’ll appreciate the peace of mind that comes with it.
Installation Tips
Setting things up can get a little tricky. Make sure to read the instructions carefully! I can’t stress how much of a headache it is when you skip something. Proper installation is key to ensuring everything runs smoothly.
Test your equipment in different locations around your property. You might find sweet spots that work better than others. I even set up small makeshift stations in a few areas to see which ones jived better with my communication needs.
Don’t be afraid to ask for help! I consulted with some buddies who were a bit more tech-savvy than I am. A second pair of hands can make all the difference, especially with some of the more advanced setups.
Regular Equipment Maintenance
Now that everything’s set, let’s not forget about upkeep. Maintaining your devices is essential. I learned this the hard way when one of my radios started acting funky because I hadn’t charged the battery properly.
Regularly check your equipment for wear and tear. Just like a reliable vehicle, communication tools need love too. Replace batteries and check connections often to ensure everything’s reliable and ready when you need it.
Lastly, don’t ignore software updates if your devices have them. Keeping everything ‘updated’ keeps you in sync with whenever advancements happen, and can sometimes even improve functionality—bonus!
Testing Your Communication System
Conduct Regular Tests
The importance of testing can’t be overstated. I set aside time each month to run drills, practicing different scenarios and making sure everything worked as intended. It’s surprising how many little things can go wrong!
Include everyone in your tests, especially if you’re in a community setup. It’s great for improving your plans and making adjustments when necessary. Plus, it builds teamwork and ensures everyone knows how to use the equipment properly.
Always take notes during these tests. It’s beneficial to recognize patterns and troubleshoot ahead of emergencies rather than during them, you know? I keep a log of lessons learned from each testing period to make tweaks in my setup, ensuring it’s as efficient as possible!
Feedback Loop
Getting feedback from you and anyone else involved is crucial. I made it a habit to gather input after our drills to see what worked and what didn’t. Sometimes, I think I’m on top of things, only to discover that someone else had a troubleshooting problem that I never anticipated.
Encourage open dialogue about how the system is functioning and areas for improvement. Fresh perspectives can lead to innovative solutions that you might not have thought of!
Maintaining that feedback loop consistently leads to a better overall communication setup. It’s like evolving and adapting, ensuring you’ve got the most reliable system possible as your needs change!
Preparing for Emergencies
Lastly, prepare for emergencies. We all know that the unexpected can happen, and off-grid living can sometimes present challenges. So, having protocols in place for communication during emergencies is key.
I always keep flashlights, extra batteries, and backup communication methods handy. Create a plan on how to ensure reachability and who will be the key contacts if you need assistance.
Lastly, practice makes perfect—when the chips are down, you’ll want everyone to know how and when to get in touch with each other, even in a pinch!
FAQ
1. What types of equipment do I need for an off-grid communication system?
You’ll want to check out a combination of walkie-talkies, ham radios for longer-range communication, and potentially satellite phones for more critical needs. The choice depends on your communication goals and surrounding environment.
2. How often should I test my communication system?
I recommend testing your tools at least once a month. Regular drills can help ensure everything is functioning as it should and allow you to adjust if any issues arise.
3. Do I need a license for ham radios?
Yes, in many places, you’ll need a license for ham radios. It’s essential to check your local regulations before getting started!
4. What should I include in my emergency communication plan?
Your emergency plan should include alternative communication methods, status check protocols, and key contacts. Make sure everyone is on the same page to avoid confusion when things go south!
5. How can I maintain my off-grid communication system?
Regular checks and maintenance are crucial. Ensure equipment is charged, replace batteries when needed, and keep an eye on wear and tear. Regularly updating software and testing functionality are also key parts of effective maintenance.

by Preparation Call Editorial Team | Jul 30, 2025 | Preparedness
Community Organizations and Local Groups
Finding Your Local Preparedness Groups
One of the best places to start is by checking out community organizations focused on disaster preparedness. I remember when I first got into this, I stumbled upon a local group that meets monthly. They’re passionate about educating the community on risks and planning ahead. These groups often post their events on community boards, social media, or even websites dedicated to local activities. Getting involved can make a real difference!
Be sure to reach out to local nonprofits. Some are specifically dedicated to disaster preparedness. They often offer training sessions and workshops that not only inform you but allow you to meet like-minded individuals. It’s a perfect way to share experiences and resources. Plus, you get to learn from folks who have dealt with emergencies firsthand.
Sometimes, you can even find volunteer opportunities within these organizations. Taking action not only boosts your skills but also helps you forge stronger connections with others who care about disaster preparation. Trust me, it’s rewarding to be part of something bigger than yourself.
Online Forums and Social Media Groups
Utilizing Social Media for Connections
In this digital age, online forums and social media are gold mines for connecting with others interested in disaster preparedness. Platforms like Facebook and Reddit have numerous groups dedicated to this cause. I’ve made some great connections just by joining a few of these communities and engaging in discussions about best practices and experiences.
Don’t shy away from participating in these conversations! Ask questions, share your own tips, and learn from others. I once posted about an emergency kit I was assembling, and the feedback and suggestions I received were incredible. People love to help, and you’ll find loads of generous folks offering their insights.
Moreover, attending virtual events or webinars hosted by these online communities is another fantastic way to connect. You’ll often find experts sharing their knowledge, and it’s a fantastic opportunity to network with attendees as well. It’s all about being proactive and putting yourself out there.
Workshops and Training Sessions
Enrolling in Local Workshops
Another hands-on way to connect with others is through workshops. Many organizations hold training sessions on various aspects of disaster preparedness, from first aid to emergency planning. When I attended a local workshop that involved creating an emergency plan, I realized how beneficial it was to interact with others in a learning environment.
These workshops not only equip you with valuable skills but also create a sense of camaraderie among participants. You’re all there for the same reason: to be better prepared for the unforeseen. I met several people who have since become friends, and we often exchange ideas on how to improve our preparedness efforts.
Keep an eye out for certifications, too! Some places offer official training that could enhance your personal resume while connecting with others on the same path. It’s both fulfilling and instrumental in building a network of preparedness-minded individuals.
Neighborhood Associations and Community Plans
Engaging with Your Neighbors
Don’t underestimate the power of your immediate surroundings! Neighborhood associations are often key players in disaster preparedness efforts. I started attending my local meetings, which led to discussions on safety and emergency plans tailored specifically to our area. Engaging with your neighbors builds a foundation of trust and mutual support.
It’s a great way to get a pulse on what resources are available in your community. Some neighborhoods even set up brigades for emergencies, which means you’ll know exactly who can help in a crisis. The feeling of knowing that you’re all on the same team is comforting.
Plus, you can collaborate on community-wide drills and create a neighborhood emergency response plan. It’s empowering to feel like you’re not just preparing personally, but building a resilient community. It turns something daunting into a group effort – and that’s pretty special.
Emergency Services and Government Programs
Building Relationships with Local Services
Lastly, connecting with emergency services can be a huge asset. Fire departments, police, and local emergency management offices often offer workshops and resources for the public. I attended a session hosted by our fire department that not only provided valuable information but also allowed me to meet local responders.
These services are not just there when disaster strikes; they want to promote preparedness in the community too! Establishing a connection with them can provide you with additional support and resources that you might not find elsewhere.
Furthermore, local governments often have programs aimed at improving community resilience. Stay updated on what they offer; they might share your interest in having a well-prepared community and provide tools and initiatives that can further enhance your preparation efforts.
FAQs
1. Why is connecting with others important for disaster preparedness?
Connecting with others allows you to share resources, experiences, and tips, making your preparedness efforts more effective. It also creates a support system that can be crucial during emergencies.
2. Where can I find local preparedness groups?
Check community bulletin boards, social media platforms, and local nonprofit organizations. Often, these groups will hold regular meetings and events that anyone can join.
3. How do online forums and social media help in preparing for disasters?
They provide a space for discussion and sharing of best practices. You can connect with experts and peers who can offer insights and advice tailored to your situation.
4. Are workshops really beneficial for disaster preparedness?
Absolutely! Workshops provide you with practical skills and knowledge while also giving you a chance to meet others who are equally invested in being prepared.
5. How can I involve my neighbors in disaster preparedness?
Start by discussing the importance of preparedness in your neighborhood associations or simply through casual conversations. You can organize meetings, share resources, or even practice drills together!

by Preparation Call Editorial Team | Jul 30, 2025 | Preparedness
Understanding the Basics of Rainwater Harvesting
The Importance of Rainwater Collection
Let me tell you, collecting rainwater isn’t just some trendy thing to do; it’s downright essential. First off, we all know water is life, right? So having a backup source can be a lifesaver. Plus, it’s a sustainable way to cut down on your utility bills. Imagine using collected rainwater for your garden or washing your car!
Besides the practicality, think about the environmental impact. By harvesting rainwater, we reduce stormwater runoff, which helps keep our local waterways cleaner. Trust me, this system can make a real difference.
When I first started, I was amazed by how easy it is to harness nature’s water gifts, and it had me feeling like an eco-warrior. It’s fascinating to think that this simple practice can help combat the water crisis we sometimes hear about.
Components of a Rainwater Collection System
Alright, let’s dive into the nuts and bolts. A rainwater harvesting system generally includes a catchment area (like your roof), guttering, a downspout, and a storage tank. It might sound simple, but each piece plays a crucial role. Trust me, getting the right components makes all the difference.
There’s also the filtration system, which is super important to keep your stored water clean and safe for uses like irrigation. Without it, you might end up with all sorts of gunk in your tank, which is definitely not what you want.
Don’t skimp on the quality of materials either. A sturdy tank and reliable filters can save you headaches down the line. I made some mistakes with cheaper materials in my early days, and let me just say, I learned my lesson!
Legal Things to Consider
Before you get all gung-ho and start building your system, check your local regulations. In some places, rainwater harvesting is encouraged, while in others, there might be limits or specific guidelines to follow.
Every municipality is different, and it’s important to comply with any guidelines to avoid fines or complications. I remember when I jumped in without doing my homework and faced a bunch of red tape afterward. Definitely not fun!
Once you know the legal landscape, you can feel good about your project. It’s empowering to contribute positively to the environment while sticking to the rules.
Setting Up Your Rainwater Collection System
Choosing the Right Location
Location, location, location! You’ve gotta pick the right spot for your collection system. Ideally, you want an area that receives ample rainfall and is easy to access. Trust me; you don’t want to be lugging buckets across a muddy yard!
I like to set my tanks close to the house so I can connect them easily to my downspouts. This not only makes things efficient, but it also helps ensure I’m utilizing every drop of rain that falls.
If you have trees or other structures nearby, consider how they affect rainwater flow. I learned the hard way that certain branches can block rain, so keep those in mind when deciding where to place your system.
Installing the System
Now comes the fun part—installation! If you’re a DIY enthusiast like me, you’ll find it pretty satisfying to get your hands dirty. Follow the manufacturer’s guidelines for the specific components you buy, but I can give you a general idea of how it goes. You’ll start by installing your gutters and downspouts to ensure water flows into your collection tank.
Connecting the tank is usually a straightforward process. I remember the first time I hooked mine up; it was exhilarating to see the water start filling up the tank after a rain.
As you’re setting everything up, don’t forget to install a first flush diverter if you can. It helps ensure that the initial dirty water from the roof doesn’t contaminate your storage tank. Trust me; you’ll thank yourself later for it!
Testing Your System
Once everything’s in place, it’s time to test things out! After the next rain, keep an eye on your system and see how it performs. You’re looking for any leaks, blockages, or issues with water flow. The last thing you want is a nasty surprise after all your hard work.
Don’t worry if you find a hiccup here or there. I had my share of troubleshooting too. Use this time to tweak and improve your setup. Sometimes a simple adjustment can make a world of difference.
If all goes well and your system fills up, you’ll want to test the water quality as well. Just to be safe! It can be a bit of work, but it’s a rewarding experience that reassures you your system is running smoothly.
Maintaining Your Rainwater Collection System
Regular Inspections
Maintenance is key to keeping your system functional. Get into the habit of inspecting your gutters and tank regularly. You’d be surprised at how quickly debris can pile up. I usually check mine after significant storms to clear any leaves or dirt that may have accumulated.
Watch for any signs of wear and tear, too. If you spot something that doesn’t look right, nip it in the bud before it escalates. Trust me, catching issues early saves time and money!
Also, keep your filtration system in top shape. This is what keeps your water clean, and it’s easy to forget. Regular cleaning should become part of your routine maintenance.
Cleaning the System
It’s not the most glamorous task, but cleaning your rainwater system is essential. I recommend doing a thorough clean at least once a year. Empty your tank, scrub it down, and make sure there’s no algae build-up.
While you’re at it, I find it helpful to give the gutters a good clean too. Removing any dirt, leaves, and debris helps facilitate better water flow when it rains.
After everything’s cleaned up, refill your tank, and you’ll be surprised at how fresh and invigorating it feels to have clean water stored up and ready to use!
Using Your Collected Rainwater Wisely
Ultimately, it’s all about how you use that collected water. Just because you’ve got it doesn’t mean you can use it for everything! Be mindful of where your rainwater goes. I typically use mine for watering my indoor and outdoor plants, and it works wonders.
Many people also use collected rainwater for flushing toilets or washing their cars—great for saving on the water bill. Just make sure you’re aware of what can and can’t be done with it, depending on local guidelines.
After all this work, it’s quite gratifying to see the positive impact you’re making, both for your home and the environment. You might find yourself falling in love with this eco-friendly practice just as I did!
Frequently Asked Questions
What are the primary components needed for a rainwater collection system?
The basic components include a catchment area like a rooftop, guttering to collect water, downspouts to channel it into a storage tank, and filtration to keep the water clean. It’s crucial that each component is chosen carefully to ensure optimal performance.
How do I know if rainwater harvesting is legal in my area?
Before starting your project, it’s important to check local regulations regarding rainwater harvesting. Laws can vary greatly by location, and some areas encourage it, while others may have restrictions. A quick call or visit to your local government’s water department can save you from potential headaches later on.
How can I maintain my rainwater collection system effectively?
Regular inspections and cleaning are key to maintaining your system. Make it a habit to check your gutters and tank frequently for debris or any signs of damage. Cleaning out your filtration system at least once a year helps ensure you’re collecting clean water.
Can I use collected rainwater for drinking purposes?
Using rainwater for drinking can be done, but it requires proper treatment and filtration to be safe. If you’re considering this, it’s essential to research and implement the necessary purification systems to meet health regulations in your area.
What are some practical uses for collected rainwater in the home?
Collected rainwater can be used for various purposes, such as watering plants, washing vehicles, and flushing toilets. It’s a great resource for irrigation in your garden, helping you save on your overall water bill while giving back to the environment.