by Preparation Call Editorial Team | Jul 30, 2025 | Preparedness
Plan Ahead: Stocking Up on Non-Perishables
Understanding Non-Perishables
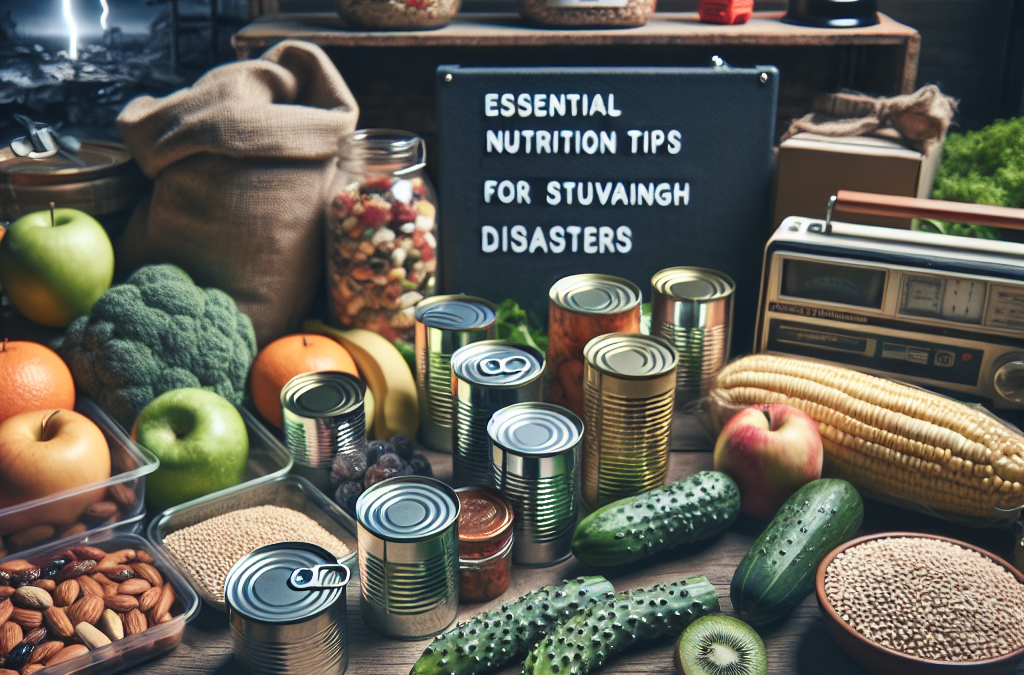
When preparing for potential disasters, the first step is understanding what non-perishables are. These are foods that don’t spoil easily, including canned goods, dried pasta, and rice. They form the core of any emergency supply plan because they can last for months or even years. Believe me, you don’t want to be scrambling to think of meals when the skies are dark.
One thing I always do is check the labels for expiration dates. It’s easy to think that food will last forever, but trust me, even canned beans have a shelf life. I recommend stocking items that have a long shelf life and can be used in multiple recipes. It’s essential to think about versatility here. You want to have meals that can be easily prepared with just a few key items.
Lastly, don’t forget to include some simple snacks. Granola bars, nuts, and trail mixes can help keep spirits high during frustrating times. Remember, food is not just about sustenance; it also serves an emotional purpose. Feeling a little treat can do wonders for morale!
Diversify Your Supplies: Nutrient-Rich Options
Why Nutrient Variety is Important
One of the biggest mistakes people make when preparing for disasters is focusing too heavily on caloric intake and neglecting nutrition. Just because you’ve stocked up on pasta and rice doesn’t mean you’re covered. Variety in your diet leads to a robust immune system, which is vital when things get tough. I learned this the hard way when I had only carbs to live on for weeks; let me tell you, I felt sluggish and out of sorts.
Consider adding canned vegetables, fruits, and legumes to your collection. Not only do these foods provide essential vitamins and minerals, but they also bring some color to your meals, making them more appealing during a time of crisis. I’ve found that even being able to throw some peas into my rice creates a sense of normalcy, which I desperately crave during turbulent times.
Don’t forget about proteins either! Canned meats, beans, and nuts are must-haves. Protein keeps you feeling full for longer, and it’s essential for maintaining energy levels when you’re juggling unexpected events. So mix it up and keep it interesting, even in a disaster situation!
Stay Hydrated: The Importance of Water
Water Storage Basics
It might sound basic, but having enough water is crucial and often overlooked. I can tell you from personal experience that I’ve been caught without sufficient water, and trust me, it’s no fun. A good rule of thumb is to have at least one gallon per person per day for at least three days. That said, you might want to stock even more if space allows. You’d be surprised how quickly it disappears, especially if you’re cooking food!
Besides just drinking water, think about how much you’ll need for cooking and hygiene. I always set aside a few extra gallons to make sure I’m covered on all fronts. Water filtration systems or purification tablets can come in handy too. In emergencies, having the ability to make water safe for drinking can be a game-changer.
Lastly, don’t forget to have a plan for water wastage. It’s easy to go through your supply faster than anticipated. You should always be conscious of how you’re using it and be mindful of conserving as much as possible. Each drop counts in critical times!
Food Safety Measures: Preventing Spoilage
Avoiding Spoiled Goods
Even in disasters, you have to think about food safety. I can’t tell you how many times I’ve thrown out food simply because it wasn’t stored properly. First off, make sure that you’re keeping your non-perishables in dry, cool areas. Heat and moisture can turn even the best canned goods into a nasty surprise.
Rotating your food supplies regularly is also essential. I try to use the first-in, first-out method, which means using older products before newer ones. It not only saves you from waste but also ensures everything you consume is fresh and safe.
Additionally, know how to check for spoilage. Cans with bulging tops, or any packets that feel off, should NOT be consumed. Safety first, always! Emergency times can be stressful enough; the last thing you want is to get sick from bad food.
Emergency Meal Prep: Easy Recipes on the Fly
Quick Cooking Ideas
Okay, so let’s talk about actually making meals when the time comes. I like to have a few go-to recipes in my back pocket that only require minimal ingredients. Think of meals that can be thrown together quickly without losing flavor. A personal favorite of mine is a simple one-pot chili made with canned beans, tomatoes, and some spices. It fills you up and tastes great!
Also, don’t ignore the power of simple stir-fry. Toss a can of mixed vegetables, some protein, and soy sauce together, and you’ve got yourself a meal! You can cook it over whatever heat source you have available. These meals are comforting, familiar, and help to ground you when everything else feels a bit chaotic.
And here’s a little secret—don’t be afraid to get creative! Sometimes, it can be a good stress reliever to play master chef with whatever you have. Look at it as an opportunity to experiment with different combinations; who knows, you might discover a new favorite meal in the process!
FAQs
What should I prioritize when stocking up for a disaster?
Focus on non-perishable foods that have a long shelf life, and make sure to include a variety of nutrients—think protein, vitamins, and healthy fats.
How can I ensure my water supply lasts?
Store at least one gallon per person per day, and consider having a water filtration system or purification tablets to make your water last longer.
How do I know if my food is still safe to eat?
Always check for any signs of spoilage. Cans with bulging tops or dents shouldn’t be consumed, and always trust your senses—if it smells off, toss it!
Can I still prepare tasty meals with limited supplies?
Absolutely! Keep a few simple, versatile recipes in mind, and don’t hesitate to get creative with what you have. It’s all about improvisation!
What can I do to keep my spirits up during tough times?
Maintaining a positive outlook, experimenting with cooking, and enjoying some comfort foods can help keep morale high during stressful situations. Remember, it’s not just about the food—it’s the experience!
by Preparation Call Editorial Team | Jul 30, 2025 | Preparedness
1. Assessing Your Home’s Vulnerabilities
Understanding Common Weak Points
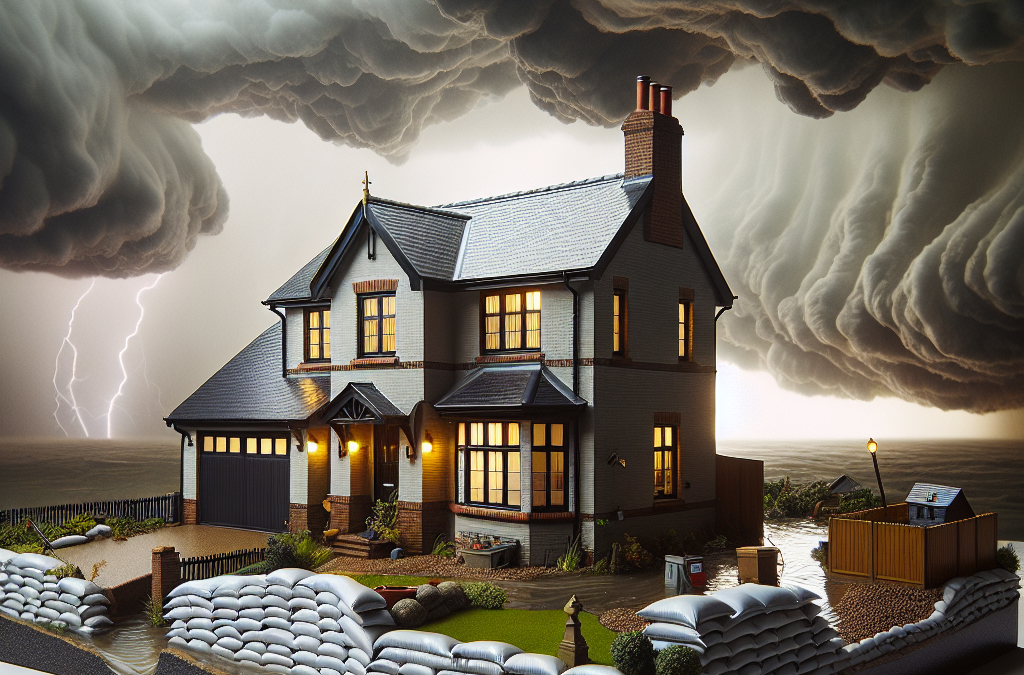
When I first started thinking about storm protection, I quickly realized that my home wasn’t impervious to nature’s fury. Common weak points often include roofs, windows, and doors. These areas are usually the first to show signs of wear and can be severely affected during severe weather.
Furthermore, the materials used in construction can influence how resilient your home is to storms. For example, older homes with traditional single-pane windows are much less effective at resisting high winds and debris than modern double-glazed windows.
Taking the time to assess these vulnerabilities not only prepares you for the worst but also gives you peace of mind knowing that you’ve identified where your home needs help.
Conducting a Structural Inspection
My structural inspection kicked off with a thorough walk-around of my property. I looked closely at gutters, downspouts, and the overall exterior. Loose shingles? A cracked window? These details matter! I recommend making a checklist to ensure you don’t miss anything important.
If you’re not sure what to look for, you might want to consult a professional. Having someone trained in storm readiness can help pinpoint weaknesses that I might overlook while doing a simple check-up.
Once you have that list, you can prioritize repairs and upgrades. It’s like a map showing the way to a safer, storm-proof home!
Reviewing Local Weather Patterns
Knowing your enemy is half the battle, right? That’s why I took some time to dive into my area’s weather patterns. Does your region get heavy snow or intense hurricanes? Each storm has different implications for your house.
I started by checking historical weather data and trends; local weather stations often provide insights on the frequency and severity of storms. This information is crucial since it guides the preparation efforts you need to undertake.
Understanding what kinds of storms are most likely helps me decide where to invest more energy and resources in my home’s protection strategy. Ideally, learning about these patterns early can save you time and money later!
2. Strengthening Structural Elements
Reinforcing the Roof
Your roof is your first line of defense against storm damage. After my initial assessment, I realized that my shingles were aging quickly. Investing in a new roof or upgrading to impact-resistant materials can literally save your home from being exposed during storms.
Make sure to check not only the shingles but the underside too. Water damage can often hide under rotting boards. While doing my inspection, I found a few issues that needed immediate attention and prevented them from snowballing into bigger problems.
The great thing about a robust roof is that it enhances your home’s value while offering security. It’s a win-win situation!
Reinforcing Windows and Doors
Next up were my windows and doors. I didn’t realize how much they could be a vulnerability until I learned about storm shutters. Installation was surprisingly straightforward, and they can withstand high winds and debris.
If shutters aren’t in your budget, even applying a film to your windows can help them resist shattering. I felt much more secure knowing I had taken some practical measures to protect those glass panels!
As for doors, check your frames! Reinforcing door frames makes them much less susceptible to being kicked in by storm winds. It might seem trivial, but every little bit helps!
Strengthening the Foundation
Now, let’s not forget about the foundation! I realized that a solid foundation prevents flood damage, which is super important. A thorough inspection revealed some cracks and gaps that could let water seep in during storms.
To seal these gaps, I used specific waterproof compounds that have worked wonders for me. Keeping your foundation in tip-top shape ensures that water has nowhere to go but away from your home.
Moreover, grading the landscape around your property can help minimize flood risks. Ensuring the ground slopes away from your house has been one of my best decisions!
3. Outdoor Preparations
Landscaping and Trees
A tidy yard doesn’t just look good; it also keeps your home protected! I took a good look at my landscape and realized that some tree branches were closer to my roof than I’d like. Trimming back those branches protects against falling limbs during heavy winds.
Additionally, opting for wind-resistant plants and shrubs helps to create a natural barrier against strong gusts. I’ve read that dense foliage can act as a shield for your home!
Cleaning up any debris and securing patio furniture can also prevent wind from tossing them around, potentially causing damage. Preparation goes a long way here—don’t wait for the storm to get ready!
Drainage Systems
Good drainage is key to avoiding water damage during storms. I had to install downspouts that directed water away from my foundation. Make sure your gutters are clean and functioning. Clogged gutters can lead to valleys of water collecting around your home!
French drains are another great tool to consider. They help channel water away from your yard and can help prevent basement flooding, which I found invaluable during intense storms last year.
Also, consider the grading of your lot. Ensuring proper slope can help minimize pooling and prevent damage down the line. I’ve found that maintaining proper drainage offers peace of mind in storm season!
Preparing an Emergency Kit
One of the things I learned is that being ready for a storm goes beyond physical home protection; it also involves preparing an emergency kit. I made sure to stock up on essentials like bottled water, non-perishable food, batteries, and a first-aid kit.
Having these items available can make a huge difference if you’re stuck at home or lose power. I even made sure to include copies of important documents like insurance papers. It’s better to be safe than sorry!
Lastly, don’t forget about communication. I ensured my phone was charged, and I had a portable charger on hand. Communications are vital during a storm, and I know how isolating it can feel without them.
4. Insurance Coverage Review
Understanding Your Policy
This is super important! I went through my homeowner’s insurance policy with a magnifying glass. I needed to understand what exactly was covered in case of storm damage. Some policies may not cover certain types of water damage, so double-checking is key.
I found that discussing my coverage with my insurance agent revealed some potential gaps. They also helped clarify any uncertainties I had about deductibles or coverage limits.
Making sure my policy was up to date gave me this shield of comfort knowing that I’m doing my due diligence!
Documenting Your Home’s Condition
To solidify my insurance claims process if the worst should happen, I took a video tour of my home. As weird as it feels, having an inventory of my possessions, along with their condition, creates seamless documentation should I need to file a claim.
Let me tell you, it saved me a ton of hassle when I had to use it following a particularly intense storm. Recording additional images of costly items gives me peace of mind!
Plus, if you ever make renovations, capturing those updates makes everything easier and quicker for your insurer later on.
Reviewing Flood Coverage
In my home insurance analysis, flood coverage caught my eye. Most standard homeowner’s insurance doesn’t cover flood damage, which is a serious issue if you live in a susceptible area.
After a conversation with my agent, I decided to invest in additional flood insurance. It’s good to remember that even if you’re not in a flood zone, you can still be affected. Being proactive in this way has provided incredible peace of mind!
If you’re in a similar situation, don’t think twice about giving your insurer a call for guidance. A little knowledge can go a long way!
5. Building a Community Plan
Connecting with Neighbors
No man (or woman) is an island, right? When I prepared for storm season, I found that building connections with my neighbors makes a world of difference. We established a small neighborhood group that shares information on storm prep, which I’ve found immensely helpful!
Having a buddy system for check-ins during storms can alleviate some fear. Just knowing someone will look after each other makes facing dire weather much less daunting. It’s about building a support network!
We’ve even had meetings to discuss sharing resources, which is a great way to exchange supplies and knowledge. Collaboration can make all the difference during storm season!
Developing an Evacuation Plan
Part of being prepared is planning an escape route when things get dicey. I talked with my neighbors about potential evacuation routes and gathering points in case we need to leave quickly. Knowing where the nearest shelters are was also a vital piece of the puzzle.
Having a plan ensures that chaos doesn’t reign when a storm arrives. We even discussed how we would communicate in case of evacuations, whether it’s using social apps or group texts. It made me feel so much better just having a safety net!
Make sure to involve everyone, including kids—having a well-thought-out plan gives all involved, young and old alike, confidence during emergencies.
Sharing Information and Resources
Lastly, we agreed to keep each other posted about storm forecasts and help one another with preparation tasks. For example, if someone struggles to secure their patio furniture, they know they can call for help.
We also decided to share our emergency kits. If someone has an extra flashlight or batteries they can lend out, it can elevate others’ preparedness levels significantly!
Being united as a community not only strengthens individual readiness but also creates that comforting feeling of safety and support. It’s amazing what collective effort can accomplish!
FAQ
1. What should I particularly look for when assessing vulnerabilities in my home?
Look for loose shingles, cracked windows, and old doors, as these are often the most susceptible to storm damage. Checking these areas can help you make necessary improvements before a storm hits.
2. Do I really need to reinforce my windows and doors?
Yes! Reinforcing windows and doors can prevent shattering during high winds. Installing storm shutters or applying protective film can also add an extra layer of safety.
3. How can I ensure my home’s drainage system is effective?
Make sure gutters are clean and working well. Installing downspouts that direct water away from your home and considering French drains can significantly improve your drainage system.
4. Is flood insurance necessary even if I don’t live in a flood zone?
Yes! Many areas not considered flood zones can still experience flooding. It’s a good idea to discuss flood insurance with your agent to make sure you’re covered.
5. Why is it beneficial to create a community plan for storms?
Building a community plan enhances support among neighbors, making it easier to share resources, check on each other during storms, and develop evacuation strategies together.

by Preparation Call Editorial Team | Jul 30, 2025 | Preparedness
Planning Your Adventure
Choosing the Right Location
When planning a wilderness trip, you’ve got to think carefully about location. I personally recommend selecting a spot that suits your skill level. For beginners, a nearby forest or a national park with clear marked trails is perfect. As you get more comfortable, venturing into more rugged terrain becomes exciting. Just remember to scout out potential hazards in the area, like wild animals or unstable weather conditions.
Also, consider the season you’re heading out. Each time of year brings unique challenges and rewards. For example, springtime might feature blooming beauty but also unpredictable rain. On the flip side, winter hikes can be breathtaking with that pristine snow, but they demand more careful planning. Check weather forecasts and prepare accordingly—it can make or break your adventure.
Don’t forget to inform someone about where you’ll be. Whether it’s a friend or family member, having someone know your whereabouts can add an extra layer of safety, just in case things go sideways. Trust me, that little bit of precaution can give you peace of mind while you’re out enjoying the wild.
Essential Gear and Supplies
Your Packing List
So, let’s chat about gear. The essentials can vary widely depending on your destination and duration of stay. Generally, I always pack a sturdy backpack, a reliable water filter, and a first-aid kit. Trust me, you don’t want to be stuck with no way to purify your water, nor do you want an injury to turn into an ordeal.
Along with safety gear, having extra layers of clothing is key. There’s nothing worse than getting soaked or too cold because you didn’t plan for changing weather. I often bring a lightweight rain jacket and a warm layer, just in case. You can always take off layers, but being underdressed can lead to serious risks out there!
And let’s not forget about food. Pack snacks that provide quick energy, like nuts or energy bars. In a survival situation, having food that can give you sustenance without needing an elaborate setup is crucial. Remember to keep your food stored safely, too; those curious animals will be on the lookout for any opportunity!
Fire Making Skills
Different Methods to Start a Fire
Fire can seem daunting to start in the wild, but it’s so important. I love practicing various methods at home first, like using matches, lighters, and even fire starters like cotton balls soaked in petroleum jelly. Each method has its strengths. Matches are reliable, but lighter can be easier to manage.
Then, there are traditional methods like the bow drill—definitely a skill worth practicing. It may take practice, but when you In closing get that ember, it’s incredibly rewarding. Even being in the wilderness brings back memories of my first successful fire! Nothing beats that warm glow after a long day of hiking.
Remember to gather tinder, kindling, and fuel wood before you start. Dry leaves, small twigs, and even bark work wonders for tinder. I often find that preparing your fire site, making a little teepee structure, helps keep the flames going strong once you get it lit. And always practice fire safety: have water at hand, and never leave a fire unattended.
Water Sourcing and Purification
Finding Clean Water
Water is another survival essential that can sometimes be overlooked. I’ve experienced firsthand how vital it is to have a reliable water source. Streams and rivers are typically your best bet, but you need to assess the water quality. Getting too close to human activity can lead to contamination, so it’s best to source your water upstream.
If you can’t find running water, rainwater collection can be a lifesaver. Using tarps or clean containers, I’ve gathered water during storms, and it doesn’t get much fresher. But always remember, collecting rainwater requires some foresight and having the right gear ready.
Never drink untreated water straight from nature without purifying it first! I carry a portable water filter wherever I go. Boiling is also a reliable method; if you can get a fire going, that’s a surefire way to kill off harmful bacteria. Just be mindful of how much fuel you use for boiling—make it count!
Navigation and First Aid
Reading Maps and Compasses
When wandering in the wilderness, knowing how to navigate is crucial. I remember my first trip without a map—I felt adventurous until I realized I was completely turned around. It’s important to familiarize yourself with reading topographical maps and using a compass, as they can prevent you from getting lost or worse.
Always practice your skills beforehand. Using landmarks along with your compass gives you confidence in your ability to find your way. A good tip is to locate several reference points on your map before heading out. This way, you’ll be able to tell how far you’ve walked and determine your location more easily.
In addition to navigation, being prepared with first-aid knowledge can save lives. Knowing how to treat common injuries like sprains or cuts helps keep spirits high on a trip. I’ve taken courses myself, which made me feel much more secure about what to do if something goes wrong. Plus, having a first-aid kit stocked and accessible is essential!
Conclusion
Wilderness survival is all about being prepared and knowing the skills to handle different situations. The more you know, the more confident you’ll feel heading out into the wild. Always remember, practice makes perfect, and learning from each trip only adds to your expertise.
FAQ
What should I pack for a day trip into the wilderness?
An ideal packing list includes water, snacks, a first-aid kit, a knife, a fire starter, and appropriate clothing. Always ensure you have essentials handy to keep safe and comfortable.
How do I start a fire without matches or a lighter?
Using methods like the bow drill or fire steel can help you start a fire without traditional means. It requires practice, so give it a go before you’re in a survival situation!
Where can I find clean drinking water in the wild?
Look for streams or rivers, ideally upstream from any human activity. Rainwater collection can also provide fresh water. Always remember to purify any water before drinking.
What are the best navigation tools for wilderness survival?
A good quality map and compass are essential. It’s also beneficial to have GPS devices, but always have a backup in case batteries die or you lose service.
How can I improve my first-aid skills for wilderness trips?
Taking certified first-aid courses is the best way. They provide hands-on experience, which is invaluable. Additionally, reading books or guides on wilderness first aid can be helpful.

by Preparation Call Editorial Team | Jul 30, 2025 | Preparedness
Assess Your Home’s Vulnerabilities
Identify Weak Points
In my experience, the first step to safeguarding your home involves taking a close look at its vulnerabilities. Think about the windows that don’t quite lock all the way or the back door that’s seen better days. Walk around your property and jot down anything that feels insecure. A solid game plan starts with knowing what needs to be addressed.
Make a mental note (or write it down, you know what works for you) of areas around your home that might be hidden from view, like the side gate. These spots are prime for opportunistic looters who might think they’re hiding from plain sight. Being aware of your home’s layout is crucial.
Once you’ve pinpointed potential weak spots, it’s time to brainstorm ways to strengthen them. Whether it’s reinforcing a door or improving outdoor lighting, each little step counts and makes your home a harder target.
Consider Your Neighborhood
The environment around your home plays a big role in security. Chat with your neighbors; trusting relationships among those living close to you can create a natural security network. I’ve found that simple conversations can lead to group strategies that involve shared watchfulness, especially during uncertain times.
Pay attention to any upcoming events or issues in the neighborhood that could affect security. Community meetings are a great way to stay updated and share tips for keeping each other safe. I remember a time when our neighborhood banded together over a rumor of increased break-ins; it made a significant difference.
Be aware of your surroundings, too. If something seems off, trust your instincts. Making notes about unusual activity can help you communicate concerns even if they’re shared with local authorities or neighbors.
Enhance Overall Security
Beyond just locking doors and windows, there’s a wide range of measures I’ve implemented that heighten home security. Installing smart locks or an advanced security system has given my family more peace of mind. I mean, knowing that I can monitor my home from wherever I am really reduces anxiety. Plus, you can set it up so that it alerts you to any unusual activity.
Surveillance cameras have also been a game changer for me. Having eyes on the perimeter of your property not only catches potential threats but also deters them. I’ve noticed that just having visible cameras puts people on notice. It’s like an unspoken warning that your home is not an easy target.
Lastly, I can’t stress enough the importance of regular maintenance checks. Ensure that alarms, cameras, and locks are in good working order. Setting a calendar reminder to do this every few months can mean the difference between safety and an unfortunate event.
Create a Safety Plan
Develop Family Communication Strategies
Whenever a crisis pops up, having a solid plan is vital. I usually set up a comprehensive communication strategy with my family. This entails everyone knowing how to reach each other during emergencies. Trust me, nothing can replace the peace of knowing your loved ones are safe and accounted for.
In addition to that, establish a meetup point outside your home where everyone can regroup if the situation escalates. During a tough situation, sticking to the plan becomes crucial—everyone remains calm, and decisions can be made without panic.
Regularly discuss and practice your safety plan. It may seem redundant, but practicing drill scenarios makes everyone feel more prepared and can save lives if push comes to shove. I’ve learned firsthand that repetition really cements knowledge.
Emergency Supplies Preparedness
When the going gets tough, being prepared with emergency supplies can truly be a lifesaver. From basic stuff like food and water to medical kits, I took the time to put together comprehensive kits that my family can easily access during a crisis. Keeping an eye on expiration dates is crucial; no one wants to rely on expired supplies.
Besides food and water, consider including items such as flashlights, batteries, and even a portable phone charger. During my own experiences, I found that a reliable power source can make navigating through dark times much easier.
Lastly, it doesn’t hurt to have copies of important documents stored in a safe place at home, or even better, in a digital format. This can include insurance documents, identification, and property titles. It may seem trivial, but having easy access to these details can be the difference in recovery efforts.
Know Local Emergency Services
I can’t stress this enough: knowing your local emergency services can create a crucial lifeline during crises. Familiarize yourself with local police, fire stations, and emergency numbers—not just for your own sake, but for everyone around you. It’s always useful to have this information easily accessible.
I also recommend building relationships with local law enforcement. Previously, I attended community events where officers interacted with residents, which helped me learn their approach in emergencies. Having a rapport can lead to quicker response times when seconds matter.
Ultimately, don’t hesitate to reach out to these services during emergencies. They’re there to help, and many times, they can provide immediate advice on securing your home during a crisis. A little bit of knowledge can go a long way in ensuring your home’s safety.
Secure Your Home Before Crisis Strikes
Install Effective Locks and Reinforcements
Once I started thinking more seriously about home security, investing in sturdy locks became my first move. Simple deadbolts provide a good level of security. But consider upgrading to smart locks; they offer more flexibility, especially when you’re away and want to control access remotely.
I also noticed reinforced doors and windows can deter break-ins significantly. Installing window security film makes panes harder to break through, which delays any potential looters. It’s like an extra layer of armor for your home.
The improvements don’t stop at the doors and windows. Secure sliding doors with rod-style locks or have them fitted with extra locks for good measure. It’s the little things that stack up and create an incredibly protective environment for your family.
Landscape for Security
Surprisingly, how you landscape your yard can have a significant impact on home security. From my experience, maintaining low shrubbery and sparse trees around your home creates a clear line of sight for neighbors and security cameras. Thieves prefer to hide in overgrown areas, so keeping your yard tidy can help dissuade them.
If you can, consider planting thorny bushes near windows and entry points. Not only do they add a natural deterrent, but they also maintain your home’s aesthetic appeal without making it feel like a fortress. I’ve always found that balance between security and a welcoming home is essential.
Lastly, good lighting plays a critical role. Plenty of outdoor lights, especially motion-sensor ones, can disorient unwanted visitors. When landscaping, make sure you’re not blocking those lights with high hedges or trees.
Join or Form a Neighborhood Watch
If there’s one thing I’ve learned, it’s the power of a community. Joining a neighborhood watch is one of the best ways to improve the security of your area. When more people keep an eye out for peculiar activity, it creates a sense of collective responsibility for safety.
Add regular community meetings or just simple get-togethers where you can talk about concerns or observations you’ve made in the area. I’ve found that knowing who lives near you and having shared strategies makes us all feel more secure.
Moreover, consider creating a communication platform with your neighbors. Whether it’s a group chat or an email list, staying in the loop can be the key to acting quickly when issues arise.
Maintain a Low Profile
Control Visibility of Valuables
When it comes to home security, I always remind myself less is more. Avoid making it obvious that you have valuable items at home. That huge flat-screen TV in the living room? Maybe consider minimizing the drapes or curtains so they don’t scream “look at me!” when you’re not at home.
It helps to think about what you throw in the trash, too. Packaging from expensive gadgets is often a giveaway to potential thieves. Instead, find ways to disguise those items when you dispose of them. Keeping a low profile can be one of the heaviest hitters in security.
Also, think about your online presence. While social media is great for sharing life highlights, posting photos or statuses about your latest purchases or vacations can inadvertently advertise your valuables to the wrong audience. I know it’s tempting, but exercising a bit of caution is always wise.
Use Smart Technology Wisely
In a world where technology is king, I’ve found integrating smart devices into home security is a game changer. From smart cameras to home automation systems, there are plenty of options available to enhance your home security. These devices keep me connected to my home no matter where I am.
For instance, smart doorbells with cameras allow you to see who’s at your door without ever leaving the couch. Pair that with remote locking and unlocking features, and it almost feels like you’re there, even when you aren’t. That capability is priceless when it comes to security.
However, remember to use smart technology wisely. Ensure you’ve secured your Wi-Fi network, as overly connected devices can introduce vulnerabilities if not protected. Investing in cybersecurity measures is just as important as physical security for today’s homes.
Practice Everyday Vigilance
I’ve learned that security is an ongoing commitment. I make it a point to lock doors and windows, even when I’m home, to keep those habits firm. It’s easy to slip into a routine, but staying vigilant is vital, especially during uncertain times.
Keep an eye on your neighborhood, looking out for anything odd or out-of-place. I often encourage my friends to take note of their surroundings while walking or driving. A little awareness can go a long way in prevention.
Lastly, trust your gut feelings. If something feels off, don’t hesitate to reach out for help, whether that’s calling local authorities or just asking a neighbor for heightened vigilance. It’s in these simple actions that we cultivate a safer community.
FAQs
1. How can I identify vulnerabilities in my home?
You can identify vulnerabilities by walking around your home and examining all entry points—doors, windows, garages, and sheds. Look for wear and tear, and consider areas that aren’t visible to passersby, as these can be attractive to thieves.
2. What should be included in an emergency supply kit?
Your emergency supply kit should include non-perishable food, bottled water, a medical kit, batteries, flashlights, and a portable charger. It’s also wise to have sanitation supplies and essential documents on hand.
3. Is it worth installing a home security system?
Absolutely, a home security system can be a strong deterrent against crime and provides peace of mind. Look for options that allow remote monitoring and response features for added security when you’re away.
4. How can landscaping help with my home security?
Good landscaping reduces hiding spaces for criminals and enhances visibility around your home. Keeping shrubs low and well-trimmed helps neighbors and passersby keep an eye on potential threats.
5. What role does the community play in home security?
The community plays a significant role in home security through shared vigilance. Neighborhood watch programs or simple connections with neighbors create a network that can monitor and respond to suspicious activities effectively.

by Preparation Call Editorial Team | Jul 30, 2025 | Preparedness
1. Assess Your Property
Check Your Roof and Gutters
First off, I can’t stress enough how important it is to check your roof. You’d be surprised by how many people ignore this until it’s too late. I like to climb up there myself—safely, of course—and look for any missing shingles or damage. A sound roof is your first line of defense against rain and wind. If I see anything suspicious, I’ll usually call in a pro to handle it.
Gutters are equally crucial. They direct water away from your property. I make it a point to clean my gutters regularly to avoid any blockages that could lead to overflow during a storm. Trust me, a clogged gutter can cause some serious water damage!
And while you’re at it, make sure that downspouts direct water at least 5-10 feet away from your foundation. I use extensions to help with this. It’s all about keeping the water where it won’t do harm!
Evaluate Windows and Doors
Next on my list are the windows and doors. If they’re old and drafty, it’s time for an upgrade. I’ve made the switch to double-paned windows, and let me tell you, it has made a world of difference. Not only do they provide better insulation during winter, but they’re also tougher against strong winds.
Don’t forget about sealing any gaps! A quick run of caulk can do wonders. I also like to invest in storm doors as an additional layer of protection. It might seem like a small thing, but it makes me feel safer during those crazy storms.
Lastly, consider the idea of impact-resistant glass if you’re in a high-risk area. It’s a bit of an investment, but it pays off when the weather gets rough! I’ve actually become quite the afficionado in storm-proofing after going through a few nasty hurricanes.
Landscape Wisely
Believe it or not, your landscaping plays a pretty big role in your home’s preparedness for extreme weather. I’ve made a habit of trimming back any trees that seem a little too close for comfort. Overhanging branches can become deadly projectiles if things get nasty.
It’s also a good idea to plant things that are resilient to harsh conditions. I prefer native plants that can withstand heavy rains or droughts without requiring too much fuss. Plus, they look great too! Round it off by creating some good drainage around your garden beds to avoid any flooding issues.
One more thing—make sure to check the slope of your yard. Ideally, it should slope away from your house to direct any runoff further down. Working on my yard has definitely given me peace of mind during storms.
2. Reinforce Structural Integrity
Invest in Storm Shutters
When I first moved into my house, I didn’t think much of storm shutters. But after a few intense weather events, I realized these bad boys are a game-changer! They protect windows from flying debris and can be a real lifesaver.
I’ve opted for accordion-style shutters because they’re easy to use and don’t stick out like a sore thumb when closed. Plus, they’re pretty durable. You know I love anything that requires minimal upkeep!
If storm shutters are a no-go for you, consider plywood as a backup plan. Just measure your windows, get the right thickness, and store them for emergencies. Just don’t wait until the last minute to put them up!
Secure Your Garage and Outdoor Items
Speaking of outdoor items, I’ve learned the hard way that securing everything outside is a must. Anything loose or movable is a potential projectile during high winds. I make it a point to bring in patio furniture and store my garden tools in a secured shed or garage.
If you have a garage, make sure it’s properly secured. A strong wind can easily shove open a weak door. I’ve added an extra padlock for peace of mind, and I also keep it organized. It sounds ridiculous, but a clutter-free garage makes it easier to grab essentials when you need them.
Consider anchoring large outdoor structures like sheds or gazebos as well. I’ve seen them get tossed around like they’re nothing during a storm. You can use tie-down straps or even concrete blocks to keep them in place!
Consider Flood Insurance
This next one isn’t about physical preparation but financial. Flood insurance is something I always recommend to friends in at-risk areas. Regular homeowners’ insurance often doesn’t cover flood damage, so it’s worth checking into.
Make sure you understand what’s covered and what’s not. I found it helpful to have a chat with my insurance agent to clarify any doubts. It’s better to be safe than sorry, right?
And remember, getting coverage before you need it is key. Most policies have a waiting period, so don’t wait until a storm is on the horizon. You don’t want to be caught without a safety net when you need it the most!
3. Prepare an Emergency Kit
Essential Supplies
This might sound a bit cliché, but an army marches on its stomach! I make sure my emergency kit is stocked with all the essentials: water, non-perishable food, a first aid kit, and any necessary medications. I like to keep enough supplies to last at least a week, just in case.
Don’t forget about a flashlight and extra batteries. I can’t tell you how many times I’ve been caught without light during a blackout, and trust me, it’s not fun! A portable charger for my phone is also on my must-have list.
To wrap up, remember to rotate those supplies every six months. I’ve made it a routine to check my kit when I change the clocks for daylight saving time, ensuring everything is fresh and usable.
Communication Plan
Part of being prepared is having a communication plan in place. I always make sure my family knows how to reach each other in case of separation during an emergency. You never know when a storm might hit and potentially disrupt cell service.
We’ve also established a meeting spot outside of town, just in case things get really chaotic. It gives each of us peace of mind knowing we have a plan. I recommend keeping written lists since not everyone is glued to their smartphones—especially in a crisis.
Don’t forget to update your contacts with emergency numbers and local disaster services. I keep a hard copy tucked in my emergency kit for easy access.
Have a Plan for Pets
For those of us with furry family members, don’t forget about them when you’re prepping your emergency kit. I always include pet food, medications, and copies of their medical records. I won’t lie, the thought of leaving my doggo behind during an emergency is enough to keep me up at night!
Make sure you have a leash and carrier ready to go. In instances of evacuations, having a safe way to transport your pets is vital. I encourage folks to practice loading their pets up so they get used to the hustle.
And don’t forget to keep identification on your pets—collars with tags and microchips. God forbid they get lost in the chaos.
4. Stay Informed and Connected
Weather Alerts and Apps
In my experience, knowledge is power when it comes to extreme weather. I can’t tell you how many times a simple weather alert saved me from being caught off-guard! I’ve loaded multiple weather apps on my phone to stay updated real-time, especially during storm season.
Local news stations are also a go-to resource. I make it a habit to check in regularly for updates and warnings. It’s comforting to have reliable information and know what to expect in case a storm is approaching.
Another tip is to set alerts for your nearby areas, not just your own. Sometimes storms can shift quite unexpectedly, so having a wider safety net helps in the long run!
Community Resources
Sometimes our communities are the best resource for information. I often connect with my neighbors to stay in the loop about local preparedness activities or shelters. It’s like having your own little support system!
Many towns have emergency management services that provide updates regarding road closures or community shelters. I make sure to follow those channels to stay informed.
If you get a chance, consider joining local preparedness groups. They often hold events and encourage hands-on learning about how to stay safe. Plus, you meet some pretty awesome people!
Emergency Services Information
To wrap up, knowing how to contact your local emergency services is key. I keep a list of numbers handy, including the fire department, police, and medical services. I’ve clearly labeled this and placed it in my emergency kit and on the fridge.
In addition, familiarize yourself with local evacuation routes. In case you need to leave quickly, knowing the best way out can save you precious time. I even plotted mine out and practiced driving them during clear days.
And remember, staying calm during a storm can make all the difference. The last thing you want is to panic and make rash decisions!
5. Create a Financial Plan
Emergency Fund
Now, knock on wood, but one thing I always recommend is having an emergency fund. You don’t want to be scrambling to cover unexpected costs like repairs or temporary housing. I aim to set aside about three to six months’ worth of expenses, which provides me with some serious peace of mind.
Having this cash reserve makes it easier to bounce back after a disaster. I like to have a mix of savings accounts and cash easily accessible in case the power is out for a while. You never know how long services might be disrupted!
Keeping track of these expenses in a budgeting app not only helps during crises but also teaches good financial habits overall!
Document Important Information
Speaking of finances, I’ve learned the hard way that documenting important information is key. I keep scanned copies of necessary documents—like insurance policies, personal IDs, and property deeds—both on my computer and securely in my kit. You never know when you might need these!
Having all your information in one place saves time and stress when you’re dealing with an emergency. Plus, it helps to speed up claims later, should you need to file one.
Keeping these files up-to-date is necessary, too. I recommend reviewing everything annually, especially if you’ve made any changes to your home or policies.
Insurance Review
To wrap up, take some time to review your insurance policies. I do this every year to ensure I’m adequately covered for whatever Mother Nature throws my way. Sometimes, life changes, and what was sufficient coverage might not be enough anymore.
I encourage folks to compare different providers or seek advice from an insurance broker who can provide tailored coverage options. It’s like doing a yearly check-up for your home—so important!
Ultimately, being financially prepared adds to your overall safety net when the weather gets rough.
Frequently Asked Questions
1. What is the most important step in preparing for extreme weather?
Assessing your property is crucial. Make sure your roof, gutters, windows, and doors are all in good condition and secured properly.
2. How can I make sure my home doesn’t flood?
Invest in proper drainage systems, landscape wisely to direct water away, and consider flood insurance for additional peace of mind.
3. What should I have in my emergency kit?
Your kit should include essentials like water, food, first-aid supplies, flashlights, batteries, and any medications you may need.
4. How often should I update my emergency plan?
I recommend reviewing your emergency plan at least once a year or whenever there are significant changes in your household or community.
5. Is flood insurance really necessary?
Yes! Many homeowners’ policies don’t cover flood damage, so having separate flood insurance can protect you financially if a disaster strikes.

by Preparation Call Editorial Team | Jul 30, 2025 | Preparedness
Unlock the secrets to natural health with our Apple Cider Vinegar Tonic, a powerful blend of lemon, ginger, and raw honey, designed to fight inflammation and boost your immune system. This easy-to-make tonic harnesses the anti-inflammatory properties and antioxidants of its all-natural ingredients to offer a holistic approach to wellness. Ideal for daily consumption, it provides a simple yet effective way to enhance your digestive health, reduce joint pain, and revitalize your energy levels, making it an essential addition to your health regimen.
Of course, it is important that you consult those you trust for advisement on your health and wellness. This tonic is for information purposes and should not be considered a health claim.
Healing Harmony Tonic: A Natural Anti-Inflammatory Remedy
Description: Discover the soothing benefits of our Healing Harmony Tonic, a natural remedy crafted from the earth’s purest ingredients. This tonic combines the powerful anti-inflammatory properties of apple cider vinegar, fresh lemon juice, ginger, and raw honey to create a refreshing drink that not only alleviates inflammation but also boosts overall health.
Ingredients:
- 1 cup of organic apple cider vinegar
- Juice of 2 fresh lemons
- 1-inch piece of fresh ginger, grated
- 2 tablespoons of raw honey
Properties and Benefits of Each Ingredient:
- Apple Cider Vinegar: Rich in acetic acid, it helps reduce inflammation and can lower blood sugar levels.
- Fresh Lemon Juice: Contains vitamin C and antioxidants, promoting immune defense and skin health.
- Ginger: Known for its potent anti-inflammatory and antioxidant effects, ginger can relieve nausea and pain.
- Raw Honey: Offers antibacterial and anti-inflammatory properties, and provides a natural energy boost.
Preparation Process:
- In a clean glass jar, combine the apple cider vinegar and fresh lemon juice.
- Add the grated ginger to the mixture.
- Stir in the raw honey until fully dissolved.
- Seal the jar and shake well to ensure all ingredients are thoroughly mixed.
- Store the tonic in the refrigerator for up to one week.
Suggested Daily Dosage: For best results, take 1 tablespoon of the Healing Harmony Tonic each morning on an empty stomach. If the taste is too strong, dilute it with a glass of water.
Best Uses and Timing: This tonic is ideal for those experiencing joint pain, digestive issues, or anyone looking to enhance their overall health naturally. Consuming it in the morning kickstarts your metabolism and leverages the tonic’s benefits throughout the day.





