
by Preparation Call Editorial Team | Jul 6, 2025 | Preparedness
1. Aligning with Safety Regulations
Understanding Compliance Requirements
When I first started getting into emergency preparedness, the maze of safety regulations overwhelmed me. Every location, be it a school or an office, has specific requirements. Understanding these is critical if you want your drills to be effective and compliant. Familiarize yourself with the local laws and codes; trust me, it’s worth the investment of time.
Make it a point to regularly check if there are any updates or changes to these regulations. Policies can evolve, and what was compliant six months ago might not be anymore. Establishing this as a routine part of your safety oversight keeps your drills relevant and compliant.
Additionally, seeking guidance from safety professionals or attending workshops can give you insights that regulations might not capture, ensuring you’re not missing out on best practices.
Tailoring Drills to Specific Requirements
Not every organization can treat emergency drills the same. For example, what works for a high-rise building might differ significantly from a community center. Identifying the specific needs of your space allows you to tailor your drills accordingly. It’s essential to include features such as accessibility for those with disabilities and considering age demographics.
Moreover, engaging your team in these conversations can offer fresh perspectives. They might bring up challenges you’ve never considered, helping to make your drills even more comprehensive and inclusive.
Remember, drills that lack relevance or fail to accommodate the unique characteristics of your environment can lead to disengagement. Ensure that your team knows their safety is top priority; this helps them invest emotionally in the training process.
Scheduling Regular Checks
I can’t stress enough the importance of regular practice drills. Some organizations might think a one-time drill suffices, but that couldn’t be further from the truth. Make a schedule for periodic drills—quarterly works well for many. Keeping this routine not only reinforces learning, but builds muscle memory.
Also, don’t forget to document these drills! Having a log of progress helps pinpoint areas in need of improvement and serves as a great reference green board during audits or inspections.
Plus, it’s an opportunity for a team-building experience! Just imagine the camaraderie and team spirit that can emerge when everyone knows what to do in case of an emergency.
2. Assessing Team Readiness
Identifying Knowledge Gaps
When I first began organizing drills, I quickly realized that not everyone shares the same level of awareness about emergency procedures. By conducting little assessments or asking questions during meetings, you can identify where knowledge gaps exist. This helps you refocus the training efforts on those crucial areas.
Visual aids and interactive sessions can also enhance understanding. Engaging activities where teams actively participate can immediately boost comprehension and awareness.
Additionally, don’t hesitate to ask for feedback after drills. If your team has suggestions or elements they didn’t understand, work them into your future sessions. Learning is an ongoing process!
Boosting Comfort Levels
Emergency situations can be tense, so creating a comfortable environment for participants is a must. When organizing drills, I always make an effort to balance seriousness with a relaxed atmosphere. When people feel at ease, they’re more likely to absorb the material and take the scenarios seriously.
A good practice is to allow everyone to ask questions, no matter how trivial they may seem. A friendly Q&A session after each drill session can reinforce learning and ease anxiety about the unknown. The goal is to boost their confidence in real emergency situations.
Another way to achieve this? Simulate realistic scenarios without the intense pressure. Casual walkthroughs help everyone envision the steps without that pressure cooker intensity approaching.
Incorporating Real-Life Scenarios
I’ve found that integrating real-life experiences into your drills makes a significant impact. When people can relate to situations more personally, it feels less like a chore and more like necessary training. Collect stories or insights from those who have faced challenges and share these with your team.
Of course, you’ll need to remain sensitive to participants, so approach this tactfully. Not all experiences will be easy to hear, but sometimes the facts can hit home better than theory.
Conducting debriefs after drills, where participants can share their thoughts, enriches these experiences. This can foster a culture of openness and continuous improvement within your organization.
3. Seasons and Specific Events
Utilizing Seasonal Changes
Let’s face it: seasons affect our behavior and readiness. Winter storms, summer heatwaves, or spring floods can all change the landscape of emergency preparedness. Planning drills according to these seasonal challenges can raise awareness and make them more relevant.
For example, conducting fire drills in the spring as landscaping changes can help highlight the importance of keeping emergency exits clear. It’s about seizing those opportunities when they arise!
Alternatively, consider having themed drills that coincide with specific seasons. Halloween can be a fun time to incorporate safety talks regarding fire hazards, and summertime can focus on outdoor emergency preparedness.
Responding to Local Events
I very much believe in rolling with the flow of what’s happening in the community. If there’s a significant event going down, like a local festival or a national holiday, use that as a chance to run relevant drills. This not only showcases your readiness but can also boost morale and community spirit.
Thinking outside of the box is key here. Local emergencies or disasters might prompt discussions about additional drills centered around natural disasters or even active shooter situations. You never know what discussions can spark change.
Consider collaborating with local emergency services for joint drills. These partnerships create community ties and provide real insights into how emergency management works more broadly.
Engaging the Community
One of the most fulfilling parts about running emergency drills is sharing knowledge with the community. This turns training into a more communal approach and can really empower participants. In my experience, hosting open drills where anyone can join encourages a larger safety net.
During these community drills, remember to use a mix of instructional techniques. People learn differently, so employ visual, auditory, and kinesthetic strategies to accommodate everyone.
Following up these drills with printed materials can help folks remember what they learned, as many of us tend to forget details post-drill. Plus, it offers something they can reference as they share their new knowledge with others.
4. Evaluating Drill Effectiveness
Gathering Feedback
It’s crucial to get input after each drill. Reflecting on what went well and what could be better will only serve to improve future sessions. I typically encourage participants to share their feelings openly; it creates a trusting environment and encourages constructive criticism.
Creating easy-to-fill-out feedback forms can make it less intimidating for folks. They’re often more honest when they can express themselves quietly, so be open to their thoughts! You’d be amazed at the insights they can provide.
Incorporating regular feedback loops helps build a culture where everyone feels their opinions truly matter. Trust me, it can lead to a more engaged team.
Simulating Real-World Conditions
If there’s one thing I’ve learned from running drills, it’s the power of realism. While it’s essential to cover basics, simulating actual conditions can enhance preparedness in remarkable ways. How will they adapt when the real deal hits? That’s the question I always ask myself!
This might mean timing drills at unpredictable hours or reducing participants’ clarity on what’s happening. The chaotic elements can prepare them better for real-world scenarios where things are often unpredictable.
After each drill, evaluating the responses during those simulated conditions serves as a powerful learning tool, emphasizing the importance of adaptability and resilience.
Iterating on Future Drills
The best part of evaluating drill effectiveness is taking actionable steps moving forward. I’ve made it a habit to draft an action plan based on feedback, simulation data, and overall evaluation. Having a tangible plan helps ensure you’re not repeating outdated practices.
Don’t hesitate to revamp the schedule if needed. If you discover month after month that everyone struggles with a specific aspect, make an adjustment to help facilitate growth and improve overall readiness.
Running drills isn’t just about fulfilling requirements; it’s about nurturing a culture of safety in your organization. Make sure you iterate continuously to achieve this long-term goal.
5. Keeping the Team Motivated
Engaging and Rewarding Participation
Let’s face it: emergency drills aren’t always the most exhilarating of activities. To keep spirits high, I often think up creative and fun ways to implement these drills. Asking for themed costumes or maybe friendly competitions can spice things up a bit!
Moreover, offering small rewards for participation—like snacks or fun certificates—can do wonders for motivation. Everyone appreciates recognition for their contributions, and it helps cultivate a sense of camaraderie.
Also, sharing the results and any positive outcomes that stem from successful drills can give your team a sense of ownership. Show them how their efforts directly contribute to a safer workplace!
Establishing Continuous Learning Opportunities
You know what keeps the fire burning? Continuous learning! Consider incorporating brief, engaging safety seminars or workshops throughout the year. Reminding everyone about new advancements or regulations can keep your culture fresh and engaging.
Incorporating storytelling can also enhance retention. Sharing relatable experiences from emergency professionals can create an insightful environment that keeps your team plugged in. These stories often resonate more than fact-filled presentations, leaving a lasting impression.
As people become more informed and engaged, they tend to take these lessons to heart, creating a more vigilant team ready to respond during emergencies effectively.
Cultivating a Support System
No one wants to feel like a lone sailor during emergency situations, right? Establishing a robust support network is critical in promoting overall morale. Team members should feel confident reaching out to each other and supervisors when it comes to safety and readiness discussions.
Being approachable opens up the discussion for issues, fears, or questions that may arise. I always try to foster an environment where my team knows their concerns are valid and worthwhile.
Encouraging communication among the team breeds trust, leading everyone to feel collectively responsible for their safety and preparedness. Plus, that sense of belonging can keep spirits high during the most mundane drills.
Frequently Asked Questions
1. How often should we conduct emergency practice drills?
It’s generally a good idea to conduct drills at least quarterly. However, depending on the type of organization, more frequent drills may be advisable, especially if your team undergoes changes or new regulations come into play.
2. What kinds of emergencies should we focus on during drills?
You should tailor your drills to the most likely emergencies your organization may face. This could include fire, natural disasters, medical emergencies, or active shooter situations.
3. Should participants receive training before drills?
Absolutely! Providing introductory training can help participants know what to expect and enhance the overall effectiveness of the drills.
4. How can I keep participants motivated during drills?
Incorporating fun themes, reward systems, and continuous learning opportunities can help keep the motivation high. Keeping the environment light and engaging makes the experience much more enjoyable for everyone!
5. What should I do after drills are completed?
After any drill, it’s crucial to gather feedback, assess effectiveness, and develop action plans for improvements. Celebrating successes and addressing areas for growth ensures your team continuously improves and stays prepared.
by Preparation Call Editorial Team | Jul 6, 2025 | Preparedness
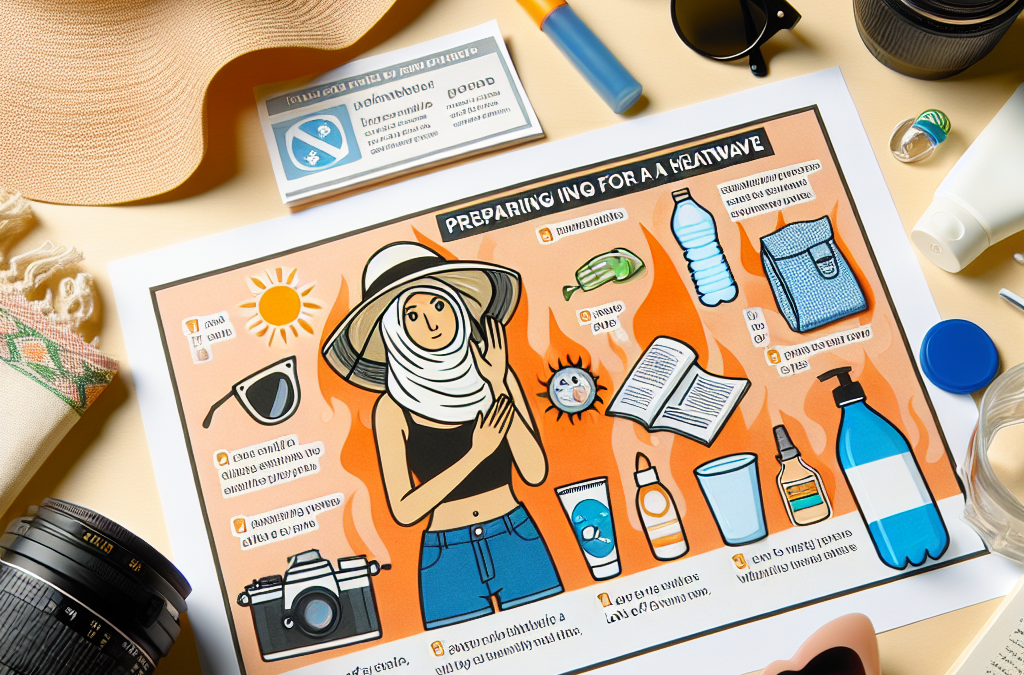
Preparing for a Heatwave: What You Need to Know
Preparing for a Heatwave: What You Need to Know
Here are the top 4 semantic keyword phrases for this article:
- Stay Hydrated During Extreme Heat
- Protecting Your Home from Heat
- Heat Safety Tips for Vulnerable Groups
- Planning Ahead for a Heatwave
Stay Hydrated During Extreme Heat
Importance of Staying Hydrated
Let me tell ya, staying hydrated during a heatwave is no joke. I’ve learned the hard way that when temperatures soar, your body needs extra fluids. Water is your best friend; it helps regulate your body temperature and keeps everything running smoothly. Not staying hydrated can lead to heat exhaustion or worse, and trust me, I’ve seen it happen!
When it’s blazin’ outside and you’re sweating like crazy, water alone sometimes doesn’t cut it. Your body is losing more than just H2O; you’re losing electrolytes too. So, I like to mix things up with some electrolyte drinks. They help replenish what you’re losing, keeping those cramps at bay.
Remember, hydration isn’t just about drinking water when you’re thirsty; it’s a constant process. I keep a bottle with me all day. Set reminders if you need to—trust me, you’ll feel so much better for it.
Tips for Staying Hydrated
As a pro tip, always carry a reusable water bottle when you’re out and about during a heatwave. I’ve found that filling it up before heading out becomes a little ritual for me. Whether I’m going for a walk or just chilling in the backyard, this habit has helped me stay on top of my hydration game.
Another strategy I use is eating water-rich foods. Fruits like watermelon, cucumbers, and oranges are not only refreshing but also packed with water. I often toss a fruit salad together or blend smoothies that keep me cool while hydrating at the same time!
Lastly, avoid drinks that can dehydrate you like alcohol or caffeinated beverages. I’ve fallen into that trap, thinking a cold drink will cool me down. Instead, I opt for flavored water or iced herbal teas that taste great and keep me hydrated.
Protecting Your Home from Heat
Creating a Cool Environment
I can’t stress how crucial it is to keep your home as cool as possible during those scorching heatwaves. It’s all about creating a comfortable oasis. I started using blackout curtains in my windows. They help block out that blazing sun, reducing the indoor temperature significantly.
Ceiling fans are another lifesaver. I make sure to have them going all the time. If you reverse them, they can even circulate cool air better! You wouldn’t believe how much a little airflow can help.
If you have air conditioning, keep it running, and don’t forget to clean those filters regularly. I learned this lesson after one sweltering summer when my AC barely worked because I neglected its maintenance. Keep your system in good shape to survive the heat!
Sealing Up Your Home
Another thing that worked wonders for me was sealing up any drafts. I’ve gone around my house with a can of caulk, sealing up windows and doors. It sounds tedious, but it can really keep that cool air from escaping, making it feel like a sanctuary indoors.
Also, keep heat sources to a minimum. I try to use my oven less and stick to cooler meal options. Your stovetop and oven create extra heat in the house, so I often rely on my trusty slow cooker or grill outside during the summer months.
Plus, don’t forget to hydrate your plants. They help cool down your environment too! I’ve grown a little herb garden, and besides giving me fresh herbs for cooking, I feel like they create the perfect little green space that helps lower the overall temperature inside.
Heat Safety Tips for Vulnerable Groups
Understanding Vulnerable Groups
When it gets hot outside, certain folks are more vulnerable than others. I’ve seen firsthand how heat affects the elderly, infants, and those with chronic illnesses. They’re at a higher risk for heat-related illnesses, so being aware can make a huge difference.
If you have elderly neighbors or family, checking in on them during extreme heat is crucial. A simple phone call can let them know you care and remind them to stay hydrated and inside as much as possible.
For parents, keeping an eye on your little ones is equally important. They don’t always know when they need a break from the heat. I always set timers when my kids are playing outside so they can come in for a cool drink and rest.
Creating Safety Plans
Making a heat safety plan is something I’ve found helpful for my family. We discuss where they can go if it gets too hot. If we don’t have air conditioning, we’ve identified public places like libraries or community centers as our go-to’s during a heatwave.
Having a buddy system worked well for me, too. Keeping an eye on each other can save you from potential heat emergencies. My friends and I often check in on one another during those hot days; it’s a great way to stay connected and safe.
Don’t forget about pets! They can also suffer from heat stress. I make sure to provide plenty of water, and keep them indoors during the hottest hours of the day, just like I do for myself.
Planning Ahead for a Heatwave
Monitoring Weather Reports
Planning ahead for a heatwave isn’t just about stocking up on ice cream. I’ve learned to check the weather regularly, especially during the summer months. Trust me; being prepared can really take the sting out of those hot days.
Weather apps can be your best friend. I have one on my phone that sends me notifications about excessive heat warnings. Being one step ahead allows me to plan my day better, whether that means changing my usual outdoor plans or making sure I have extra ice in the freezer.
Listening to local news can also provide you with updates about heatwave resources. Often, they announce cooling centers or special programs for those who may need assistance during high temperatures.
Stocking Up on Supplies
Another pro tip is to stock up on supplies before the heatwave hits. I always keep bottled water, electrolyte drinks, and non-perishable snacks around. You never know when you might get stuck inside due to a heatwave, and it’s great to have a little stash!
Don’t forget sunscreen and hats if you must venture outside. The last thing you want is to end up with a sunburn. I’ve been through that, and let me tell you, it’s no fun.
Additionally, having a first aid kit handy is a smart move. You might not need it, but it’s better to be safe than sorry. It’s always a relief when I know I have the basics ready just in case someone feels unwell or encounters heat exhaustion.
FAQ
What are the best drinks to stay hydrated during a heatwave?
Water is your top choice, but you can also go for electrolyte drinks or smoothies that have water-rich fruits. Keeping your hydration fun is key!
How can I cool my home effectively without AC?
Using blackout curtains, fans, and sealing drafts can significantly cool your home. Plus, cook less indoors during the heat of the day to keep the temperature down.
What should I do if I have a vulnerable person in my care during a heatwave?
Check in on them regularly, help them stay hydrated, and create a safe environment for them indoors. Planning visits to cooling centers if necessary is always a good idea!
How can I prepare for an unexpected heatwave?
Monitor weather reports, stock up on water and snacks, and ensure you have supplies ready, including first aid kits and hydration options. Planning ahead makes all the difference!

by Preparation Call Editorial Team | Jul 6, 2025 | Preparedness
Assessing Your Needs
Understanding Your Household
Before diving into food storage, I always like to take a good look at my household dynamics. How many people are eating here? What are their favorite meals? Are there any dietary restrictions? Knowing this helps ensure that I’m stocking up on food that we’ll actually enjoy. Trust me, you don’t want to be in a situation where you have six cans of lima beans and nobody wants to eat them!
It’s important to survey the tastes and preferences of everyone in your household. Ask questions, have a family meeting, and get everyone on board with the ideas you’re cooking up. It saves so much time and heartache when the food you’ve stored gets gobbled up instead of tossed.
Also, consider potential emergencies. Do you live in an area prone to natural disasters? If so, you might want to build a more robust plan. Understanding your needs upfront sets a solid foundation for everything you’re about to do in this process.
Calculating Your Food Requirements
Once I’ve assessed my household, the next step is figuring out just how much food I need. Typically, I calculate based on three meals a day for three months. Sure, it sounds slightly overwhelming, but we can break it down! A simple spreadsheet can help track what you have and what you need.
A good rule of thumb is to aim for about 2,000 calories a day per adult, but this can vary based on lifestyle and health requirements. I also take into account snacks for those late-night cravings! I love keeping some cookies or chips handy because, let’s be real, they’re too hard to resist.
At this stage, I jot down categories of food: proteins, grains, fruits, vegetables, and dairy. From there, I estimate how many servings of each category I’ll need. For example, if we need 120 servings of grains over three months, I can start calculating how many bags of rice, pasta, or oats I’ll have to stock up on.
Watching for Dietary Restrictions
As I’ve mentioned, it’s critical to keep an eye on dietary restrictions—if you have them! If a family member is gluten-free or vegan, try to include substitutes in your food storage plan. Luckily, there are many options available today, but that was not always the case.
I like to compartmentalize my shopping list to make sure I’m accounting for everyone’s needs. If you’ve got a picky eater, plant-based options can sometimes save the day while still being appealing to others in the family.
Ensure you have a variety of foods that are accessible for everyone. Not only does it make mealtimes easier, but it encourages a sense of inclusivity when everyone is stocked with their favorites!
Choosing the Right Foods
Long-lasting Items
When I venture into selecting foods for my storage, I focus on shelf-stable items. Rice, beans, canned goods, and pasta are staples that I can rely on. I like to purchase food in bulk for savings, but you can also look for sales or use coupons to make it more budget-friendly.
Ensure that you check expiration dates. I know it seems tedious, but no one likes to discover that they only have month-old snacks stashed away in their pantry. A rolling rotation system usually works wonders; I try to use the oldest items first, so nothing goes to waste.
Consider high-nutrition items too. Foods like peanut butter or powdered milk can add substantial energy boosts while sitting on the shelf. The more varied the nutrition, the better equipped you’ll be for any occasion!
Incorporating Variety
If you’re anything like me, variety is key. The last thing I want is a food storage plan that feels like a boring diet. I love mixing things up with flavored rice, different kinds of pasta sauces, and seasonings. This keeps me excited about cooking and trying new recipes!
Incorporating various cuisines can also make meal planning way more fun. I use spices and sauces to transform basic ingredients into worldwide meals, making it easy even when I’m pulling from long-term storage.
Plus, variety helps prevent burnout. If you’ve stored the same bland ingredients, mealtime can quickly feel stale, and nobody wants that! So think creatively and stock up on spices, herbs, and versatile bases that will keep your taste buds tantalized.
Add in Preservatives
Long-term food storage often requires some preservatives. Items like vinegar, sugar, and salt can help enhance the shelf-life of foods, especially if you’re considering canning or pickling. I’ve recently gotten into experimenting with preserving vegetables—what a game-changer!
Again, I recommend double-checking what you’re buying and how to store it properly. For example, sugar can effectively prevent spoilage in certain fruits, whereas salt can help with proteins.
Always follow guidelines or recipes when it comes to preserving food, as it’s essential for safety. It’s a bit of a science project but totally worth the effort when you can crack open a jar of homemade pickles later on!
Storing Your Foods Properly
Choosing the Right Containers
Oh boy, this is where the fun begins! I love finding the perfect containers to organize my food storage. Glass jars, sturdy plastic bins, and vacuum-sealed bags are my go-tos. They keep foods safe from pests and moisture, making it easier to maintain quality over the months.
Make sure all containers are clearly labeled with the contents and expiration dates. I create a system where I can easily check what I have on hand instead of digging through a mountain of mismatched containers. Clarity is everything!
Also, consider your space. I optimize storage by stacking where possible and using underutilized areas like under beds or in storage closets. Just because it’s food storage doesn’t mean it has to look cluttered!
Optimal Temperature and Environment
Storing food correctly really comes down to temperature and environment. I always ensure my storage area is cool, dark, and dry. A basement or a pantry away from direct sunlight is perfect. Too much heat can spoil your goods before their time.
It’s also good to monitor temperature swings. If you live in an area with extreme seasonal changes, consider investing in a thermometer and humidity gauge. You can avoid unnecessary mishaps caused by environmental factors.
Take stock of how foods are performing over time. It might be worth your while to check in on them every month, reshuffling and rearranging if needed to prolong their life better.
Regular Maintenance
One thing I can’t stress enough is regular maintenance. Don’t think about your food storage as a ‘set it and forget it’ kind of deal. At least once a month, I like to do a quick inventory check to ensure everything is good to go and nothing is nearing its expiration date.
Also, do a taste test every once in a while. Using some of your stored food in regular meals can help prevent surprises when you’re in a pinch. Plus, this way, it’s integrated into your lifestyle rather than just sitting in storage.
Ultimately, keep learning! There are always new methods and ideas out there about food preservation. Keeping yourself educated is key to a sustainable food storage plan!
Creating a Meal Plan
Working with What You Have
Now, this is where the magic happens! Every month, I sit down to create a meal plan using the food I have in storage. I find it’s a great way to ensure variety while minimizing trips to the grocery store. Plus, it helps keep waste down.
I usually do a few different lists—one for breakfast, lunch, dinner, and even snacks. It’s awesome knowing that I can whip something up without having to run out for last-minute ingredients.
At times, I like to introduce themed nights—Taco Tuesday, Pasta Night, or Stir-fry Saturday! It gives a bit of structure to my meal planning while making it fun every week!
Incorporating Fresh Items
While I’m all about long-term food storage, I don’t forget about the importance of fresh ingredients! I love to incorporate fresh vegetables and fruits into my meals when I can. This could be buying local produce or growing a little garden of my own.
Knowing which fresh ingredients pair well with your staples can make meals pop. Think about complementing dried beans with some fresh herbs or combining grains with seasonal veggies to elevate your dishes.
It’s important to be resourceful! I also recommend managing what fresh foods you have and how quickly they might spoil. Make sure they fit into your meal plans while they’re fresh and vibrant!
Planning for Variety
All in all, I always emphasize variety in my meal plans. Mix things up with cuisines, flavors, and ingredients. It helps not to get into a food rut where you’re dreading the same old meals.
One trick I picked up is to create a “swap” for meals. Like, if we’re having chili one week, I’ll consider a chili-like recipe with different ingredients the next. It creates excitement and keeps things interesting.
Creative planning is key! I get the family involved to choose themes or suggest meals, which makes everyone feel included and eager to try new things. It’s a great team effort!
Reviewing and Adjusting Your Plan
Checking Inventory Regularly
The only way to improve is to review, right? I make a habit of checking my inventory during my monthly meal planning. If you notice some things are consistently not getting used, this is your cue to adjust. Let’s face it, we can’t store unpopular items indefinitely.
I also create a little chart on my fridge that helps me track what’s being eaten and what’s just sitting there. Every month is an opportunity for an adjustment, and I love it!
Keeping an open mind when reviewing your inventory will allow improvements and keeps things fresher in your storage and plans. It’s about finding what works best for you and your household.
Feedback from Family and Friends
Involving family and friends in discussions about meal plans and what they love keeps things collaborative and engaging. Sometimes I’ll sit down for a meal together and will ask what everyone thinks about a certain dish or how it could be tweaked.
In sharing feedback, I learned something interesting: I could introduce new flavors that nobody knew they’d like! Sometimes it’s about trial and error, and I say bring it on!
Receiving insights allows you to adapt your food storage plan and make it more appealing to everyone involved. This inclusion fosters a sense of community and satisfaction around meals.
Staying Informed on New Options
Food trends change, and so do our tastes! I make it a point to stay updated on new food options or preservation techniques emerging in the market. It’s exciting to discover what’s out there!
By reviewing new recipes or even learning about alternative foods, I not only enhance my storage plan, but I expand my cooking repertoire. Who knew that I could incorporate so many textures and flavors from varying regions?
Learning is a journey, and keeping up with the latest trends gives food storage a fresh vibe while ensuring I’m continuously improving my practices.
FAQ
1. How long can food be stored?
Food can last for several months to years, depending on the type of food and storage conditions. Properly stored and monitored, many items can be eaten safely even after long periods.
2. What items are best for long-term food storage?
Staples like rice, beans, canned goods, pasta, and freeze-dried foods tend to have longer shelf lives and are great for storage. These foods provide essential nutrients and are versatile for meal planning.
3. How can I keep track of inventory?
Creating an inventory list on your computer or even a simple chart on your fridge can help you stay aware of what you have. Regular checks during meal planning can also help manage what’s left.
4. Can I store fresh produce long-term?
While fresh produce generally has a shorter shelf life, learning preservation techniques like canning, freezing, or dehydrating can help extend their usability in your food storage plan!
5. How do I avoid food waste in storage?
By carefully planning meals based on what you have and practicing regular inventory checks, you can significantly reduce waste. Engage your family in meal planning to ensure everyone’s tastes are considered!
by Preparation Call Editorial Team | Jul 6, 2025 | Preparedness
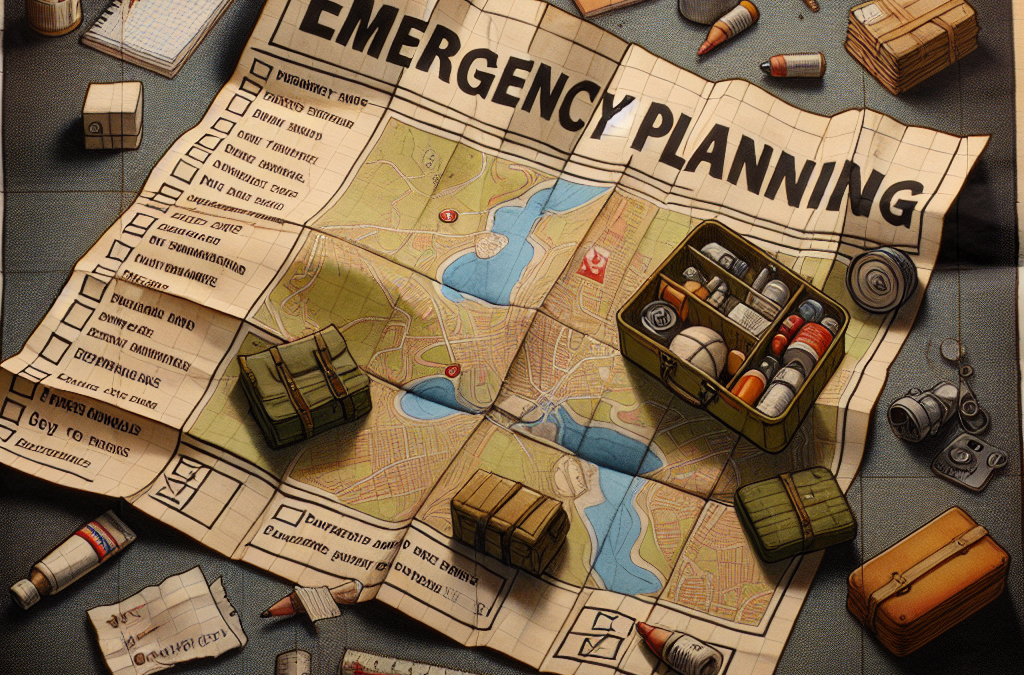
Hello there! Today, I want to share some insights from my own experiences about emergency planning. Let’s dive deep into some common missteps that many folks, including myself in the past, tend to make when prepping for emergencies. It’s all about learning and improving, right?
Not Having a Clear Communication Plan
One of the biggest blunders I’ve seen – and made – is not having a solid communication plan. Believe me, when chaos strikes, having a clear line of communication can make all the difference.
Identify Contact Points
First things first, you need to decide who your key contacts are. This should include family members, friends, and even your neighbors. Make sure everyone knows who to reach out to in the event of an emergency.
Next, it’s essential that these contacts are diverse. Maybe it’s a relative in another state or a friend in a different neighborhood. Having a network that spans out can be lifesaving. Trust me; you don’t want to put all your eggs in one basket.
In closing, communicate this plan to everyone involved. Don’t assume they’ll remember all the details. Write it down and have everyone acknowledge their roles. The clearer the plan, the less confusion there will be when it’s needed most.
Establish Alternative Methods of Communication
If the primary method fails – say, cellular networks are down – what then? Having alternatives is crucial. I’ve learned the hard way that relying solely on one form of contact can lead to frustrations.
Consider apps like WhatsApp or Signal, which can run on Wi-Fi. Make sure your family knows how to use them. Maybe share some practice scenarios for fun! It’s an excellent way to ensure everyone is comfortable with the tools available.
Another thing to think about? Old-school methods like walkie-talkies or designated meeting points. Sometimes, technology can fail, and fallbacks are critical.
Regularly Update Your Plan
Lastly, don’t make the mistake of letting your communication plan gather dust. Regular updates are necessary as your situations change – new jobs, new moves, or shifts in relationships.
I set reminders every six months to discuss and tweak our plans. This ensures everyone is still on the same page and familiar with the latest resources and protocols.
It’s a simple step, but it helps maintain the integrity of your plan. When statuses change, you don’t want your network to become impractical.
Ignoring Local Hazards
Alright, let’s talk about something crucial: overlooking local hazards. Depending on where you live, your emergency plan should reflect the unique risks your area faces.
Research Local Risks
The first step involves doing a bit of homework. What natural disasters are common in your area? Earthquakes, floods, wildfires…having this intel is key. I learned this after a colleague experienced flooding because they didn’t realize their city was prone to it.
Check out local government websites or community boards; they often have valuable guides on local hazards. This intel will help tailor your emergency bags and response strategies significantly.
In my town, I’ve integrated storm preparedness after realizing our weather patterns shifted. Control what you can by understanding your surroundings and adjusting your plans accordingly.
Prepare Specific Supplies
Once you know the hazards, create a list of emergency supplies tailored to those risks. For flooding, you might want waterproof bags and sandbags; for wildfires, have fire-resistant gear ready.
I remember during a wildfire scare, I was woefully unprepared. I quickly adjusted my kits to include smoke masks and fire blankets. It was a lightbulb moment! You don’t want to wait until the event occurs to put these supplies together.
Cross-check these supplies occasionally, especially if you haven’t touched them in a while. Something that was operational a year ago might have expired or become outdated.
Engage With Your Community
And let’s not forget about community engagement. It’s such an underrated aspect! Local groups often have insights and resources, so consider connecting with them. I’ve made some fantastic friends who helped me understand what to expect if a disaster were to strike.
Participate in community drills or informational meetings—it’s an excellent way to stay prepared and learn from others facing similar challenges. Having that camaraderie can make emergencies less daunting.
Plus, sharing experiences helps foster an environment where everyone is more prepared. We’re all in this together, after all!
Failing to Practice Your Plan
This one’s a biggie: failing to practice the plan! You might have the most finely crafted emergency plan, but if you’ve never rehearsed it, what’s the point?
Regular Drills
Scheduling regular drills is something I can’t stress enough. Just like fire drills in school, your family should practice your emergency response. This creates familiarity and can uncover any holes in your plan.
I try to hold drills every few months, varying the scenario slightly each time to keep everyone on their toes. It’s kind of fun and helps reinforce that preparedness mindset. You never know when practice will pay off!
Reassuring your family that practicing is just as vital as the plan itself can help reduce anxiety during real emergencies. The more prepared you are, the more confident you’ll feel.
Involve Everyone
Involving everyone, from kids to grandparents, is crucial. Each person’ll usually retain different pieces of the plan. Encouraging an open dialogue allows everyone to feel included and invested in the plan.
I’ve seen that older family members might even contribute valuable insights from their experiences. Plus, involving everyone helps ease worries—especially for kids who might feel overwhelmed with emergency talk.
So whether it’s a scavenger hunt for supplies or a pretend emergency at home, make it fun! Keeping the experiences positive is key.
Feedback Sessions
And after drills, it’s superhero moment feedback time! Discuss what worked and what didn’t. You’d be amazed at the potential improvements that can arise during these sessions.
It encourages accountability and helps us tweak our plans based on actual experiences. Take note of any surprises during drills, and communicate openly about concerns. Adjustments can always be made!
Feedback also serves as a motivator. It boosts morale when everyone knows they’re working towards staying safe and prepared.
Neglecting to Include Pets in Planning
Look, I love my pets, and I can’t imagine leaving them behind in an emergency. Another mistake I’ve made was assuming they wouldn’t need a plan. Spoiler alert: they do!
Create a Pet Emergency Kit
Making a pet emergency kit is an essential step. I’ll never forget the first time I packed my dog’s essentials: food, water, medication—the works. It might seem obvious, but having that kit ready is a lifesaver.
Along with the basics, don’t forget to include any comfort items. Something familiar can help soothe their anxiety during tough situations. Plus, that stuffed toy might work wonders if they get scared.
How often should you check this kit? You guessed it—regularly! Treat it like your human emergency kit. Things can change, and so do your pet’s needs.
Plan for Transportation
When an emergency strikes, how do you safely transport your pets? This is a critical yet overlooked aspect of planning. If you can’t get to your car or evacuate on foot, do you have a plan in place?
In our house, we’ve designated carriers and harnesses for our pets to ensure we can get them in a safe way. Then, practice getting them into the carriers to make the process smoother when it counts.
And don’t forget microchipping or keeping a collar with ID tags. It’s a safety net that gives you peace of mind in case you get separated during a chaotic event.
Include Emergency Contacts for Vets
Ultimately, keep a list of emergency contacts, including your vet’s number, in your emergency kit. This is sometimes overlooked in the hustle. Keep it handy—along with your pet’s medical records, just in case.
Also, consider having a secondary vet listed in case your primary vet is unreachable. Making that network will streamline care in stressful moments.
Your furry friends are family too, and their needs are just as important as everyone else’s. Including them in your emergency plan ensures you won’t leave anyone behind!
Overcomplicating Your Plan
Let’s wrap this up with a common pitfall: overcomplicating the plan. Simplicity is key! When a disaster strikes, the last thing you want is to scramble through pages of instructions.
Be Clear and Concise
Keep your plan straightforward. Clarity will help in those high-stress moments. I’ve seen complicated diagrams that leave folks confused rather than informed.
Sometimes, sticking to a few key points makes for quick reference during emergencies. It’s about getting to the good stuff when every second counts.
It’s also a great idea to have everyone involved sign off on the plan. If they know what’s up, they can confidently act quickly when it really matters!
Use Visual Aids
Visuals can be immensely helpful! From simple charts to maps of your local area, having that visual is really beneficial, especially for visual learners.
I have these charts in places where everyone can easily see them—like the fridge or by the front door. They serve as awesome reminders, too!
Think of a child’s drawing that gets the point across better than paragraphs of text. Sometimes less truly is more.
Regular Simplification Review
Lastly, regularly review and simplify your plan. Just like any good strategy, efficiencies can always be made as life goes on. What seemed necessary a year ago might not be today.
Ask everyone how comfortable they feel with the plan and if there’s anything they think is overly complicated. Being open to feedback can streamline the whole process and minimize confusion.
Ultimately, keeping it simple is the best way forward. Emergencies are chaotic enough without us adding hurdles to them!
FAQ
- What is the first step in creating an effective emergency plan?
Start by identifying key contacts and establishing a clear communication plan for your family and friends.
- Why should I research local hazards?
Understanding your area’s specific risks allows you to tailor your emergency supplies and preparation strategies effectively.
- How often should I practice my emergency plan?
I recommend practicing your plan every few months to keep everyone familiar and ready when emergencies hit.
- What should I include in my pet’s emergency kit?
Make sure to have food, water, medication, identification, and comfort items packed and ready for your furry companions.
- How can I keep my emergency plan simple?
Be clear and concise in your strategies, use visual aids as reminders, and regularly review your plan to minimize complexity.
by Preparation Call Editorial Team | Jul 6, 2025 | Preparedness
1. Strengthening the Structure
Assessing Current Structural Integrity
When I started thinking about disaster resilience, my first step was to take a hard look at my home’s structure. I poked around, checking for any signs of disrepair. Cracks in the walls or a shaky foundation can be big red flags. I even called in a local contractor who had experience with disaster preparedness. They gave me a thorough assessment and made some recommendations that really opened my eyes to potential risks.
One thing I found super helpful was understanding the different materials used in my home. For example, masonry buildings tend to be stronger against wind and water damage compared to wood. Knowing what I was working with helped me prioritize which areas needed the most attention.
After the assessment, I made a list of repairs and upgrades, from bolstering beams to reinforcing roofs. It was a bit of an investment, but I knew these changes could save me a heap of trouble if disaster ever struck. Plus, feeling safe in my home is totally worth it!
Upgrading Materials
Once I knew what needed fixing, I focused on upgrading materials to something sturdier and more disaster-resistant. I swapped out old windows for impact-resistant ones, which is a game changer if you live in a hurricane zone like I do. It took some getting used to seeing the price tag, but man, the peace of mind was unbeatable.
I also tackled my roofing. By choosing a durable metal roof, I not only improved the lifespan of my home’s covering but also its resistance to extreme weather. It was a big chunk of change upfront, but it paid off when I had lower insurance premiums and fewer worry lines on my forehead!
Lastly, I added some exterior features, like storm shutters and reinforced doors. These upgrades made me feel like I could batten down the hatches and keep the bad elements at bay. Trust me, these little tweaks can make a world of difference!
Creating Safe Spaces
I knew I had to think about where to hang out during a disaster. For that reason, I dedicated a part of my basement as a safe room. The combination of sturdy construction and stored supplies created a reassuring atmosphere. I furnished it with comfy blankets, some food, and even a little entertainment, just in case we were in there for a while.
I also took a moment to think about my yard. I removed any big trees that could potentially come crashing through if high winds hit. It’s such a bummer to lose some greenery, but I always remind myself it’s better than losing my roof or worse!
Having a safe space didn’t only mean physical safety. Psychologically, it helped my family feel more secure. We even did some emergency drills together, which eased those pre-disaster jitters and made for some bonding along the way!
2. Emergency Preparedness Plans
Creating a Family Plan
Setting up an emergency preparedness plan with my family was probably one of the most important aspects I tackled. We gathered around the kitchen table and discussed various scenarios – everything from flooding to tornadoes. Just getting it all out there started some great conversations.
Each family member had a role to play, which made things less overwhelming. We established a meeting point and reviewed multiple escape routes out of the house. Knowing we were all on the same page put me at ease. In a chaotic moment, it’s comforting to know exactly what to do.
I made sure to jot everything down and keep copies handy. Plus, digital copies stored safely in the cloud were a lifesaver. Trust me, having a plan ready gave me a sense of control over any situation. It’s kind of like having a backup battery for your phone – you never realize how essential it is until it’s needed!
Building an Emergency Kit
Next up was assembling an emergency kit. I scoured some checklists online and began gathering essentials like non-perishable food, water, flashlights, and first-aid supplies. I won’t lie, it felt like a bit of a scavenger hunt, but it was oddly satisfying slotting each item into my designated storage bins.
Incorporating some personal touches to that kit made it less of a chore. I added my favorite snacks and books to keep everyone’s morale high. Trust me, when you’re hunkered down, a little comfort food can go a long, long way!
I also made sure to rotate the food and check expiration dates regularly. There’s nothing worse than thinking you’re all prepared only to find outdated supplies when you need them most. A little upkeep every month kept my kit ready for action!
Staying Informed
I All in all realized that being disaster-ready also means staying informed. I signed up for local weather alerts and followed the news to stay on top of any approaching threats. Having that information at my fingertips helped me make timely decisions and stay a step ahead.
I also talked about important resources with my neighbors. Community is everything, and knowing my neighbors had a plan made me feel like we were all in this together. Plus, we exchanged tips that opened my eyes to additional resources I had never considered before.
And let me tell you, I also developed a trust in the Red Cross apps that can provide safety information during disasters. It became one of those things I didn’t want to live without, ensuring I had access to critical information no matter what!
3. Insurance and Financial Preparedness
Reviewing Insurance Policies
Now, let’s talk about a less exciting topic: insurance. It might not be as thrilling as picking out new plants for your garden, but trust me, understanding your insurance policy is crucial. I spent an afternoon going through my coverage, and it was eye-opening, to say the least.
Many policies vary widely in what they cover. I learned that my standard homeowners’ insurance didn’t cover flood damage, and that would have left me hanging out to dry. After some research, I found additional policies that fully covered me, especially since living in a flood-prone area is a reality I face regularly.
Reviewing and adjusting my coverage regularly became a habit – just like changing the batteries in smoke detectors. I set reminders a couple of times a year to ensure I’m never caught off guard, and I suggest making a plan to do the same!
Financial Preparedness
You know how they say cash is king? Well, that phrase becomes particularly valid in a disaster. I decided to stash away some cash, just in case bank access was restricted. I learned that having emergency funds on hand can ease so many worries during a turbulent time.
Additionally, creating a detailed inventory of my possessions was a game changer. I took pics and recorded values, which could help with insurance claims later. I stored everything on a secure cloud service, so I could access it whenever necessary.
Cleaning out old stuff and documenting it also felt surprisingly therapeutic. Who knew disaster prep could lead to a decluttering spree? Not to mention, it made my home a bit more organized, which I love!
Community Resources
Finding out what local resources are available is another significant step that often gets overlooked. I discovered a ton of programs through my local government and community organizations designed specifically for disaster preparedness. They had training sessions and even offered discounts on emergency kits!
Joining a local neighborhood group helped me network with others who share similar concerns about preparedness. We’ve had some epic book exchanges, but more importantly, we strategized and learned from each other’s experiences, which was invaluable.
And don’t get me started on the workshops! Some were even hosted by retired professionals who shared electric information. I learned so much and made friends along the way, too. The power of community can do wonders when it comes to facing potential disasters!
4. Landscaping for Safety
Choosing the Right Plants
Let’s dig into landscaping because, boy, did it make a difference for my disaster resilience. I took a good hard look at my garden, and I realized I could use my plant choices to my benefit. Certain trees and shrubs are more wind-resistant, which can help during storms.
For example, choosing deep-rooted trees like oaks over shallow-rooted species like pine can provide better stability, and they resist uprooting during a storm. I carefully planned my garden thinking about potential wind patterns and the best spots to plant those sturdy plants!
I also made sure to keep my landscaping away from home structures. Fire-resistant plants like native grasses are not just great for controlling erosion, but they create a buffer zone if wildfires hit. It’s all about creating a protective barrier while still rocking that garden aesthetic!
Drainage Solutions
Another essential factor in my yard was proper drainage. Being near a waterway, I learned the hard way that standing water can wreak havoc during heavy rains. I invested in grading my yard to encourage water to flow away from my home, which literally saved my foundation from water damage.
I also added features like French drains and rain gardens, making my garden not only beautiful but functional. These installations not only help absorb rainwater but also give wildlife a little place to thrive!
Plus, it’s a fun conversation starter during BBQs – trust me, friends dig it when they hear about your awesome environmental consciousness!
Wildfire Defensible Space
If you live in an area prone to wildfires like I do, establishing a defensible space is a must. I made a ten-foot buffer around my home by cutting back branches and ensuring that any flammable materials were nowhere near the structure. It felt like I was building a fireproof fortress!
I added gravel paths, which help break the continuity of vegetation, as well as some strategically placed stones. It was kind of like creating my very own mini-defense station and helped keep my house safe no matter the season.
Talking to a fire mitigation expert opened my eyes to even more incredible strategies. Having backup plans and strategies for fire spread provided some serious relief and put me on high alert!
5. Regular Drills and Maintenance
Emergency Drills
Just like every good team, practices make perfect. I realized that conducting regular emergency drills with my family was not just beneficial but downright essential. Every few months, we would run through our plan from start to finish.
It became almost routine – we would practice how to exit our home quickly and gather at our designated safe spot. I incorporated fun elements to break the tension, such as timing ourselves to see how fast we could evacuate. It’s amazing how much laughter and preparation can go together!
Having kids made it even more enjoyable. They loved playing their roles, while it reinforced the seriousness of being prepared. It sparked some discussions, too, about what to keep in our kits and how to stay calm in emergencies!
Regular Maintenance Checks
Routine home maintenance checks became my new weekend project. I set aside time every month to inspect my home — from checking smoke detectors to ensuring gutters were clear. There’s nothing quite like that feeling of being proactive!
I also made sure my emergency kit remained fully stocked and updated. Just last month, I swapped out my old flashlights for some new ones, and I even added a portable charger for my phone. Staying ahead of the game kept me relieved and ready!
And let me tell you, keeping up with yard work and repairs not only helps with disaster prep but gives my home that homely vibe, you know? It’s like a double win!
Reviewing and Adapting Plans
As life changes, so must our emergency plans. I regularly took time to review and update them. When I got a new pet, for example, I made sure to adjust our drills and kits accordingly. Keeping the family on the same page was key.
I also sought feedback from family members about our plans. This way, I could tweak things based on preferences and ideas. After all, resilience isn’t just about stockpiling supplies; it’s also about having everyone engaged in the process.
Mixing it all up kept things interesting and reminded us that being prepared is ultimately a team sport!
FAQs
1. What is disaster resilience?
Disaster resilience refers to the ability of a home or community to prepare for, respond to, and recover from various disasters, such as floods, hurricanes, or fires. It involves a combination of structural integrity, emergency preparedness, and community involvement.
2. How often should I review my disaster preparedness plan?
It’s best to review your disaster preparedness plan at least twice a year. However, each time there are significant changes in your living situation, such as new family members or moving, you should take the time to adjust your plan accordingly.
3. What should I include in my emergency kit?
Your emergency kit should include essentials like non-perishable food items, a battery-powered or hand-crank radio, water, a first-aid kit, a flashlight, extra batteries, and any necessary medications. Personal touches like favorite snacks or comfort items are excellent additions, too!
4. Can landscaping help in disaster preparedness?
Absolutely! Choosing the right plants, ensuring proper drainage, and creating defensible spaces in your yard can significantly enhance your home’s resilience against natural disasters. It’s a great way to combine beauty with functionality!
5. What role does community play in disaster preparedness?
Community plays a crucial role in disaster preparedness. Sharing resources, supporting each other during emergencies, and participating in local training initiatives can strengthen overall resilience. Together, communities can create a robust safety network that benefits everyone!

by Preparation Call Editorial Team | Jul 6, 2025 | Preparedness
1. Homesteading Gurus
Understanding the Homesteading Movement
Homesteading has become quite the buzzword lately, hasn’t it? It’s all about living off the land and being more self-sufficient. Personally, I love this concept because it aligns so well with the simple, back-to-basics lifestyle that many people crave these days. Homesteaders not only grow their food but often raise animals as well, making them experts in a variety of skills essential for self-reliance.
When diving into homesteading, I found that it really isn’t just about farming; it’s about a whole lifestyle change. You learn to appreciate the fruits of your labor (literally!) and become more connected with nature and the cycles of the seasons. These are powerful teachers, and the insights I’ve gained have been invaluable.
Many of the top homesteading experts offer resources like blogs, books, and workshops that can guide you through this journey, helping you to understand everything from vegetable gardening to cheese-making!
Key Figures in Homesteading
One of my go-to individuals is Joel Salatin, a fearless advocate for sustainable farming practices. His approach showcases how you can create a profitable farm that nourishes the community while respecting the environment. I appreciate how he emphasizes the relationship between farming and local food systems, strongly resonating with my own self-reliance philosophy.
Then there’s Amy Stross, known for her insightful blog “Tenth Acre Farm.” I love how she focuses on urban gardening and teaches us that you don’t need a massive plot of land to succeed at homesteading. Her tips have helped me maximize small spaces, showing me that every bit counts!
Lastly, I can’t leave out the incredible knowledge provided by The Prairie Homestead, created by Jill Winger. Her down-to-earth lessons are filled with practical advice on everything from chicken-keeping to canning, and her warm personality makes the learning process fun.
Getting Started with Homesteading
If you’re just starting out, my advice is to take it one step at a time. Don’t feel overwhelmed thinking you need to become a master right away. Start with small projects—maybe try your hand at container gardening or raising a few chickens. Get your hands dirty and enjoy the learning curve!
Furthermore, I found that connecting with local groups or online communities is a game-changer. You can exchange tips, share crops, and learn from one another’s experiences. It’s super gratifying to feel this sense of community while on your self-reliance journey.
Document your journey! I, for one, love to keep a journal about my successes and failures in homesteading. It helps clarify what works and what doesn’t, and maybe it can even inspire someone else down the line!
2. Survival Experts
Skills You Can’t Ignore
When it comes to self-reliance, survival skills are non-negotiable. I can’t emphasize enough how important it is to know how to take care of yourself in unexpected situations. Survival experts teach us skills that could one day save our lives, and hey, it feels empowering to know I’ve got it handled!
Building a good survival skill set starts with the basics: fire-making, foraging, and shelter-building. It’s fascinating to see how ancient techniques still hold value today. Honestly, learning how to start a fire with just a couple of sticks is surprisingly satisfying.
Beyond just the practicalities, these skills instill a sense of resilience. It puts me in touch with my capabilities and teaches me to remain calm under pressure—lifelong skills that are applicable in everyday life, too.
Notable Survival Experts
One of my key resources has been Bear Grylls, who has made survival techniques accessible through entertainment. Watching him navigate challenging environments has taught me a lot! His adventurous spirit encourages me to step outside my comfort zone while having fun.
Another fantastic figure in this realm is Cody Lundin, author of “When All Hell Breaks Loose.” He brings a unique perspective, blending survival skills with mental preparedness—which, let me tell you, is just as crucial as knowing how to tie a knot!
Lastly, I enjoy following the work of Dave Canterbury, who offers practical hands-on demonstrations and talks about the importance of resourcefulness, an aspect I truly appreciate. It’s about making the best use of what you have, and that resonates so strongly with my self-reliant nature.
Practical Steps to Develop Survival Skills
If you’re interested in honing your survival skills, start by researching local survival workshops or classes. They can be fun and allow you to apply what you learn immediately. I remember my first class—it was challenging but also a blast, and I left feeling empowered!
Consider reading survival manuals, watching instructional videos, or even trying survival scenario games with friends. The more you immerse yourself in these skills, the more comfortable you’ll become. Don’t forget to practice; it’s the true key to mastering any skill!
My tip? Create a survival kit tailored to your needs and keep practicing basic skills. Each time you go camping or hiking, bring your kit along and see what you can do. You’ll feel like a survival pro in no time!
3. Financial Independence Advocates
A Path to Self-Sufficiency
When I think of self-reliance, the first thing that comes to mind is financial independence. Having control over your finances feels liberating, don’t you think? Learning from experts in this area can help pave the way to a more self-sufficient lifestyle.
Understanding budgeting, investing, and savings is vital. It’s not just about pinching pennies; it’s about making your money work for you. This means creating a sustainable financial plan where you can support your chosen lifestyle without depending on others.
Financial independence isn’t just a dream; it’s totally attainable with some smart planning and effort. I love the idea of achieving freedom through financial savvy!
Financial Guides I Follow
One of the most inspiring figures for me has been Mr. Money Mustache. His philosophy of frugality combined with smart investment strategies feels incredibly relevant. He really flips the script on traditional thinking about work and money!
Another expert worth mentioning is Dave Ramsey. His straightforward principles about managing debt and budgeting resonate deeply with me. His baby steps approach is accessible for anyone and truly sets the foundation for financial independence.
Lastly, I can’t go without mentioning Suze Orman. Her personality shines in her teachings, and she breaks down complex financial information into digestible pieces. Her insights help instill confidence in managing finances better.
Taking Control of Your Finances
To start your journey toward financial independence, begin by creating a budget that reflects your values and goals. It’s fun to envision the kind of life you want to create and see how your spending aligns (or doesn’t) with that vision. I enjoy using apps to help keep track of my spending habits.
Next, work on building an emergency fund. Life can throw curveballs at you, so having a financial safety net can make all the difference. I’ve learned that saving a small portion every month can lead to a sense of security and peace of mind.
Lastly, educate yourself about investing. There are tons of great resources out there for beginners! I remember my first time buying stocks—it felt scary, but with the right knowledge, it became empowering. Invest in yourself and watch your financial independence grow!
4. DIY Enthusiasts
Your Own Home Solutions
Ah, DIY—my love! There’s something undeniably satisfying about creating something with your own two hands. From building furniture to sewing clothes, DIY not only saves money but also fosters creativity, making it a perfect avenue for self-reliance.
One of the coolest aspects of the DIY movement is that it encourages resourcefulness. Instead of depending on purchasing new items, you can repurpose materials you already have. This mindset shift can lead to a more sustainable lifestyle.
Plus, it’s a fun way to learn new skills and even involves a sense of accomplishment when you complete a project, and I can tell you, nothing beats that feeling!
Influential DIY Figures
One of my favorite channels is DIY Creators, where you’ll find endless inspiration for projects. The simplicity of the tutorials makes it easy for anyone to try their hand at crafting, and I’ve learned so much from watching his unique methods!
Another awesome figure in this arena is Ana White, known for her easy-to-follow furniture-building plans. She truly emphasizes that anyone can build furniture; you just need the right guidance, and that’s what I appreciate about her philosophy!
Don’t forget about Bob Vila! He’s like the godfather of DIY. His knowledge and expertise have guided countless DIY enthusiasts through home renovations and improvements. Watching his projects has motivated me to try things I never thought possible!
Embarking on Your DIY Journey
If you want to embrace DIY, start small! Choose a project that excites you, whether it’s a simple home decor item or a small garden project. Gather the necessary tools and materials and get to work—trust me, it’ll be worth it when you see the finished product!
Join online communities or local workshops to meet fellow enthusiasts and share ideas. There’s nothing quite like the energy of brainstorming with others who share your passion!
Lastly, document your progress! Sharing your DIY journey on social media not only encourages you to stay motivated but can inspire others, too. Remember, it’s okay to make mistakes; that’s where the best lessons often come from!
5. Nutrition and Health Coaches
Eating for Independence
Nutrition plays a massive role in self-reliance. I’ve realized that being knowledgeable about what I consume empowers me to make better choices that align with my personal values. Eating whole, natural foods is a significant part of my self-reliant journey.
Health coaches help us navigate the overwhelming array of diets and nutritional information out there. Their guidance can lead us to discover what works best for our unique bodies and lifestyles. It’s fascinating to learn how food can serve our health beyond just sustenance!
Having a deep understanding of nutrition can also encourage us to grow our food, fostering a more connected relationship with what we eat. I’ve loved exploring how to incorporate nutrition into self-sufficiency!
Guiding Lights in Nutrition
I always find wisdom from Michael Pollan, who emphasizes the importance of eating real food and understanding where it comes from. His no-nonsense approach to food choices resonates with my values of sustainability and simplicity.
Another great resource is Dr. Mark Hyman, whose focus on functional medicine has opened my eyes to how food can be used as medicine. His insights encourage a holistic view of health and nutrition, which is crucial to self-reliance.
All in all, I cannot forget about my favorite nutrition and wellness coach, JessiH Wellness. Her focus on intuitive eating has helped me build a healthier relationship with food, reminding me to listen to my body’s needs.
Building a Nourishing Lifestyle
To embark on a journey toward better nutrition, start incorporating more whole, unprocessed foods into your diet. Plan some meals around seasonal produce, and trust me, it will make a world of difference!
Experiment with cooking at home. I’ve discovered that preparing meals is an exhilarating task, and you gain control over what goes into your food. Plus, it simply tastes better when you make it from scratch!
Lastly, dive into nutritional education! There are so many resources available; whether you prefer podcasts, articles, or classes, learning more about nutrition can empower you greatly. It’s a key piece of the self-reliance puzzle!
FAQs about Self-Reliance Experts
1. Why is it important to follow self-reliance experts?
Following self-reliance experts can provide you with valuable insights and practical tips that can help you live a more independent lifestyle. They often share tried-and-true methods that can save you time and reduce frustration.
2. Can I become self-reliant if I live in an urban area?
Absolutely! You can implement many self-reliant practices in an urban setting—like container gardening, cooking from scratch, and learning DIY skills. With creativity and determination, self-reliance can be attainable anywhere!
3. How do I prioritize which area of self-reliance to focus on first?
Start with what interests you the most or what you’re passionate about. Whether it’s gardening, DIY projects, or financial independence, pursuing something that excites you will make the journey more enjoyable and fulfilling.
4. Are there beginner resources available for learning these skills?
Yes! There are plenty of books, blogs, and classes that cater to beginners. Don’t hesitate to seek out local workshops or online courses that focus on specific skills you want to learn.
5. How do I maintain motivation while becoming more self-reliant?
Celebrate your successes, no matter how small! Document your journey and share it with others. Connecting with like-minded individuals can also keep you motivated and encouraged on your path to self-reliance.





