When it comes to putting together an emergency kit for your family, the first step is to understand the specific needs of each member. Each person may require different essentials based on their age, health, and personal circumstances. For instance, young children may need specific items like diapers or formula, while elderly family members may require medications or mobility aids.
I often recommend starting with a family meeting to discuss everyone’s unique needs. This way, you can create a comprehensive list that ensures no one is left out. Involving everyone also helps teach kids about responsibility and the importance of being prepared.
Consider additional situations as well—maybe a family member has allergies or special dietary requirements. Essentially, your kit should cater to the unique mix that makes your family, well… yours!
Recognizing Potential Threats
Next, it’s crucial to identify the types of emergencies your family might face. Depending on where you live, you might be more susceptible to hurricanes, earthquakes, or even man-made disasters. Understanding these potential threats will help you tailor your kit accordingly.
I remember living in a coastal area and learning the hard way about the importance of preparation during hurricane season. I had to reconsider what essentials made the most sense. Each region has its quirks, so be sure to do your research.
Moreover, once you know the risks, you can instruct your family on what actions to take during each type of emergency. This knowledge will empower everyone to stay calm when things get chaotic.
Engaging Children in the Process
One of the best ways to ensure you have all bases covered is to involve the children. This can be as simple as having them help choose what goes into the emergency kit. It’s a fun way to make them feel included while also teaching valuable lessons.
For younger children, a “survival game” can be a great way to get them excited about the kit. Have them pretend to pack their own essentials based on toy items, which adds a playful element. You’ll be surprised at how serious they take it!
Older kids can take on more responsibility, perhaps leading the effort to check expiration dates on food or medications. Their participation fosters a sense of ownership over the kit and emphasizes its importance.
Essential Supplies for Every Family Kit
Food and Water Provisions
When you think about essentials, food and water are the big hitters. I can’t stress enough the importance of having a sufficient supply of non-perishable food. Think items like canned goods, energy bars, and, of course, plenty of bottled water!
Every family should aim for at least a three-day supply of food and water per person. It can be helpful to label these items with dates to ensure freshness. Plus, having a stockpile of food means you can skip that last-minute grocery dash if a crisis hits.
Don’t forget also to consider dietary restrictions—there’s no point in packing up a ton of peanut butter if someone is allergic. Think about what everyone actually eats and adjust accordingly!
First Aid Kits
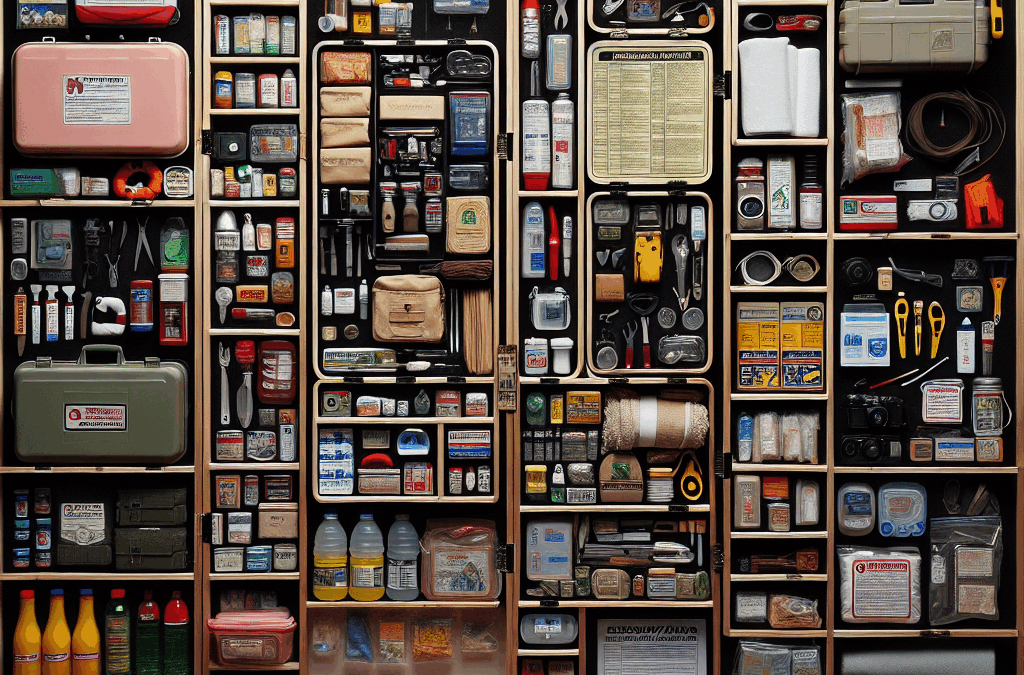
A well-stocked first aid kit is another critical part of your emergency kit. Now, I’ve seen a fair share of first aid kits that just contain a couple of Band-Aids, but that won’t cut it in a true emergency situation. Make sure to stock up on antiseptics, gauze pads, and any medications your family may need.
I also recommend including a pamphlet on basic first aid techniques. While you might think you remember everything from the last course you took, it’s always good to have quick-reference material on hand. It can literally save a life!
Don’t overlook any special medical needs, such as an EpiPen for allergies or inhalers for asthma. Make a checklist to keep track of everything, and ensure you review it regularly.
Safety Gear and Tools
Safety gear can really make a difference in times of need. Items like flashlights, batteries, multi-tools, and whistles should definitely be on your list. Trust me, these are the little things that can bring peace of mind during a crisis.
During a power outage, having reliable flashlights with extra batteries can turn a stressful night into a cozy family campout! I vividly recall a blackout during a snowstorm, and let me tell you, those dollar-store flashlights became treasured family items!
Consider including personal safety items, such as blankets for warmth, gloves, and even a basic survival guide. Knowing you have simple tools at your fingertips gives you all a sense of security.
Planning for Communication
Establishing a Family Communication Plan
Having a communication plan is crucial for ensuring everyone stays connected during an emergency. I suggest setting up a designated meeting place or a point of contact outside your immediate area. Life can get chaotic, and knowing where to meet can ease everyone’s mind.
It’s a good idea to write down emergency contacts, including neighbors, family, and friends. Keep this list in your emergency kit and also create digital copies in your phones. It’s super handy to have the information at your fingertips.
Lastly, holding regular family drills can help keep everyone in the loop. The more familiar your family members are with the plan, the smoother things will go during an actual emergency.
Using Technology to Stay Informed
In today’s world, technology is our friend! Make the most of apps and services that provide real-time updates on emergencies and potential threats. These can be lifesavers in knowing what actions need to be taken.
Additionally, consider having backup charging options for your devices, such as power banks. It’s essential to stay connected and receive critical updates, especially during power outages. No one wants to be caught off-guard!
Don’t forget about social media platforms; they can also be excellent resources for gathering information from your community about any unfolding situations. Just remember to verify info from reliable sources!
Reevaluating Your Plan
Once your emergency plan and kit are set, the work doesn’t end there. Reevaluating your plan is just as important as setting it up originally. As life changes—like new family members or moving—you need to update both your kit and your communication plan.
I like to set reminders on my calendar to review our emergency kit every six months. This helps ensure that food isn’t expired and that necessary supplies are replenished. It’s also a great opportunity to teach kids about responsibility!
Please keep in mind that emergencies can be unpredictable; don’t be afraid to ask for family input or expert advice on what else might be necessary. The goal is to feel prepared, not overwhelmed.
Conclusion
So, there you have it—a comprehensive guide to tailoring emergency kits for your family! It can seem like a daunting task, but breaking it down into manageable steps, engaging your family, and regularly reassessing your supplies will make the process smoother.
Whenever I hear of an emergency, I’m thankful for the effort I put into preparing my family. Feeling ready really alleviates stress and, above all, promotes a sense of security. I hope you feel inspired to assemble your family’s emergency kit with love and a bit of fun!
FAQ
What supplies should I prioritize in my family emergency kit?
The essentials you should prioritize are non-perishable food items, clean water, a first aid kit, safety gear (like flashlights and multi-tools), and important documents. Tailor these to your family’s needs!
How often should I check the contents of my emergency kit?
It’s a best practice to check your emergency kit every six months. This ensures that items are not expired and that you have everything your family might need in case of an emergency.
What resources can I use to identify potential local emergencies?
National and local government websites, news outlets, and community bulletin boards are excellent resources. Additionally, there are apps designed to provide real-time updates about local emergencies.
How can I involve my kids in the emergency preparedness process?
Involve your kids by having them help pack the kit, create a “survival game” with their toys, or assign them responsibilities like checking expiration dates. It keeps it fun and educational!
What should I do if my family goes through a real emergency?
Stay calm, follow your communication plan, and make sure everyone in your family knows where to meet. Utilize the items in your kit, and remember to check in with each other regularly. Support is key!
When disaster strikes, the stakes can be high. Whether it’s a natural calamity like a hurricane or an unexpected event such as a power outage, understanding the risks is your first step toward effective emergency preparedness. Acknowledging what could happen allows you to tailor your readiness efforts accordingly. Research local hazards—earthquakes, floods, wildfires—and assess how they might impact your home and community. This awareness not only equips you with knowledge but also fosters a proactive mindset.
Once you’ve grasped potential threats, it’s time to create a comprehensive emergency plan. This blueprint should map out what actions to take in various scenarios. Consider where you would go if you needed to evacuate and identify safe routes out of town. Designate a meeting point for family members in case you’re separated. It’s essential that everyone understands their roles; assign tasks based on age and capability so that each person knows what to do when the time comes. Document your plan clearly and ensure that every family member has access to it—this could save precious moments during a crisis.
Next comes the creation of an essential emergency kit, which serves as your lifeline when chaos unfolds. Start by gathering non-perishable food items such as canned goods and granola bars, enough to sustain each household member for at least three days. Don’t forget about water—aim for one gallon per person daily! Include medications, important documents (like IDs and insurance papers), first aid supplies, flashlights with extra batteries, and tools for communication like a battery-operated radio. Personalize this kit according to your family’s specific needs; toddlers may require diapers while elderly family members may need additional medical supplies.
In our fast-paced world inundated with information, staying informed is crucial during emergencies; hence effective communication plays a vital role in preparedness. Sign up for local alerts regarding weather updates or safety announcements from government agencies via smartphone apps or text messages. Establish group chats within your community or family networks so that everyone remains connected during crises—this can facilitate quick decision-making and resource sharing.
Lastly, practicing preparedness through drills ensures that everyone is ready when disaster strikes unexpectedly. Conduct fire drills at home or practice evacuation routes regularly—familiarity breeds confidence! You can even simulate other scenarios: What would you do in case of an earthquake? How would you respond if faced with severe flooding? Engage all family members in these exercises so they feel empowered rather than anxious about what lies ahead.
Emergency preparedness isn’t just about gathering supplies; it’s about cultivating resilience amid uncertainty. Equip yourself with knowledge about potential risks while crafting solid plans tailored to those situations—it transforms fear into readiness! As daunting as it might seem initially, taking small steps consistently will make all the difference when facing unforeseen challenges down the line.
So remember: Be prepared—not scared! Embrace this roadmap towards emergency readiness today!
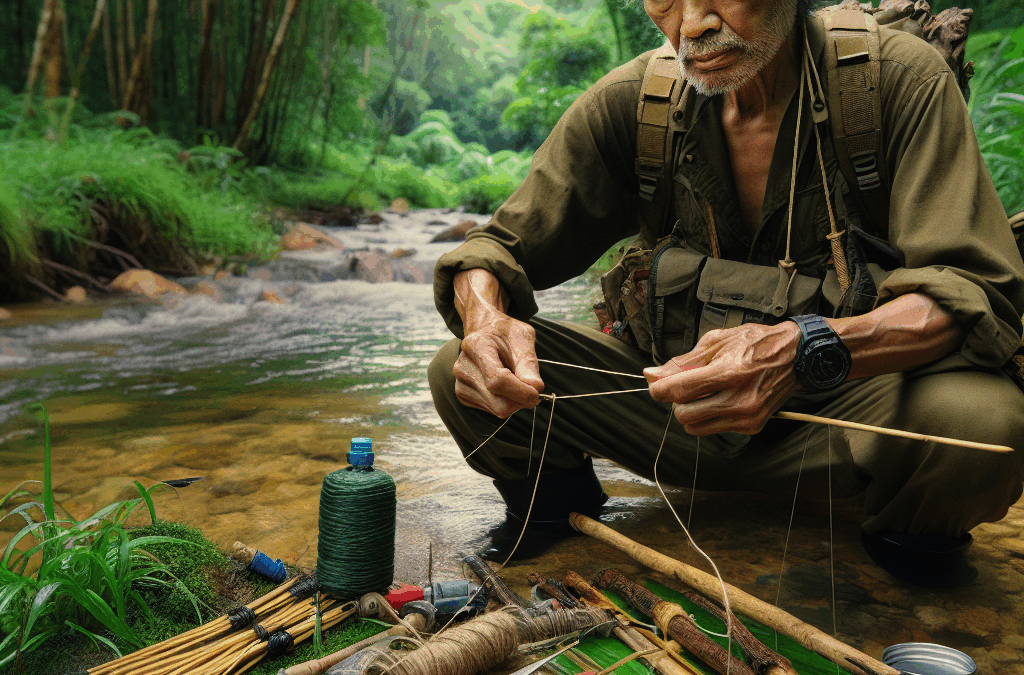
First things first, let’s talk about gear. I remember when I first got into survival fishing; walking into a tackle shop was like stepping into a candy store! But let’s keep it real—you don’t need a fancy rod and reel to catch dinner. A simple spinning rod is often the best bet for beginners. It’s versatile and easy to use, perfect for grabbing smaller fish like panfish or even larger ones.
When selecting a rod, I always suggest looking for one that feels comfortable in your hands. The reel should be smooth and easy to operate. I once spent a whole day wrestling with a sticky reel, and let me tell you, it almost ruined the experience for me. The right setup not only enhances your fishing effectiveness—it makes it fun too!
Don’t forget about line; a good fishing line can make or break your catch. I recommend monofilament line—it’s user-friendly and comes in various strengths. Just remember, the lighter the line, the more stealthy you’ll be in the water. It’s like a little ninja move for catching fish!
Selecting Bait: Natural vs. Artificial
Next up, let’s chat about bait. Deciding between natural and artificial bait can be quite the debate; I’ve had my own battles picking sides. Natural bait often gets the job done, especially if you’re fishing for species like catfish or trout. Worms, minnows, and even insects can be incredibly effective.
However, don’t underestimate artificial lures! A good spinner or crankbait has saved my bacon on more than one occasion. They can be excellent for catching predatory fish like bass. My trick is to match the lure color to the water clarity; muddy waters call for brighter colors, while clearer waters might require more natural tones.
Remember to also consider seasonal changes; what works in spring may not work in fall. I’ve learned through trial and error that being adaptable in my bait choices keeps the catch coming. Just pay attention to what’s swimming around in your area, and you’re golden!
Understanding Local Fishing Regulations
No one likes a ticket, right? Before you grab your gear and hit the water, it’s critical to check out local fishing regulations. When I first started, I didn’t think much of it—just assumed fishing was fair game everywhere. Spoiler alert: it’s not!
Every body of water can have its own rules regarding what species you can catch, bag limits, and even specific fishing seasons. Ignoring these can lead to hefty fines that’ll make you wish you’d just done your homework. Plus, it’s all about being a good steward of the environment; we want our fishing spots to be around for generations to come!
Another thing to check is the need for a fishing license. Some places require them, while in others it might be free. I’ve learned it’s always best to err on the side of caution and be properly licensed. It saves you the headache and lets you fish confidently!
Locating Fish in Different Environments
Freshwater Fishing Techniques
Now, let’s dive into where the fish are hiding. Freshwater fishing can be a blast, especially in lakes and rivers. I remember the first time I fished in a lake; it felt like a treasure hunt. Fish are typically near structures like rocks, submerged logs, or weed beds. If you know where the structure is, you’re halfway to a catch.
Time of day matters as well. Early morning and late evening usually see fish being more active. I’ve had my best luck during these ‘magic hours.’ They’re like the fish’s version of happy hour—you gotta be there to reap the benefits!
Understanding water temperature also helps; fish tend to prefer certain ranges depending on the season. I’ve found that in the summer months, early mornings are the best as the water is cooler. This is when they feel more comfortable coming out to play!
Saltwater Fishing Techniques
If you ever find yourself by the ocean, you’ve gotta give saltwater fishing a shot! It’s a whole different game compared to freshwater. The type of fish you can catch varies widely, from snook to grouper. Locating these fish can take a bit of local knowledge, so I always recommend talking to local anglers.
Consider fishing on the tides; low tide often reveals hidden spots that fish may use to hide. I’ve had great success casting my line near sandbars or jetties. There’s something incredibly exhilarating about the pull of ocean fish!
Don’t forget your gear! Saltwater can be tough on your equipment, so it’s best to use corrosion-resistant materials. I learned that the hard way after my first fishing trip when my fancy rod looked like a rusty relic just a few days later!
Ice Fishing Techniques
If you thought fishing was just a summer sport, think again—ice fishing is a thrilling way to catch fish in the colder months! There’s something peaceful about sitting on a frozen lake, surrounded by snow, and waiting for a bite. I know it sounds a bit crazy, but trust me, it’s relaxing.
A crucial step, though, is ensuring the ice is thick enough to support you. I usually wait until there’s at least four inches of solid ice. Then, I drill a hole in the ice using an auger and drop some bait down. Make sure you’re dressed warmly; being comfortable means you’ll enjoy it a lot more!
When the fish are biting, it’s like nothing else. I find that using small jigs tipped with bait works wonders. Be prepared to be patient, though. Ice fishing often requires a bit of finesse, as fish might nibble but not fully commit. Just sit back, enjoy the scenery, and wait for that sweet tug on your line!
Preparing Your Catch
Cleaning Fish: The Basics
Once you’ve landed a fish, the next step is cleaning it. This is a crucial step that can determine how much you enjoy your meal later! The first thing to remember is that it’s best to do this as soon as possible after catching it. Freshness matters, right?
I usually start by scaling the fish with a scaling knife, scraping from tail to head to get off those tough scales. It’s not glamorous, but someone’s gotta do it! After that, I’ll make a cut along the belly and remove the guts. Be sure to discard these properly to keep the area clean for the next adventurous angler.
All in all, rinse the fish in clean water. I often feel a sense of pride when I hold my freshly cleaned catch—it’s rewarding to know I’ve put in the work from fishing to table. Remember to keep everything cold until you’re ready to cook it, and you’ll have a fantastic meal ahead!
Cooking Your Fish
Now that you’ve got a clean catch, it’s time to cook! There are countless ways to prepare fish, but I usually opt for something simple like grilling or pan-frying. The key is to keep the seasoning light so that you can truly enjoy the flavor of the fish itself.
When grilling, I’ll sprinkle some salt, pepper, and maybe a squeeze of lemon. Wrapping the fish in foil can also keep it moist. I learned that grilling on high heat for a short duration usually yields the best results—just keep an eye on it so you don’t overcook it!
If frying is more your jam, a little oil in the pan can do wonders. I often add a bit of cornmeal or flour for a nice crispy crust. It’s like turning your fresh catch into a feast. You would not believe the satisfaction of sitting down to a meal you caught yourself!
Storing Leftovers
Okay, so you’ve caught and cooked your fish—now what if there are leftovers? Don’t worry; there are simple ways to store them for future culinary adventures. The first step is letting the fish come to room temperature before you put it away. I always make sure it’s cooled down, so it doesn’t mess with my fridge’s temp.
Then, I wrap it tightly in plastic wrap or foil, or store it in an airtight container. It’s crucial to label your storage container with the date to keep track of how fresh it is. Stored properly, it can last up to three days in the fridge!
For longer storage, consider freezing. I’ve had success freezing fish in vacuum-sealed bags. Just be sure to remove as much air as possible before sealing; this helps guard against freezer burn. You’ll thank yourself later when you can whip out that delicious frozen fish for a quick meal!
Safety and First Aid in Fishing
Staying Safe on the Water
Safety is paramount while you’re out fishing. No one wants a mishap to ruin their day. Wearing a life jacket is essential, especially if you’re out on a boat. I’ve seen too many accidents happen because someone thought they’d be fine without one.
Weather conditions can change quickly, so keep an eye on local forecasts. I learned this the hard way when a lovely sunny day turned into a thunderstorm during my fishing trip. I was soaked, scared, and wishing I had checked the weather before heading out!
Also, bring a first aid kit. I’ve had my fair share of small scrapes and cuts from fishing gear. Having basic supplies, like band-aids and antiseptic, can make a big difference. Safety and preparedness can keep your fishing experience enjoyable!
Handling Fish Responsibly
Being responsible about how we handle fish is just as important as catching them. Even if you plan to catch and release, ensuring the fish is handled gently is key. Using wet hands or wet gloves can minimize damage to its scales and slime coat, which is critical in the fish’s survival after release.
Fighting a fish too long can lead to fatigue and stress. I’ve learned to pay attention to the fish’s condition and to bring it in quickly if I’m planning to release it. A quick release can ensure the fish stands a better chance of survival.
Moreover, practicing selective harvest—meaning you keep certain species according to regulations—helps maintain healthy fish populations. We always want to fish responsibly, making sure our waters stay vibrant and full of life!
Basic First Aid for Fishing Injuries
Even with all the safety precautions, accidents can happen, especially when dealing with sharp hooks and fish spines. I’ve had my own run-ins, so it’s important to know a bit about first aid. Always keep a pair of tweezers handy for removing hooks from your skin, and never yank it out—it’ll only make it worse!
If you get a cut, clean it immediately and apply pressure to stop any bleeding. Most of the time, I just clean it and slap a band-aid on, but if it’s deep, seek medical help. In the great outdoors, minor injuries can be more serious than at home, so being prepared is vital!
That said, having a buddy with you while fishing can be a huge help. There’s strength in numbers, and it’s easier to manage injuries if someone else is around. Plus, you can trade off fishing duties while you care for each other!
Frequently Asked Questions
1. What are the best fishing techniques for beginners?
For beginners, I recommend starting with simple fishing gear, using natural bait, and practicing patience at different times of the day. Freshwater fishing is often easier to learn, so consider local lakes or rivers to start your fishing journey.
2. How can I tell if the fish are biting?
You’ll notice fish might nibble at the bait before fully committing. Keep an eye on your line; if it’s moving erratically or going slack, that’s a good sign there’s a fish down there. Experience helps you recognize these signs, so don’t be discouraged if it takes time!
3. How do I handle and release fish safely?
When handling fish, always use wet hands or gloves to protect their slime coat. If you’re planning to release them, keep them in the water as much as possible, and use a hook removal tool to reduce stress on the fish.
4. What should I bring for a day of fishing?
Essential gear includes your fishing rod, bait, and tackle. Don’t forget personal items like sunscreen, water, snacks, and a first aid kit. A fishing license, if required, should also be on your list. Always come prepared to maximize your experience!
5. What’s the best way to store fish after I’ve caught it?
After you’ve caught your fish, clean it as soon as possible and store it in a cold environment. If you plan to eat it soon, wrap it tightly in plastic or store it in an airtight container. For longer storage, freezing in vacuum-sealed bags is best.