Select Page
What Every Renter Needs to Know About Preparedness

What Every Renter Needs to Know About Preparedness

Understanding the Importance of Preparedness

Why Preparedness Is Key

Let me tell you, being prepared as a renter is absolutely crucial. From my experience, you never really know when something is going to go wrong—floods, fires, or even unexpected maintenance issues can pop up out of nowhere. It’s like life throwing a curveball when you least expect it. Being prepared gives you peace of mind and ensures that you’re not left scrambling when things go awry.

Plus, let’s be honest, being a renter means that you’re navigating a different ballpark compared to homeowners. Your landlord has certain responsibilities, but you can’t always rely solely on them. If there’s an emergency, you need to have a game plan ready to go. That’s why I’m all about keeping things organized and knowing what to do.

And speaking of knowing what to do, staying aware of local emergency procedures is a biggie. Trust me, knowing your building’s evacuation routes and emergency contacts can be a lifesaver—literally! It puts you one step ahead in stressful situations when everyone else might be panicking.

Creating an Emergency Plan

Developing Your Plan

Alright, let’s get real. The first step in creating an emergency plan is just sitting down and making a list. I know it sounds boring, but hear me out! Identify potential emergencies specific to your area. For instance, if you live near a fault line, earthquakes should be on your radar. Or if you’re in a hurricane zone, that’s another thing to consider.

Once you’ve pinpointed those emergencies, take it a step further. Think about how you’d respond. Who would you contact? Where would you go? Write this all down. I can’t stress enough how helpful it is to have a printed copy tucked away somewhere handy in your apartment.

Lastly, don’t forget to involve your roommates or family members in this process. Everyone should be on the same page about the emergency plan. A quick meeting over snacks can help everyone understand their roles, and it makes the whole thing feel less daunting!

Building an Emergency Kit

What to Include

Your emergency kit is basically your survival bag! You want to pack it with all sorts of essentials to get you through unexpected situations. Start with the basics: food, water, and first aid supplies. It’s crucial to have enough non-perishable food to last a few days, just in case you can’t get to a store.

Don’t forget important documents, like rental agreements and IDs. Store these in a waterproof bag. In case of emergencies, the last thing you want is to be fumbling around for your lease in the middle of disaster. I’ve been there, and it’s so frustrating!

And hey, add some personal touches to your kit! Maybe it’s a flashlight with extra batteries or a blanket to stay warm. Think about what would keep you comfortable or safe during a tough time. Having items that make you feel a bit more at ease can make a world of difference when things get crazy.

Staying Informed and Connected

Use Technology to Your Advantage

In today’s world, staying informed has never been easier, and you should totally take advantage of that! I use apps that send warnings about severe weather or emergencies in my area. Set these up on your phone and keep notifications turned on—you never know when something important will pop up!

Beyond apps, consider connecting with your neighbors. Having a solid community can be incredibly helpful. I’ve found that simply introducing yourself to neighbors can lead to exchanging contact info. You never know when someone will be able to lend a helping hand!

Also, don’t shy away from local resources! Many communities host preparedness workshops or provide valuable resources. Getting involved not only helps you learn but also connects you with others who are in the same boat.

Review and Practice Your Plan

Testing Your Plan

Okay, so you’ve got your plan and your kit—now what? Reviewing and practicing your emergency plan is super key! I recommend going over your plan at least once or twice a year. Things change, and so do your needs, so keeping your plan fresh is important.

And practice makes perfect, right? Doing a mock drill with your roommates or family can help everyone feel more confident. Plan out what you’d do in different scenarios. You’ll even pick up on any gaps in your plan when you run through it together.

All in all, give your emergency kit a good once-over. Check expiration dates on food and batteries, and refresh any supplies that are low. Doing this will keep you prepared and ensure you’re ready for anything life throws your way!

FAQs

1. What should I include in my emergency kit?

You should include non-perishable food, water, a first aid kit, personal documents in a waterproof bag, flashlights, batteries, and any comfort items you might need.

2. How often should I review my emergency plan?

It’s a good idea to review your emergency plan at least once or twice every year, especially after any major life changes or if you move to a new place.

3. How can I stay informed about emergencies in my area?

Utilize apps that send alerts about severe weather or local emergencies. Also, consider joining local neighborhood groups or community boards to stay updated.

4. Should I involve my roommates in the preparedness process?

Absolutely! Involving your roommates (or family members) ensures that everyone is on the same page and knows their role during an emergency, which makes everything smoother.

5. What’s the first step I should take to prepare for an emergency?

The first step is to sit down and identify potential emergencies that are relevant to your area, then create a comprehensive emergency plan tailored to those risks.
Copy of PREPARE Mag ad 970 x 250

How to Train Children on Emergency Response Actions

How to Train Children on Emergency Response Actions

Understanding Emergency Situations

What constitutes an emergency?

So, first off, we’ve gotta talk about what an emergency even is. Sometimes, it’s not just those massive situations like fires or earthquakes. It could even be something simpler like getting lost in a store! Recognizing the difference helps kids grasp the gravity of various situations.

I like to keep it engaging, so I often share stories or examples from my own life. It makes it relatable and, honestly, a lot more fun! Plus, when they can visualize their own experiences, it sticks better.

Getting kids to identify what an emergency looks like helps them understand when it’s time to react. Whether it’s feeling unsafe or needing help, it’s crucial they feel empowered to recognize those moments.

The importance of staying calm

If there’s anything I’ve learned, it’s that staying calm in a crisis can be a game-changer. Kids often take cues from adults in stressful situations. If they see panic, they might freak out too! I work on ways to model calmness through breathing exercises or grounding techniques, which they can use when things get tense.

When I practice this with children, I act it out. I pretend to be in a stressful situation—maybe I’m pretending to lose my keys—and I show them how to breathe and pause before reacting. It’s all about fostering a reaction they can remember when the heat is on.

Praise always helps when they show calmness in a practice drill. I make it a point to highlight how relaxing and focusing helped them navigate through the scenario. Positive reinforcement goes miles with kiddos!

Encouraging questions

Creating an open environment for questions is super important too. Kids are naturally curious, and I find that they often have brilliant questions that lead to deeper discussions about safety and emergency response. I always encourage them to ask anything, stressing that no question is too silly.

When they ask, I make sure to give thorough answers—using language that they’d understand, of course! I might share real-life examples where appropriate, linking back to discussions we’ve had previously. This way, it feels like a dialogue rather than a lecture.

Through this exchange, it nurtures their critical thinking. They learn not just to know facts, but to connect those facts to real-world scenarios. It’s all about stimulating their minds, and it certainly makes the experience more meaningful!

Developing a Safety Plan

Creating a family action plan

Alright, let’s dive into the nitty-gritty of making a solid family safety plan. First off, it’s about collaboration! I love getting everyone’s input, even if it sounds a little silly. Children have a way of thinking outside the box that adults sometimes forget.

We sit down together and brainstorm what we’d do in varied emergencies. I have them suggest things, and we build a really clear, step-by-step plan. Making it visual, like on a poster board, helps them remember the key points!

Then, I’ll have practice drills based on our action plan. We treat it like a fun game, and the kids get to be the heroes of the story, responding and executing our emergency plan. This practice is key, as it builds muscle memory for when they need to act!

Identify safe spots and escape routes

Next up, we map out safe spots in our home and community. It’s like our own little treasure map to safety! Honestly, kids think it’s cool to know where to go in case things go awry.

When we go over our escape routes, I like to make it interactive. For instance, we practice “what if” scenarios, and I ask questions on how we would get to safety. It sparks their imagination and keeps them engaged.

Giving them ownership on knowing these routes makes a difference! They begin to feel responsible for their own safety, and that’s empowering for them. It builds confidence, which is super important in high-stress situations.

Regular family drills

You know what’s next? Having regular drills! But let’s be real, we can turn these into something fun and not super serious. I suggest planning them out on the family calendar like a special event—it’s a great way to remind everyone to take it seriously but also enjoy themselves.

I like to mix things up so it doesn’t get boring. One time, we went outside and did a “fire drill” with a twist—we pretended we had to run with our favorite stuffed animals! It ended up being a hilarious bonding moment.

Afterwards, I always check-in to see how they felt about the drill. What worked, what didn’t, and what they’d like to do differently next time. This feedback loop is so crucial for their learning and for fine-tuning our plan!

Teaching Basic First Aid

Essential first aid skills

When talking about emergencies, knowing some basic first aid can really empower kids. I like to start with simple stuff—like cleaning a cut or putting on a bandage. Hands-on practice is key, so I often use fake injuries for them to work on!

Throughout these activities, I ensure that kids are actively engaged. We make it a team effort—everyone gets involved, and I encourage them to ask questions, helping them learn better as they practice.

Also, I keep it light-hearted! Sometimes it’s worth a laugh to stumble through a task together. They learn and bond at the same time, which adds to their confidence in these skills. Plus, they get to leave the session feeling like little medics!

Recognizing when to seek help

Sometimes, knowing when to step back from first aid and get professional help is just as important as the skills themselves. I like to discuss situations that might require a call to a trusted adult or 911. Understanding this distinction is crucial to ensure they don’t try to tackle things beyond their capabilities.

To make this relatable, we often role-play different situations. I’d act out being hurt while kids identify responses, such as when to call an adult. They feel like mini-heroes being decisive in these scenarios, which is a huge confidence booster!

Reinforcing that asking for help is strong rather than a weakness helps too. I want them to know that seeking advice from trusted adults is always a smart move in sticky situations!

Practice makes perfect

Lastly, it’s all about practice! I emphasize that just like sports or music, the more they practice first aid skills, the better they become. We set aside time each week, where we revisit and refresh their first aid knowledge.

Not only does this continue their learning, but it builds their confidence and helps them become more comfortable in real-life scenarios. It’s like turning them into mini-experts without them even realizing it!

And hey, who knows? One day, these skills could genuinely come in handy. They might save a friend, and that’s a fantastic feeling! It’s all about instilling both knowledge and courage in these young minds.

Practicing Communication Skills

Effective verbal communication

So, let’s talk about one of the most important aspects of emergency response—communication! It’s not just about knowing what to do; it’s also about being able to tell others about it. I start with simple games about expressing ideas or emergencies using just words, practicing calm and clear dialogue.

I find that when kids practice articulating their thoughts aloud, it helps them in high-stress situations to communicate what’s going on, and to share their needs with trusted adults. It’s that whole concept of making sure their voice is heard, especially in a crisis.

Having storytelling sessions can be fun for this too! They can create stories about emergency scenarios, making them verbalize their thoughts in an entertaining way. They’re learning while having a blast!

Non-verbal cues

But let’s not forget about non-verbal communication! Sometimes, it’s the stuff we don’t say that speaks the loudest. Whether it’s body language or facial expressions, I stress how essential it is to recognize these cues.

I set up activities where kids have to guess emotions based solely on facial expressions. It’s a great way to enhance their observational skills! We discuss how someone might feel during an emergency and how they can communicate compassion, support or alertness through these cues.

Emphasizing that they can also use their body language to show that they’re serious, calm, or trying to communicate can be super effective in an emergency. They could use their body to direct others for help, too.

Role-playing emergencies

One of my favorite methods to teach communication is through role-playing! I find that immersing kids in a scenario often allows them to verbalize responses naturally. We set up different emergency scenarios where they take turns being the one in need of help, then the helper.

This back-and-forth fosters empathy while showcasing how effective communication can change outcomes in an emergency. They can practice using clear language to both explain the situation and seek assistance.

Honestly, kids have a blast with it, and it doesn’t feel like a lesson! I always end the role-plays with a little debrief—what went well and what could be improved. It ties everything together while reinforcing their learning!

Conclusion

Training children on emergency response is an ongoing journey. It’s about making it fun, engaging, and empowering! As someone who’s walked this path, I’ve seen the positive impact it has on kids’ confidence. They bloom when they know they can handle what life throws at them.

It’s all about empowering them with knowledge and skills that could make a difference. They become more aware, more communicative, and capable of taking action when needed.

So if you’re like me, thinking about how to best prepare the next generation for any bumps in the road, keep it open, light-hearted, and fun. You’ll create lasting memories while ensuring they’re ready to handle emergencies with confidence!

FAQ

What types of emergencies should children be trained for?

Children can be trained to recognize various emergencies, including fires, medical situations, getting lost, severe weather, and other unexpected events. It’s crucial to cover a range of scenarios to prepare them adequately.

How can I make emergency drills engaging for kids?

To keep emergency drills engaging, incorporate fun elements like games, role-playing, or themed scenarios. Keeping things light-hearted while simulating real-life situations helps children feel less overwhelmed and more prepared.

At what age should children start learning about emergency response?

There’s no one-size-fits-all answer, but around ages 4-5, children can start learning about emergencies in simple terms. As they grow older, you can introduce more complex concepts and skills tailored to their maturity level.

What resources are helpful for teaching children about emergencies?

There are various resources available! Picture books, interactive apps, videos, and local community workshops can all help teach kids about emergency response. Hands-on practice and engaging discussions are also invaluable tools.

How do I ensure my child remembers what they’ve learned?

Repetition is key! Regularly reviewing what they’ve learned through fun discussions or practice drills helps reinforce their knowledge. Celebrate their progress and encourage questions to keep them engaged and confident in their skills.

Copy of PREPARE Mag ad 970 x 250

Sustainable Practices for Long-Term Food Storage

Sustainable Practices for Long-Term Food Storage

Hey there! Let’s chat about the sustainable practices I’ve embraced for long-term food storage. It’s kind of a passion of mine, you know? It’s all about being smart with what we have and ensuring that good food doesn’t go to waste. So, here are the five key areas I focus on, and I can’t wait to share my experiences with you!

Choosing the Right Storage Containers

Materials Matter

First things first, the materials you choose for food storage can really make or break the whole operation. I’ve experimented with glass, metal, and plastic containers. Personally, I love glass because it’s non-toxic and doesn’t leach chemicals into my food. Plus, it’s super easy to clean!

That said, I do have a few sturdy plastic containers for things like grains and beans. It’s all about balance! Just make sure any plastic you use is BPA-free to keep things safe and healthy.

Don’t forget about vacuum seal bags! They’re fantastic for stashing away the goodness while eliminating extra air. It’s like wrapping your food in a protective hug, helping it last longer.

Size and Shape

Let’s talk about size and shape! I’ve got various sizes of containers – small for snacks and large for bulk items. It’s super practical to have a variety on hand. I can’t tell you how many times I’ve regretted using too big of a container for just a bit of food.

Also, consider the shape of your containers. I mean, stackable containers can save a ton of space in the pantry or freezer. Plus, you get that satisfying look of organization that makes me feel all warm and fuzzy inside!

Remember, it’s not just about storage; it’s also about making your kitchen look good. You know, eye-catching containers make a difference, and we all love a bit of aesthetic appeal.

Sealing and Labeling

Sealing is like the cherry on top of good storage practices! Make sure your lids are airtight to keep moisture and pests at bay. I love doing the double-check, making sure I hear that satisfying ‘pop’ when I seal a jar.

And can we talk about labeling? I can’t stress how much easier meal prep becomes when I know exactly what’s in each container. I started using a simple label maker and it’s a total game-changer. No more mystery jars lurking in the back!

And hey, don’t forget about dates! It’s important to keep track of when things were stored, especially if you’re using the “first in, first out” method. It saves you from the stress of trying to remember what’s in there!

Utilizing Preservation Techniques

Canning

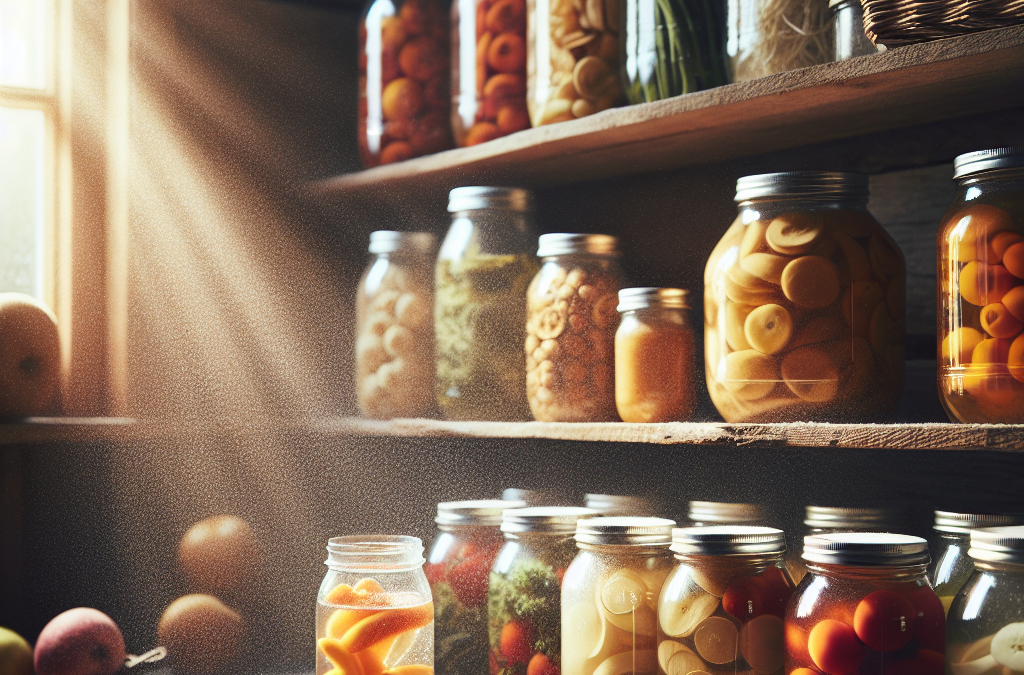
Canning has been an absolute lifesaver for me! I remember the first time I tried it; I was so nervous but now it feels like second nature. The thrill of watching those jars seal is just exhilarating. I like to can tomatoes, fruits, and even some pickles.

The best part? It preserves the taste of summer all year long! Just be sure to follow safe canning guidelines. We don’t want any botulism creeping into our goodies.

I always set aside a weekend for canning, turn up some tunes, and have fun with it. It’s like a mini-party in the kitchen, and I get to share the fruits of my labor with friends!

Freezing

Freezing is another awesome technique I swear by! Seriously, it’s amazing how much food you can save by freezing. Fresh fruits, veggies, and even some cooked meals can easily be frozen for later use. I often spend a few hours prepping food for freezing whenever I have a surplus from the garden.

One tip I’ve learned is to slice or chop food before freezing. It makes it easier to portion and use later. Plus, foods like berries freeze perfectly on a baking sheet before they get stored in bags, preventing those clumps.

Don’t overlook the power of meal prep on your freezing days! I like packing entire meals in freezer-safe containers, so all I need to do is pop one out and heat it up. Believe me, it’s a lifesaver on those busy weeknights!

Dehydrating

Dehydrating food has become somewhat of a hobby for me! I love turning fruits into tasty chips or creating my own vegetable powders. It’s pretty cool knowing I can stretch out the life of food in a fun and creative way.

If you’re thinking about trying dehydrating, get a good dehydrator! It makes the process so much easier. I often whip up a batch of apple chips or dried herbs, and they last forever.

Plus, dehydrated foods make awesome snacks for road trips or hikes. They’re lightweight and packed with nutrients, which is a win-win. I even toss some in my granola, and it takes breakfast to a whole new level!

Buying and Storing in Bulk

Finding Local Sources

Buying in bulk from local farmers and markets is one of my favorite ways to save money and minimize packaging waste. I love talking to the vendors about their practices and knowing where my food comes from. It’s like connecting with my food on a deeper level!

Also, many local co-ops offer bulk buying options for grains, beans, and spices. Plus, you can bring your own containers, which feels great and helps cut back on single-use plastics.

Support your local economy! It’s so rewarding to build relationships with farmers and see my money going directly to them instead of big corporations.

Proper Storage Techniques

When it comes to storing bulk items, organization is key! I use clear bins labeled for grains, beans, and other staples. It makes it easy to grab what I need without rummaging around, saving me time and potential mess.

Also, keep a close eye on the temperature and humidity in your storage area. A cool, dark place is ideal for most items. Trust me, it’s worth investing in good storage solutions to protect your bulk buys.

Don’t be afraid to portion bulk items into smaller containers for easier use. I often do this with items like rice or flour, just to keep things fresh and manageable.

Using the Right Oxygen Absorbers

Ultimately, I use oxygen absorbers when I’m storing large quantities of dried foods. They help keep them fresher for longer! Just make sure to follow the instructions for how many to use based on the size of your storage container.

I like to buy them in bulk online, and they’re a total game changer! Knowing that I’m preserving my food efficiently gives me peace of mind and reduces waste. It’s like having a secret weapon in my food storage arsenal.

And don’t forget: Always check the expiration dates and replace the absorbers as needed. Keeping things fresh means you’ll always have delicious food at the ready!

Creating a Meal Planning Routine

Plan Ahead

Meal planning has been a total lifesaver for maintaining my food storage. I try to dedicate a bit of time each week to plan out meals based on what I have stored. It not only reduces waste but also saves time during busy weeks!

I love creating a simple template to keep track of what I’ll be using from my pantry and freezer. It’s nice to know that I can whip something up without scrambling for ingredients at the last minute.

Plus, it’s a fun opportunity to try new recipes! I regularly browse through cookbooks or blogs for inspiration, especially to make use of whatever’s in season. Cooking becomes an adventure!

Incorporating Seasonal Foods

When meal planning, I always keep the seasons in mind. Incorporating seasonal produce not only supports sustainable practices but also enhances flavor. Being aware of what’s in season often leads me to new ideas for dishes!

Using seasonal ingredients can also save you money when shopping at local markets. It helps me stay connected with nature’s cycles and keeps my diet varied and exciting.

Don’t hesitate to explore farmers’ markets for unique seasonal finds. You might discover some delightful fruits or veggies that you’d never thought about using before!

Keeping Track of Inventory

Ultimately, keeping an inventory of what I have on hand is essential. I simply use an app on my phone or even a good old-fashioned notepad. It helps me stay organized and avoid overbuying.

Plus, it’s satisfying to check things off as I use them up. I often feel like I’m on a mission to use everything in my pantry before it goes bad!

Don’t forget to regularly reassess your stock, especially when buying in bulk. This way, you can prioritize meals and ensure that what you have is being used rather than stored indefinitely.

Incorporating Sustainable Practices

Minimizing Waste

Sustainability isn’t just a trend; it’s a lifestyle. I focus on minimizing waste by using food scraps creatively. Those veggie peels? Yes, they can become broth! And stale bread? Croutons, here I come!

I’ve made it a point to share these tips with friends and family. It’s honestly heartwarming to see others embracing less waste in their lives. Plus, sharing ideas can spark fresh inspiration!

By keeping our waste minimal, we contribute to a healthier planet. It’s a small change that can lead to significant impacts. We can all make a difference, one food scrap at a time!

Educating Others

I believe that sharing knowledge can lead to broader changes in our communities. Conversations about food storage, sustainability, and minimizing waste can lead to real action. I love hosting little workshops with friends where we dive into storage techniques and canning.

Social media is another great platform for spreading the word. I often share my food storage successes (and sometimes failures!) on social channels to encourage others to give it a go. It feels like a supportive community effort!

Everyone can benefit from learning about food storage practices. The more we know, the more empowered we feel to make sustainable choices!

Supporting Sustainable Brands

One more way to practice sustainability is by supporting brands that focus on eco-friendly practices. I’m mindful of where I buy my storage containers, food, and other supplies. It feels good to invest in companies that prioritize our planet.

There are awesome brands out there that make biodegradable or reusable storage solutions. I often do a little research before making purchases to ensure my money goes to the right places!

By supporting sustainable brands, we send a message that we care about the environment. It feels good to know that I’m playing a part in fostering change, and I hope it inspires others to do the same!

Frequently Asked Questions

1. What are some recommended containers for long-term food storage?

Glass jars and vacuum seal bags are top choices. They’re durable and help keep food fresh without leaching harmful chemicals.

2. How can I minimize waste when storing food?

Utilize food scraps creatively, like making broths or composting. Planning meals based on what you have helps reduce waste too!

3. What is the best method for preserving fruits and vegetables?

Canning, freezing, and dehydrating are excellent methods. Each has its benefits, so choose based on what works for you!

4. How do I start a meal planning routine?

Begin by assessing what you have, then create a weekly menu. Stick to seasonal ingredients to keep things fresh and exciting!

5. Why is it important to support sustainable brands?

Supporting sustainable brands helps promote eco-friendly practices and reduces your carbon footprint, contributing to a healthier planet.

Copy of PREPARE Mag ad 970 x 250