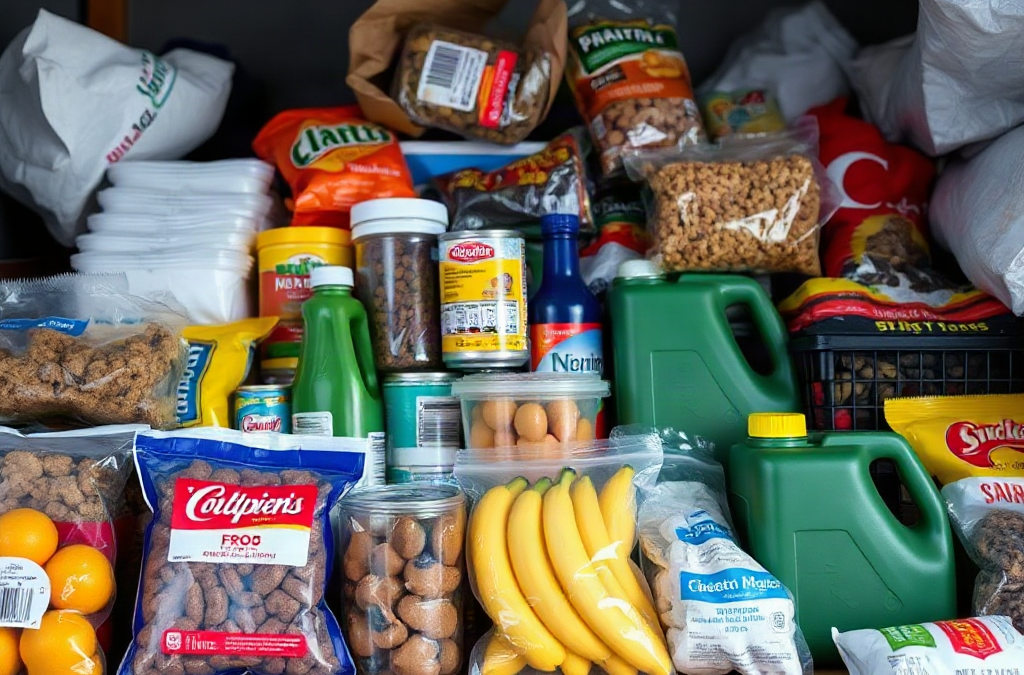
Build a Rotation System Around Use and Replacement Dates
A reliable stockpile rotation system begins with a complete inventory, not with a new shelving unit. Record each item, quantity, purchase date, printed date, and storage location. The printed date may describe quality rather than an automatic safety cutoff, and its meaning varies by product, but it remains useful for deciding which supplies deserve earlier attention. Items with clear manufacturer expiration dates, such as some medicines, should be managed more conservatively than unopened dry staples whose quality may change gradually.
Separate the stockpile into practical groups: everyday foods, long-term foods, water, first-aid and medicines, cleaning supplies, batteries, and personal-care products. Each group has a different rotation rhythm. Canned beans used regularly may enter the household meal plan every few weeks, while spare batteries might only need inspection for leakage and corrosion. Treating every item as though it needs the same monthly action wastes time and makes the system harder to maintain.
The simplest method is first in, first out. Place the newest purchase behind matching older items, then take from the front. For products with several date formats or multiple lots, add a removable month-and-year label to the shelf edge. A spreadsheet can help when quantities are large, but a handwritten shelf card may be more durable during a power outage. The best system is the one that matches how the household actually shops and cooks.
For example, if a household adds six cans of tomatoes each month, it should use the front cans for pasta sauce, soup, or chili and place the new cans behind them. If the household rarely eats canned tomatoes, buying more may be the wrong response to a perceived preparedness gap. Rotation exposes that mismatch: supplies that never enter normal use are likely to become forgotten, duplicated, or unsuitable for the household’s preferences.
Use Stockpile rotation methods for preventing expired supplies as an operating routine rather than a one-time cleanup. At the first setup, prioritize items with the shortest remaining date, duplicate packages, damaged labels, and goods stored in hot or damp locations. That sequence produces a quick reduction in risk before you spend time cataloging low-risk items.
Arrange Shelves So Older Supplies Move First
Physical arrangement determines whether rotation happens naturally or depends on memory. Store identical products together, keep labels facing outward, and leave enough space to slide older packages forward. A crowded shelf encourages people to pull from the easiest visible position, which is often the newest item. That behavior quietly reverses the intended order.
Use separate zones for active household use and reserve stock. The active zone contains products currently being consumed; the reserve zone holds additional units. When an active-zone item is used, replace it from the reserve before buying more. When new stock arrives, place it at the back of the reserve group. This two-zone approach is often easier than trying to maintain a single deep shelf where every package is difficult to see.
Storage conditions matter as much as shelf order. Heat, humidity, sunlight, pests, and repeated temperature swings can shorten useful life or damage packaging before a printed date arrives. Keep dry foods in a cool, dry, dark area; protect paper goods from moisture; and avoid placing cans directly on a concrete floor where condensation can contribute to rust. Follow product-specific instructions for medicines, chemicals, and batteries rather than assuming a pantry is suitable for everything.
A basement shelf illustrates the tradeoff. It may provide convenient space for canned goods, but a damp basement can damage labels, encourage corrosion, and make an inventory difficult to inspect. A smaller indoor cabinet may hold less but provide better visibility and more stable conditions. Capacity is not the only measure of a useful stockpile; accessibility and inspectability determine whether the contents will actually be used.
Do not keep damaged cans merely because their dates look acceptable. Bulging, leaking, severe rust, broken seals, swollen packaging, unusual odors, or signs of pests warrant caution. Do not taste questionable food to test it. When an item is unsuitable, remove it from the inventory immediately and record the replacement need. Leaving it on the shelf creates false confidence and forces the same decision during the next review.
Handle Different Supply Types and Storage Risks
Food, water, medicine, batteries, and hygiene products should not share one uniform rotation rule. Food rotation usually depends on household consumption, package condition, and quality dates. Water storage depends on the container, treatment approach, storage environment, and the guidance associated with the specific product. Medicines require particular attention to labeled expiration dates, storage instructions, and changes in appearance. Batteries need checks for leakage, corrosion, and compatibility with the devices in which they are kept.
Dry staples such as rice, pasta, oats, and flour are easy to overlook because they may appear stable. Their risks include moisture, insects, rancidity in higher-fat products, and gradual quality loss after opening. Store smaller quantities in containers that can be closed securely, and mark the opening date when the original package is transferred. A bulk package is not automatically a better value if the household cannot use it before quality declines.
Canned foods are generally easy to stack and rotate, but stacking too high can hide older cans and make inspection difficult. Group cans by type and use the shortest-date group first. For foods with a best-by date, assess the package and product according to applicable food-safety guidance rather than treating every date as identical. When doubt involves a damaged container or questionable seal, discard the item instead of trying to recover its value.
Nonfood supplies create different failure points. Alkaline batteries can leak when left for long periods in equipment, so store them according to manufacturer guidance and inspect devices separately. Adhesives, disinfectants, sunscreen, and some personal-care products can lose performance or change texture over time. A stockpile that contains plenty of products but lacks working batteries, usable tape, or effective cleaning supplies is not fully functional.
Choose rotation priority by consequence as well as age. A slightly stale snack may be inconvenient, while an out-of-date prescription medicine or compromised water container may create a more serious problem. Keep medicines and chemicals separated from food, and follow professional or official disposal guidance for unwanted medicines and hazardous products. The rotation record should identify these high-consequence items clearly so they do not disappear among ordinary pantry checks.
Run Monthly Checks Without Creating Excess Work
A sustainable inspection routine has a short monthly check and a more deliberate seasonal review. The monthly check should confirm that older products remain accessible, newly purchased items were placed behind existing stock, and any visible damage or date issue has been recorded. It does not need to involve counting every packet if the system is organized by defined shelf zones and standard quantities.
During a seasonal review, remove items from deep shelves, clean the storage area, check for moisture or pests, and compare actual quantities with the household’s intended reserve. Review whether the stockpile still reflects current diets, household size, allergies, medical needs, and available storage. A change in living arrangements may make a formerly sensible quantity excessive or inadequate.
Use a simple decision sequence:
Use soon: Move approaching-date items into normal meals or daily household use.
Relocate: Bring older matching items forward and put replacements behind them.
Remove: Dispose of compromised or unsuitable supplies through appropriate channels.
Rebuy selectively: Replace only what the household uses and genuinely needs.
Calendar reminders work better when linked to an existing event, such as the first weekend of each month or a regular grocery trip. A printed checklist on the storage door can outperform an app that nobody opens. If several adults use the stockpile, label the system plainly: “front items first,” “new stock behind,” and “record removals.” Shared visibility prevents rotation from becoming one person’s hidden responsibility.
Common failure occurs after a large shopping trip or donation. New cases are stacked in the most convenient space, older cases remain behind them, and the inventory no longer reflects reality. Correct that immediately by dating the new purchase, moving older units forward, and adjusting the count. A rotation method is working when older supplies are regularly consumed, missing items are noticed quickly, and the reserve remains easy to audit without emptying the entire room.
Match Stockpile Size to Household Consumption
The most effective stockpile is sized for realistic consumption rather than an aspirational shopping list. Review several ordinary grocery cycles and identify foods, drinks, hygiene products, and household consumables that are already used consistently. Those items are natural rotation candidates because they can leave reserve storage through normal routines instead of requiring special projects.
Preference matters. A household that does not eat canned fish will not reliably rotate it, even if it has a long stated shelf life. A person who uses a particular soap, coffee, or infant-care product may rotate those supplies quickly and notice changes in packaging or availability. Substitution is possible, but it should be tested before an item becomes part of the reserve. Buying unfamiliar foods only because they are inexpensive often produces waste and weakens confidence in the system.
Budget and space also shape the right approach. Limited space favors compact, frequently used items and smaller quantities reviewed often. A larger storage area may support deeper reserves, but it increases the burden of labeling, environmental control, and inspection. The extra capacity is worthwhile only if the household can maintain visibility and afford replacements before older goods become unusable.
Linking rotation to meal planning is a practical compromise. Select one or two reserve items for ordinary meals each week, then replace what was consumed during the next shopping trip. Keep a small “use next” basket for items nearing their preferred-use date, but do not use it as a holding area for damaged products or goods requiring special storage. The basket should reduce forgotten inventory, not postpone a disposal decision.
For more detailed household organization, connect this routine with Stockpile rotation methods for preventing expired supplies and review the system whenever the household’s needs change. The goal is not to preserve every package indefinitely. It is to maintain a clean, known, usable reserve whose contents match actual needs and whose oldest items have a clear path into regular use.
Frequently Asked Questions
What is the simplest stockpile rotation method?
Use first in, first out: place newly purchased matching items behind older ones, keep labels visible, and consume the front items first.
How often should a household inspect its stockpile?
A brief monthly check is suitable for shelf order, damage, and obvious date issues; conduct a deeper seasonal review for storage conditions and quantities.
Should every expired food item be thrown away?
Not every date label has the same meaning, but damaged packaging, swelling, leakage, severe rust, or questionable seals should be treated as disposal concerns. Follow applicable food-safety guidance.
How can I rotate supplies in a small apartment?
Use shallow, labeled zones and keep reserves limited to products the household already consumes. Smaller quantities with frequent review are safer than inaccessible bulk storage.
What should be checked besides expiration dates?
Inspect seals, swelling, corrosion, leaks, pests, moisture, odors, texture changes, battery leakage, and whether medicines or chemicals were stored according to their instructions.
Further Reading
Authoritative Sources
Food Product Dating fsis.usda.gov
Explains how date labels on foods should be interpreted and why product dating does not mean every label has the same purpose
Don’t Be Tempted to Use Expired Medicines fda.gov
Provides safety-focused information for deciding how to handle medicines beyond their labeled expiration dates
Conclusion
Preventing expired supplies is mainly an organization and consumption problem, not a shopping problem. Record what enters storage, place older matching items where they will be used first, and separate food from products with different handling requirements. Monthly shelf checks catch misplaced purchases and visible damage, while seasonal reviews expose moisture, pests, changing household needs, and quantities that no longer make sense. Prioritize medicines, water, damaged containers, and heat- or moisture-sensitive goods according to their specific instructions. For food, build the reserve around meals the household already eats so rotation happens naturally. A smaller, visible stockpile that is routinely used and replenished is more dependable than a larger cache hidden behind newer purchases.
How Cascading Failures Spread Across Essential Services
A cascading failure occurs when an initial disruption weakens several connected systems in sequence. A hurricane, wildfire, earthquake, flood, cyber incident, or severe winter storm may begin with one obvious problem, but the wider danger often comes from dependencies that are easy to miss. Electricity may be needed to operate water treatment, fuel pumps, refrigeration, elevators, cellular equipment, and medical devices. Roads may be needed to move fuel and repair crews. Communications may be needed to coordinate every response.
The useful question is not only “What hazard could occur?” but “What stops working when the first service is unavailable?” A household that has stored water but relies on an electric pump may face a different problem from a household connected to a gravity-fed system. A community shelter with a generator may still struggle if its fuel cannot be delivered, its ventilation fails, or its toilets depend on running water. Mapping these links reveals where a small backup can prevent a much larger disruption.
Consider a winter storm that interrupts electricity. Heating systems stop, mobile towers lose backup power, traffic signals fail, and fuel stations cannot process transactions. Residents may then drive farther for heat or supplies, increasing congestion while road conditions worsen. If a water utility also loses pressure, a boil-water notice or loss of service may follow. None of these effects should be treated as separate surprises; they are connected consequences that belong in one contingency picture.
Weak planning usually assumes that a single replacement will cover the original service. A portable generator may replace electricity for a refrigerator, but it cannot automatically replace safe fuel storage, ventilation, maintenance, or the public grid that supports water and communications. A paper map may preserve navigation, but it does not solve a closed bridge. Effective Contingency plans for cascading failures during disasters identify the service, its dependencies, its fallback, and the point at which the fallback becomes unsafe.
Building Contingency Plans Around Dependencies
A strong plan begins with essential functions rather than equipment. List what must continue, what can be reduced, and what can stop temporarily. Life safety, urgent medical care, potable water, sanitation, food protection, shelter, information, and access to assistance normally deserve higher priority than comfort or convenience. This approach prevents a common mistake: spending heavily on a backup device while leaving the dependent supplies, skills, or operating conditions unaddressed.
For each essential function, record four details: the primary system, the dependencies that could fail, the fallback method, and the person responsible for activating it. For example, “maintain drinking water” may depend on municipal pressure, an electric well pump, containers, treatment equipment, and a method for identifying safe sources. The fallback could involve stored water first, followed by an approved treatment method if local authorities indicate that the source is usable. The plan should state who checks notices and how the household avoids mixing untreated and treated supplies.
Use different failure paths instead of duplicating one vulnerable solution. Two battery-powered phones that depend on the same cellular network are not two independent communication options. Likewise, two vehicles may not provide redundancy if both need the same fuel station or must cross the same damaged bridge. More resilient combinations might include text messaging, a battery or hand-crank radio for official information, a prearranged out-of-area contact, and a physical meeting location. Each option has limits, so the plan should explain when to switch.
A practical dependency worksheet can be compact:
Function: What must remain available, such as medication refrigeration or drinking water.
Failure chain: Which services, parts, people, or routes support it.
Fallback: What works if the primary method fails for several hours or days.
Trigger: The observable condition that activates the fallback.
Constraint: Fuel, ventilation, storage, accessibility, training, or legal limits.
The tradeoff is complexity. A detailed plan can become unusable when people are tired or frightened. Keep the main version short, then store technical instructions separately. Mark shutoff locations, medication information, essential contacts, and meeting points where they can be found without internet access. For homes with children, older adults, disabilities, or animals, assign responsibilities that match actual abilities rather than assuming every person can lift, drive, monitor equipment, or evacuate quickly.
Triggers, Priorities, and Backup Operating Modes
Contingency plans work better when they define triggers before a crisis. A trigger is a specific observation that changes the operating mode: loss of water pressure, an evacuation order, a medical device running on its reserve battery, a road closure, a fuel shortage, or an inability to verify official information. Without triggers, people may delay action while waiting for certainty, or consume limited supplies too quickly because they have no conservation threshold.
Use staged responses rather than one dramatic decision. A normal mode might rely on utilities and ordinary shopping. A restricted mode could conserve batteries, limit refrigerator openings, charge essential devices, verify water status, and contact vulnerable relatives. A severe mode might require relocation, sheltering elsewhere, or requesting emergency assistance. The names do not matter as much as the actions and the conditions attached to them.
Priorities should reflect consequences, not convenience. If electricity fails, preserve medical equipment and communications before charging entertainment devices. If water service becomes uncertain, protect drinking and hygiene reserves before using water for cleaning vehicles. If roads become unreliable, decide whether an early move is safer than a late evacuation. Remaining at home may conserve fuel and reduce exposure to traffic, but it may be a poor choice when heat, medical care, sanitation, or structural safety is deteriorating.
A short decision sequence can help under pressure:
Check for immediate threats such as fire, structural damage, hazardous air, flooding, or medical danger.
Confirm which essential services are actually unavailable rather than relying on rumors.
Protect people with urgent needs and calculate the remaining time for medication, heat, water, or power.
Activate the least risky fallback and conserve resources that support the next fallback.
Set a review time and an escalation condition, including when to leave or request assistance.
A frequent failure is treating the worst-case scenario as the only scenario. That can lead to unnecessary travel, unsafe generator use, or exhausted supplies before outside assistance is needed. The opposite mistake is waiting for total system failure. A backup fuel container, for instance, is useful only if acquired before shortages, stored safely, and paired with equipment designed for that fuel. A plan should balance early preparation with disciplined consumption.
Include accessibility and human factors in every stage. A person who cannot use stairs may need an evacuation location selected before elevators fail. Someone dependent on refrigerated medicine may need a clinician or pharmacist’s instructions for storage limits rather than improvised cooling. These details make the contingency plan operational instead of merely descriptive.
Testing, Communication, and Recovery Decisions
Testing exposes dependencies that written plans conceal. Run a short exercise in which the main power, internet, and preferred travel route are unavailable at the same time. Do not create dangerous conditions or intentionally disconnect critical medical equipment; simulate those failures safely and inspect the results. The purpose is to learn whether people can locate supplies, understand triggers, communicate decisions, and operate backups without outside instructions.
A useful exercise might reveal that the radio has dead batteries, the generator cannot be used indoors, the contact list contains old numbers, or the meeting point is inaccessible after a bridge closure. It may also show that supplies are stored in a locked shed, that one person knows the shutoff valves, or that a family member cannot carry the planned emergency bag. Correcting these findings is more valuable than adding another category of gear.
Communication plans should specify message content, timing, and alternatives. A short text can state location, condition, needs, and next check-in time. Prearranged rules reduce repeated calling when networks are congested. A designated contact outside the affected area may help relay updates, but that arrangement should not be treated as guaranteed. Keep printed contacts, addresses, medical information, and meeting locations available when phones cannot be charged.
Recovery also needs decision rules. Restoring one service does not mean the whole system is safe. Electricity may return before water quality is confirmed; a road may open before fuel deliveries resume; a building may have power while sewage or ventilation remains impaired. Follow instructions from relevant authorities and service providers, and treat unofficial claims cautiously. Restart equipment gradually, inspect for damage, and avoid entering flooded or structurally compromised areas merely because a utility appears to be operating.
Review the plan after every exercise, outage, relocation, or near miss. Replace expired supplies, update contacts, rotate stored water and fuel according to product instructions, and record which assumptions failed. A small household may need only a one-page action sheet and a few labeled containers. A neighborhood, workplace, or facility may need role assignments, supplier alternatives, access control, and continuity records. The right level of detail is the minimum that allows another capable person to act correctly when the primary decision-maker is unavailable.
For a more complete household approach, connect these actions with Contingency plans for cascading failures during disasters that address shelter, evacuation, supplies, and information as one linked system. The measure of readiness is not how impressive the inventory looks; it is whether the plan still functions after two or three supporting services fail together.
Frequently Asked Questions
What makes a disaster failure cascade?
A cascade develops when one disruption disables or strains connected services, such as power affecting pumps, communications, fuel access, and healthcare operations.
What should a cascading-failure plan prioritize first?
Protect life safety, urgent medical needs, drinking water, sanitation, shelter, reliable information, and evacuation decisions before comfort or convenience.
How many backup options are enough?
Use at least one fallback that does not depend on the same network, fuel source, route, or utility as the primary method, then test whether it is practical.
When should a household switch to its contingency mode?
Switch when a predefined trigger occurs, such as unsafe water, a failing medical-power reserve, an evacuation order, or loss of a critical route.
How can a plan be tested safely?
Simulate outages without disabling critical equipment, practice communication and relocation tasks, inspect backup supplies, and record every assumption that proves incorrect.
Further Reading
Authoritative Sources
Make a Plan ready.gov
Provides official planning guidance for household communication, alerts, evacuation, and emergency needs
National Preparedness fema.gov
Explains preparedness concepts relevant to communities and organizations managing interconnected disruptions
Critical Infrastructure Security and Resilience cisa.gov
Offers context on dependencies, resilience, and risks affecting essential infrastructure
Weather Safety weather.gov
Supports hazard-specific decisions by directing readers to official weather warnings and safety information
Conclusion
Reliable disaster planning depends on seeing connections rather than collecting isolated backups. Identify the essential functions your household or organization must preserve, trace the services and routes behind them, and assign a fallback with a clear activation trigger. Protect limited resources by using staged operating modes, independent communication methods, and realistic conservation rules. Test the arrangement before an emergency exposes missing batteries, inaccessible supplies, unsafe equipment, or outdated contacts. After any exercise or disruption, revise the plan while the lessons are still clear. The next useful action is to choose one critical function—water, medical power, heat, sanitation, or evacuation—and document its primary system, two dependencies, one workable fallback, and the condition that requires escalation.
What a Caregiver Preparedness Scale Should Measure
A useful caregiver assessment measures the match between the person providing care and the tasks, risks, time demands, and changes likely to arise. It should not ask only whether someone feels ready. Confidence can be high when a caregiver has not yet encountered a difficult transfer, a missed medication, nighttime confusion, or a sudden change in symptoms. Conversely, a caregiver may report low confidence while already performing several tasks safely and needing only instruction in one narrow area.
The scale works best when it separates preparedness into distinct domains. Practical care may include bathing, dressing, toileting, feeding, repositioning, or using mobility equipment. Clinical and safety awareness may involve recognizing a meaningful change, following an established medication routine, recording observations, and knowing when to contact a clinician or emergency service. Communication covers understanding the care recipient, sharing accurate information with professionals, and handling disagreement about assistance. Capacity also includes time, sleep, transportation, finances, and access to another person who can step in.
For example, a daughter may be comfortable preparing meals and organizing appointments but unable to assist with a two-person transfer. Giving her one overall score would hide the immediate hazard. A domain-based result would show strong organizational readiness, limited physical-task readiness, and a need for equipment guidance or another trained helper. That distinction makes the assessment more useful than a general question such as “Can you manage?”
A practical scale can use four levels:
1 — Not prepared: The caregiver has not performed the task, does not know the safe method, or lacks the required support.
2 — Partly prepared: The caregiver understands some steps but needs demonstration, supervision, equipment, or backup.
3 — Usually prepared: The caregiver can complete the task under ordinary conditions but may struggle with fatigue, resistance, or an unexpected change.
4 — Prepared with a backup: The caregiver can perform the task reliably, recognizes limits, and has a documented escalation or replacement arrangement.
The fourth level matters because independence without backup is fragile. A high score should describe both competence and continuity. Readers comparing their results with an Caregiver preparedness scale for evaluating support needs should record the date, the task being rated, and the evidence behind the rating. A score based on a recent observed task is more reliable than a score based on intention.
How to Score Support Needs Without False Confidence
Score each domain against a specific care task, not against a vague impression of the whole role. “Medication management” might mean opening containers and following a written schedule for one stable prescription, or it might involve several medicines, changing instructions, swallowing problems, and frequent questions from the care recipient. Those are different demands and should not receive the same rating.
Begin by listing what happens on an ordinary day and what could happen on a difficult day. Include morning and evening routines, appointments, meals, toileting, transfers, communication, household safety, and record keeping. Then add events that create pressure: a fall, fever, refusal of food, missed dose, wandering, equipment failure, or the caregiver becoming ill. The scale should test readiness for the conditions that expose weak points, while avoiding the assumption that every possible event must be handled alone.
A helpful score sheet asks four questions for each domain:
Has the caregiver been shown the task by an appropriate professional or experienced trainer?
Can the caregiver explain and perform the task safely without prompting?
Can the task still be managed when time, sleep, mobility, or behavior changes?
Who takes over if the caregiver cannot continue?
Consider a spouse caring for someone who has recently become unsteady. The spouse may rate walking assistance as a three because the usual route from bedroom to bathroom is familiar. A closer review may reveal that the person sometimes rises suddenly at night and that the spouse has back pain. The ordinary task appears manageable, but the combination of unpredictability and physical strain lowers practical preparedness. A safer decision may be a clinician or therapy assessment, environmental changes, and scheduled relief rather than more determination from the spouse.
Do not calculate a simple average if one low domain creates disproportionate risk. A caregiver could score well in six areas and still be unprepared for a transfer that risks injury. Use the lowest critical score as a priority flag, then consider frequency and consequence. A frequently performed task deserves attention because small errors repeat; a rare but high-consequence task deserves a written response and a contact pathway.
The scale is an aid to conversation, not a diagnosis, certification, or substitute for professional evaluation. Skills can also decay when a task is rarely used. Recheck performance after a hospital discharge, a new diagnosis, a medication change, a fall, or a move to a different home. The best result is not the highest number; it is an accurate picture that leads to proportionate support.
Turning Low Scores Into Practical Support Decisions
A low score should produce a specific action, owner, and time frame. “Needs help” is too broad to guide a family. If the issue is safe lifting, the next step might be a professional assessment of transfer technique and equipment. If the issue is medication confusion, the response may involve a reconciled list, clearer organization, and confirmation of who handles changes. If the issue is exhaustion, the intervention is not another checklist but dependable respite, shared coverage, or a reduction in nonessential duties.
Match the remedy to the reason for the low rating. Knowledge gaps respond to teaching and return demonstration. Physical limitations may require equipment, environmental adjustment, or another person. Scheduling problems call for coverage at predictable pressure points, such as early mornings or overnight care. Communication problems may improve with a written routine, a shared log, and a named contact. Emotional strain may require a candid discussion with a clinician or caregiver support service, particularly when sleep loss, hopelessness, or inability to cope is affecting safety.
A compact action review can rank each weak domain by:
Immediate danger: Could an error cause a fall, choking event, medication harm, or delayed response?
Frequency: Does the task occur several times each day or only occasionally?
Replaceability: Can another trained person take over, or is the caregiver the only available helper?
Feasibility: Can the family realistically obtain instruction, equipment, transport, or respite?
Suppose a caregiver scores two for bathing, three for meal preparation, and one for emergency decision-making. Bathing may need a shower chair or hands-on instruction, but the emergency score deserves immediate clarification because uncertainty can delay action. The family should identify warning signs relevant to the person’s condition, keep current contact information accessible, and ask the healthcare team which changes require urgent attention. The scale cannot supply medical instructions that have not been provided.
Support should be tested in the actual setting. A technique that works in a clinic may not work in a narrow bathroom, on stairs, or when the care recipient is frightened. A backup person who says they are available may not be able to arrive during a work shift. Treat a trial shift or supervised practice as evidence. Signs that the plan is working include fewer repeated questions, safer task completion, accurate records, and a caregiver who can describe what happens when the normal routine fails. Signs of failure include improvising lifts, skipped care, escalating conflict, or postponing appointments because no coverage exists.
Readers using an assessment of caregiver preparedness should convert every score below the agreed threshold into one concrete next move. Reassess after that move rather than assuming that arranging help automatically solved the underlying problem.
Common Assessment Errors and Review Triggers
The most common error is confusing willingness with readiness. A devoted caregiver may accept every responsibility while lacking training, sleep, strength, or time. Another error is scoring the caregiver rather than the care situation. Preparedness changes when the person receiving care develops delirium, pain, swallowing difficulty, behavioral symptoms, or reduced mobility. A score should describe a relationship between current demands and current capacity.
Families also tend to omit invisible work. Scheduling, refilling supplies, monitoring changes, arranging transportation, communicating with relatives, and documenting questions consume attention even when no hands-on task is occurring. If the scale counts only bathing or feeding, it may underestimate workload and overestimate available capacity. Include mental load and coordination time, especially when one person is responsible for every decision.
Another weak assumption is that a written emergency plan equals an executable plan. A list of phone numbers does not show who can drive, who has a key, who knows the routine, or who can stay with the care recipient. Test the plan with a simple scenario: the primary caregiver is sick at 7 a.m., the usual helper is unavailable, and an appointment is scheduled. If nobody knows the first three actions, the backup score should remain low.
Review the scale when circumstances change rather than waiting for a crisis. Useful triggers include:
a hospital or rehabilitation discharge;
a fall, near fall, medication error, or missed appointment;
new equipment or a change in mobility, cognition, continence, eating, or sleep;
the caregiver starting a job, moving, becoming ill, or losing transportation;
repeated conflict, skipped tasks, or signs that the routine is no longer sustainable.
Scores should be discussed respectfully. A low rating is not a judgment about character, and a high rating is not permission to remove all support. Compare self-ratings with observed performance when safety is involved, but explain the purpose before doing so. The goal is to reveal where instruction or relief can prevent a predictable breakdown, not to win an argument about who is coping best.
A final review should ask whether the support arrangement remains workable for the next month, not merely whether today went well. That forward-looking question catches gradual exhaustion, seasonal transportation problems, and care needs that are increasing faster than the family’s informal system.
For a formal assessment, readers can bring their completed domain ratings to the person’s clinician, social worker, occupational therapist, or local caregiver-support organization. These professionals can help distinguish a training issue from a physical safety problem, identify appropriate services, and clarify which changes require prompt medical attention. Official health-system and aging-service materials are preferable to anonymous checklists when the assessment involves transfers, medication changes, swallowing, falls, or cognitive decline.
Frequently Asked Questions
What does a caregiver preparedness scale measure?
It measures readiness for specific care tasks, including knowledge, practical performance, decision-making, time, physical capacity, communication, and backup coverage. It should compare those capabilities with the current and likely care demands.
What scoring range should a caregiver use?
A four-level scale from not prepared to prepared with backup is simple to apply. The exact numbers matter less than defining each level clearly and recording the evidence behind the rating.
Should a low average score automatically mean professional care is required?
No. A low score identifies a gap, but the appropriate response may be training, equipment, respite, shared scheduling, or professional care depending on the task and risk. A critical low score should be addressed before routine care continues unchanged.
How often should caregiver preparedness be reassessed?
Review it after a discharge, fall, medication or mobility change, new diagnosis, caregiver illness, or breakdown in the routine. A monthly review can also reveal gradual increases in workload before a crisis occurs.
Can confidence replace observed skill on the scale?
No. Confidence is useful context, but observed performance, safe technique, and a workable backup provide stronger evidence. A caregiver may feel confident and still need instruction for a high-risk task.
Conclusion
A caregiver preparedness scale is most useful when it exposes the difference between being willing to help and being able to manage a defined task safely over time. Rate practical skills, health and safety awareness, communication, workload, physical limits, and backup coverage separately. Give priority to low scores involving transfers, medication changes, swallowing, falls, emergency decisions, or any task that is frequent and difficult to replace. Turn each gap into a specific action, test that action in the real home environment, and reassess after the care situation changes. Bring uncertain or high-risk results to an appropriate healthcare or caregiver-support professional. Accurate scoring should lead to better support, not greater pressure to cope alone.