by Preparation Call Editorial Team | Aug 3, 2025 | Preparedness
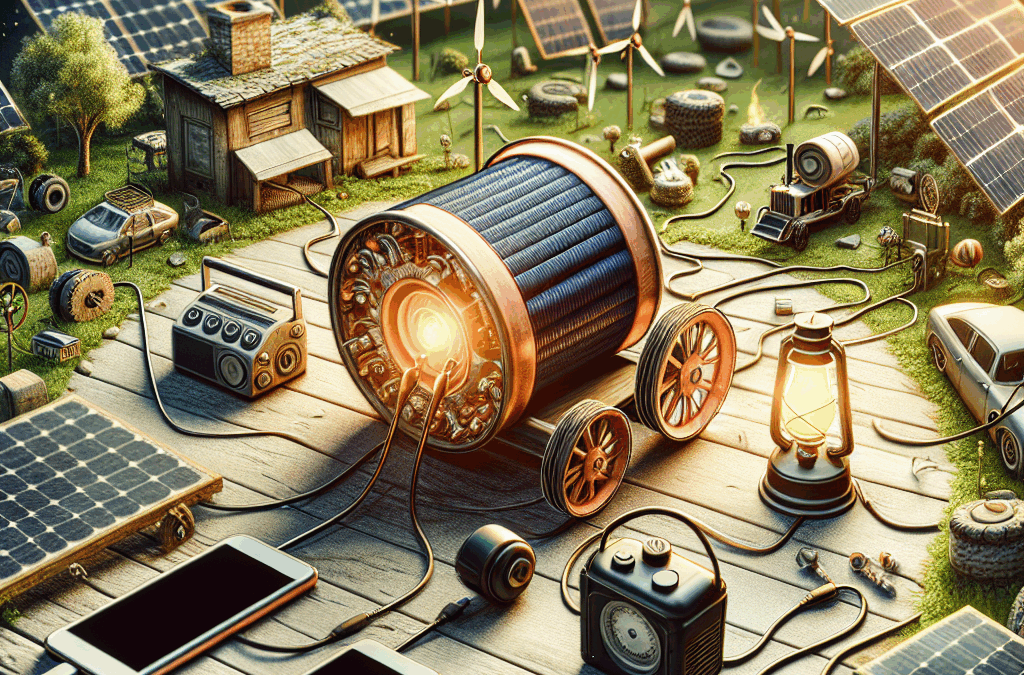
Living in a world that’s always connected, we often forget just how dependent we are on electricity.
Whether it’s smartphones, tablets, or portable speakers, sometimes we find ourselves in situations where there’s simply no plug to be found.
Having faced such moments myself, I learned a thing or two about keeping my devices charged even when the power is out.
Let’s dive into some creative ways to recharge your devices without relying on the grid!
Utilizing Solar Power
Understanding Solar Chargers
One of the best ways I’ve found to charge my devices without electricity is through solar chargers.
These nifty gadgets convert sunlight into energy, allowing you to charge your devices on-the-go.
Purchasing a solar charger might feel like splurging, but I promise it’s a game changer, especially for outdoor enthusiasts like myself.
When choosing a solar charger, look for one that matches your device’s needs.
Some chargers are designed specifically for phones, while others can handle laptops.
The key is to ensure the output voltage is compatible to avoid any tech hiccups.
It’s also good practice to check reviews and compare brands.
Some solar chargers come with additional features like built-in batteries to store energy for when the sun isn’t shining.
Plus, they’re often portable, making them an easy travel buddy.
Positioning for Optimal Sunlight
Once you’ve got your solar charger, positioning it correctly is crucial.
Trust me, I’ve made the rookie mistake of leaving it in the shade, thinking it would still work.
The best place is to lay it directly under sunlight, preferably angled toward the sun for maximum exposure.
It’s also best to avoid using it on cloudy days, as the efficiency can significantly drop.
If you live in a sunny area, try to get a feel for which spots in your yard or on your balcony generate the most sunlight throughout the day.
While you’re waiting for it to charge, you can engage in other activities, be it hiking or simply enjoying nature.
The beauty of solar charging is that it’s great for both your devices and the planet!
Using Solar Panels for Larger Devices
For those bigger gadgets, I’ve ventured into using portable solar panels.
These are a step up from handheld solar chargers, and can power larger devices that require more juice, like laptops and drones.
Setting up these panels can take a bit more effort, but it definitely pays off in terms of versatility.
Usually, they come with a variety of connectors to accommodate multiple device types, which is super handy.
Just make sure to understand how to connect and configure the setup safely.
It’s a bit of a learning curve, but once you’ve got it down, you can literally charge amid nature—and believe me, it feels pretty rewarding.
Hand-Crank Generators
Choosing the Right Generator
If the sun isn’t cooperating, hand-crank generators can be a lifeline.
These generators allow you to generate power manually through physical effort, and while it might be a workout, it’s a reliable backup.
When I first got my hand-crank generator, it was more of an experiment than anything else.
I had to learn which devices it could effectively charge, as not all can handle the output from these generators.
Always read the specs and follow the guidelines.
Getting an incompatible device can do more harm than good, and I learned that the hard way!
How to Use a Hand-Crank Generator
The operation is pretty straightforward.
Just connect your device to the generator using the appropriate cable and begin cranking.
It sounds simple, but you’ll quickly realize that it requires some stamina!
I recommend checking the output voltage frequently while cranking.
It’s also a good idea to have a clear plan on how long you need to crank to get a desired amount of charge.
Each minute usually gives you enough energy for a few minutes of device use.
Finding a rhythm helps too.
I often listen to music or podcasts while cranking—it definitely makes the workout a bit more enjoyable!
Benefits of Hand-Crank Generators
The best part about hand-crank generators is their independence from weather conditions.
No sun, no problem!
This method can also be more sustainable over the long run, which is something I’m always on the lookout for.
Plus, it’s a great conversation starter.
Nothing sparks interest quite like telling someone you powered your phone by cranking a generator!
They can also serve as a fun family activity.
Toss in a little competition, and see who can produce the most charge in a minute.
It’s a workout and a bonding experience rolled into one!
Using Rechargeable Battery Packs
Choosing Quality Battery Packs
One of my go-to methods for emergencies is having a good quality rechargeable battery pack on hand.
These battery packs can hold a charge for months and are ready to go whenever you need them.
When selecting a battery pack, make sure it has adequate capacity for your devices.
Some batteries may not be up to snuff for larger devices, so check their specifications before buying one.

I’ve found that brands vary widely in terms of reliability.
Reading user reviews is essential, and sometimes it’s worth spending a little extra for a trusted brand that you know will get the job done.
Proper Charging Techniques
Once you’ve got your battery pack, it’s important to understand how to charge it properly.
Overcharging can be detrimental, so always follow the manufacturer’s guidelines.
Many packs come with indicators, making it easier to know when to unplug.
Additionally, store them properly when not in use.
Keeping them at room temperature and avoiding extreme heat or cold extends their lifespan significantly.
Also, make a habit of recharging them periodically.
I learned early on that leaving them untouched for too long can lead to diminished capacity, which is no bueno when you really need them!
Using Battery Packs Efficiently
To maximize the utility of your battery pack, be strategic about what devices you charge.
I often opt to charge essentials first, like my phone or GPS for hiking, then move onto non-essentials once I know I have enough power to spare.
Many packs come with multiple outputs, allowing you to charge several devices at once.
Just be cautious not to overload them, as it may slow down charging speed or diminish the lifespan of your battery pack.
Lastly, plan to use your battery pack when you really need it.
It can be tempting to charge a device just for fun, but being selective about usage will ensure you’re never caught off-guard when you need power most.
Finding Alternative Energy Sources
Exploring Alternative Energy Options
In case you’ve exhausted the mentioned methods, there are other alternative energy sources to consider.
Hand-crank generators and solar chargers are just the tip of the iceberg!
For instance, certain wind-powered systems are available that can generate power using breezes.
I’m planning to explore these myself soon, especially for my camping trips.
I imagine it’d be great to harness the wind’s energy to keep my devices alive.
Additionally, bioenergy or even mechanical energy can be options if you’re willing to do a bit of research.
These unconventional sources of energy are fascinating and can often be very effective in the right conditions.
Creating Your Own Energy Solutions
Have you ever thought about building your own energy source?
It’s like a school science project but way more useful!
From basic DIY solar panels using old coffee cans to wind turbines made from PVC pipes, the possibilities are endless.
There are countless resources and communities online ready to share previous projects and tips.
The journey of creating your own devices can be just as rewarding as using them once they’re fully operational!
I love the idea of combining creativity with energy solutions.
Not only do you save money, but you also get that sweet satisfaction of knowing you made it yourself.
Networking for Access to Shared Resources
Lastly, don’t forget about the power of community!
Networking can lead to partnerships and group investments in power solutions.
I’ve met folks who collaborate on buying large solar panels or wind turbines together to share the energy produced.
Local community centers, schools, or even online forums can be fantastic places to discover like-minded individuals who are also keen on sustainable practices.
More hands make light work, right?
So, build those connections!
You never know when you’ll need to share or barter for energy, especially during rough times.
Frequently Asked Questions
1. Can I really charge devices without electricity?
Absolutely! There are multiple methods to charge your devices, including solar power, hand-crank generators, battery packs, and alternative energy sources.
2. How long does it take to charge a device using solar power?
The time to charge depends on the solar charger’s power output and the sunlight conditions. On a bright day, smaller devices can take a few hours, while larger ones might need more time.
3. Are hand-crank generators practical for everyday use?
While they aren’t ideal for frequent use, they can be great backup options for emergencies or outdoor adventures.
4. Can I create my own renewable energy system?
Definitely! There are many DIY resources available to help you create your own solar panels or wind turbines, often using materials you already have.
5. Do I need special cables to charge my devices with battery packs?
Most battery packs come with various connectors or USB outputs, but it’s always a good idea to check compatibility with your devices to avoid any issues.
by Preparation Call Editorial Team | Aug 3, 2025 | Preparedness
Essential Safety Gear
Emergency Kit
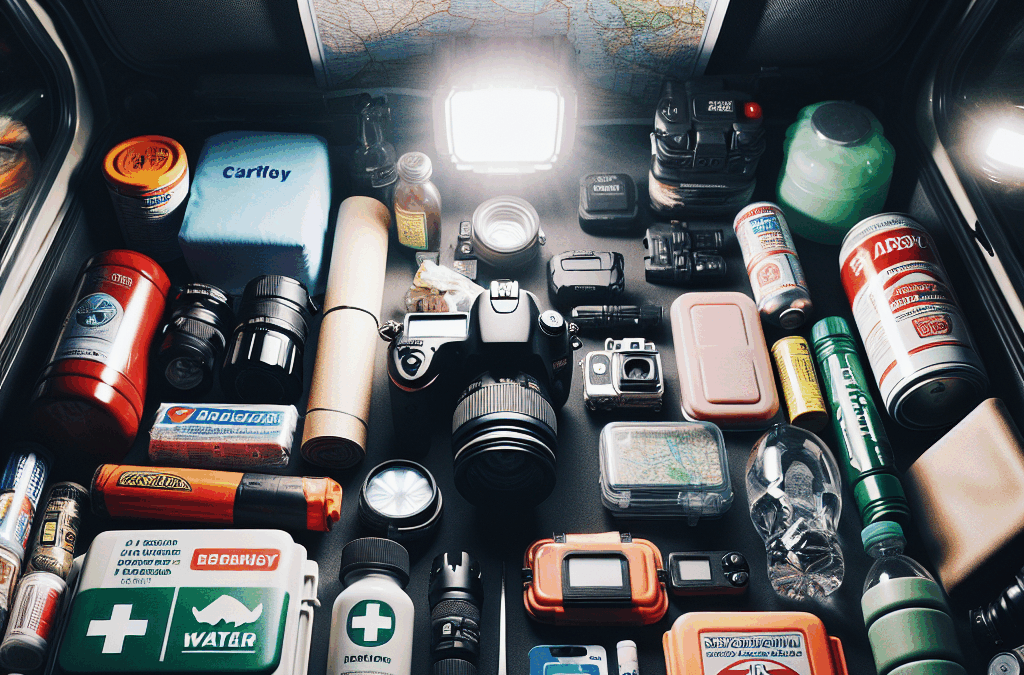
When I first built my emergency vehicle kit, I focused heavily on putting together an emergency kit. This includes essentials like first-aid supplies, flares, and a multi-tool. Each item has a specific purpose that can make a huge difference in a crisis. Trust me; you don’t want to be rummaging through your glove box when something goes wrong.
I’ve found that it’s best to buy a pre-assembled emergency kit if you’re unsure what to include. They usually have everything from sterile bandages to reflective warning triangles. I’d highly recommend checking the expiration dates on any medication or supplies every few months.
Of course, you can customize your kit! Add items that cater to your personal needs or those of your family. For example, if you have pets, consider including food and water for them, too. It makes all the difference knowing you’ve covered all your bases.
Roadside Assistance Tools
In my experience, being stranded on the side of the road is a real wake-up call. That’s why I always keep roadside assistance tools like a spare tire, jumper cables, and a tire inflator in my car. I’ve had plenty of times where those jumper cables saved the day!
It’s essential to know how to use all these tools. When I first learned about changing a tire, it felt overwhelming, but practice makes perfect! Spend some time getting familiar with these tasks, and you won’t have to rely on others when you’re in a jam.
Additionally, consider investing in a roadside emergency tool that combines several functions, like a flashlight, hammer, and seatbelt cutter. When you can tackle multiple problems with one tool, you simplify the whole process, and that’s always a win in my book!
Reflective Gear
One item that often gets overlooked is reflective gear. When you’re dealing with a roadside emergency, being visible is super important. I learned the hard way that standing on the side of a busy road without something reflective can be pretty dangerous!
I keep a reflective vest and some roadside flares in my emergency vehicle. The vest is especially crucial when it’s dark or raining; it really makes a difference. Plus, having those flares can alert other drivers that you’re there, keeping everyone a bit safer.
Remember, incident visibility isn’t just about you. If friends or family often ride with you, having extra reflective gear ensures everyone is safe. It’s just a small addition that can have a massive impact.
Food and Water Supplies
Non-Perishable Snacks
You might be thinking, “Why do I need snacks in my emergency vehicle?” Let me tell you, hunger pangs can make an emergency situation feel that much worse. That’s why I make sure to keep non-perishable snacks like granola bars, nuts, and dried fruit in my glove compartment.
When times get tough, having something healthy to munch on can help keep you calm and collected. Plus, if you’re stranded for hours, those snacks can keep your energy levels up. It’s all about making a stressful situation a little more manageable!
Remember to rotate these snacks every few months. Not only do you want to keep things fresh, but checking back on your supplies allows you to monitor any other items that might need replenishing. And it’s always nice to treat yourself to a fresh snack!
Water Supply
Hydration is essential, folks! I always keep bottled water in my car – this isn’t just for emergencies; it’s great to have for long drives as well. I typically store a few bottles in the trunk. They can get super hot, but there’s nothing quite like drinking water when you really need it.
Make sure to replace your water supply periodically, as it can get stale over time. I usually refresh mine every couple of months, and I try to keep at least three bottles on hand. This way, if I get stuck somewhere, I won’t have to worry about hydration.
The beauty of having extra water on hand is that it can also serve different purposes, such as washing minor wounds or even creating extra coolant for an overheated engine. Keeping those bottles stashed can be a lifesaver!
Portable Water Filtration
Okay, this one might sound a bit extreme, but hear me out – portable water filtration systems are game-changers! In case you run out of bottled water, having the ability to filter water can truly make a difference, especially if you’re in a remote area.
I keep a compact water filter in my emergency kit. It’s lightweight and easy to use, and it ensures I can drink safely in dire situations. Plus, it can work with river or lake water, expanding your options dramatically.
Research what type of filters work for your specific needs and make sure you know how to use them correctly. Remember, this extra layer of preparedness could be what stands between you and dehydration!
Communication Essentials
Fully Charged Cell Phone
These days, we depend heavily on our phones for communication and navigation. One tip I can share from personal experience is to keep your cell phone fully charged at all times, especially before a long journey.
I also ensure to have a charging cable and a portable charger in my emergency stash. It’s an absolute must if you’re stuck somewhere. You don’t want to miss out on calling for help just because your phone is dead!
Make it a habit to check your phone’s battery percentage before hitting the road. This will make a big difference in your preparedness, and it’s a small step that can save you a whole lot of stress and hassle down the line.
Portable Talkie-Walkies
Sometimes cell signals can be spotty or completely nonexistent when you need them most. That’s why I keep a set of portable talkie-walkies in my vehicle. These handy little devices can help you communicate with family or emergency personnel when your phone fails you.
Make sure your walkie-talkies are charged, and familiarize yourself with how to use them. Check the range and set channels so everyone knows how to reach you. Having this additional means of communication can be priceless in urgent situations.
Plus, talkie-walkies can be great for family outings or camping trips. So even if you never need them in emergencies, they’re a tool that adds fun and safety to your adventures!
Emergency Contact List
Surprisingly, one of the simplest things can also be one of the most helpful: having an emergency contact list. I usually keep a printed version tucked away with my insurance papers, and I make sure to update it regularly.
This list generally includes family members, trusted friends, and insurance info – just in case you need to reach out for help. Having these contacts easily accessible can speed up response time during emergencies.
So take a few minutes to compile your list. Not only does it serve practical purposes, but it can also ease your mind knowing you have a plan in place if something happens. An ounce of prevention is worth a pound of cure, right?
Navigation Tools
GPS Device
Although smartphones are handy, having a dedicated GPS device in your emergency vehicle can save you a lot of headaches. I’ve relied on mine countless times, especially when my phone’s battery ran low or I found myself in an area with spotty service.
Make sure to keep your GPS device updated with the latest maps and software, as this ensures you have accurate directions when you need them most. There’s nothing worse than relying on outdated information while you’re lost!
If you don’t own a GPS device, consider downloading offline maps on your phone. This way, you’re covered in areas without Wi-Fi. Just make sure you’re prepared because getting lost can really elevate your heart rate when time is of the essence!
Emergency US Map
While we live in a digital age, let’s not forget about paper maps! A physical map of your region is incredibly handy, especially if technology fails. You can fold it up and fit it right into your glove box.
I always keep a current map on hand because not every road will be easily accessible via GPS, especially in less populated areas. This little addition can help you reroute when roads are blocked or under construction.
Before your next road trip, take some time to familiarize yourself with the main roads and alternatives in your area. Trust me; having a paper map can save the day when technology lets you down!
Detailed Local Road Guides
If you’re venturing into unfamiliar areas frequently, consider keeping a regional road guide with detailed descriptions of back roads and shortcuts. In the age of GPS, it’s easy to forget the good old-fashioned road guides that contain real treasure!
This guide can help you identify alternative routes that might not show up on your GPS. It also provides insights into landmarks, gas stations, and potentially safe areas to stop. Plus, it’s nice to have a backup plan!
Spend some time browsing through sections covering your go-to travel destinations. You’ll be amazed at the hidden gems you can discover. Having this knowledge not only enhances your travel experience but can also be a lifesaver in emergencies.
First Aid and Health Items
First Aid Kit
One of the most vital items I keep in my emergency vehicle is a well-stocked first-aid kit. It might seem basic, but it’s there for a reason! I’ve used it more than I’d like to admit for minor scrapes or cuts.
I recommend checking the contents regularly to ensure everything is stocked and not expired. Be familiar with how to apply a bandage or a pressure wrap; knowing how to use these items can make a significant difference in an emergency.
If you have specific medical needs like allergy medications or a prescription for emergency use, be sure to include them as well. Customizing your first aid kit goes a long way in personal preparedness!
Personal Medications
Another must-have in my vehicle is personal medications. I always keep a stash of over-the-counter meds for headaches, allergies, and even a few for digestive issues. You never know when you’ll need a little relief!
Make sure these medications are properly labeled and organized. A little pouch can keep everything neat and accessible. Again, don’t forget to review your supplies every few months to avoid expired medicine and stock up on the essentials.
Prioritize keeping an inventory of what you have and what you need. After all, life can throw curveballs that come out of nowhere, and being prepared can save your day.
Emergency Blanket
An emergency blanket is another surprise hero in my vehicle. These lightweight thermal blankets are great for keeping warm and can even double as a water-resistant tarp if needed. I never leave home without one!
In colder climates or during the chilly nighttime in remote areas, these blankets can be lifesavers. They help to trap body heat, which can make a huge difference if stranded in cold weather.
Adding a few extra emergency items, like hand warmers, can enhance your kit. Keeping cozy when things go south can truly boost morale, and you’ll be glad you had them on hand!
FAQs
1. What are the basic items I should include in my emergency vehicle kit?
Your emergency vehicle kit should ideally include an emergency kit (first-aid supplies, flares, and a multi-tool), roadside assistance tools (jumper cables, spare tire), food and water supplies, a GPS device, and a first-aid kit.
2. How often should I check and update my emergency supplies?
It’s a good habit to check your supplies every few months. Ensure that food items are fresh, medications aren’t expired, and that your first-aid supplies are fully stocked.
3. Can I rely solely on my smartphone for navigation in emergencies?
While smartphones are useful, they can fail due to low battery or poor signal. It’s also wise to keep a paper map and other navigation tools on hand to ensure you’re fully prepared.
4. What should I do if I run out of bottled water?
If you run out of bottled water, having a portable water filtration system can allow you to purify other water sources. Always prioritize knowing how to set it up properly for safe drinking.
5. Is it necessary to keep food and snacks in my emergency kit?
Yes! Keeping non-perishable snacks can help maintain your energy and morale in emergencies. Make sure they’re easy to store and that you refresh them regularly for freshness.

by Preparation Call Editorial Team | Aug 3, 2025 | Preparation Call
In an unpredictable world, disaster preparedness is not just a luxury; it’s a necessity. Whether it’s natural disasters like hurricanes, earthquakes, or floods, or man-made emergencies such as fires or chemical spills, having a solid plan in place can make all the difference between chaos and calm. Understanding the importance of disaster preparedness empowers individuals and families to face unexpected challenges head-on.
*Essential Components of Your Disaster Preparedness Toolkit**
A comprehensive disaster preparedness toolkit is your first line of defense. Start by including basic supplies: water (one gallon per person per day for at least three days), non-perishable food items that can sustain you and your family for similar durations, and a flashlight with extra batteries. Consider adding a first-aid kit stocked with essential medications and supplies. Don’t forget personal hygiene items to keep everyone comfortable during prolonged emergencies.
Next on the list are important documents: copies of identification, insurance policies, medical records—anything critical that could be challenging to replace quickly. Pack these in waterproof bags to protect them from potential damage.
To wrap up, consider tools that can assist during recovery phases—multi-tools for repairs and duct tape for quick fixes are invaluable. And if you have pets, ensure their needs are met too; include food supplies and any necessary medications in your kit.
*Customizing Your Toolkit for Specific Emergencies**
One size does not fit all when it comes to disaster preparedness. Tailor your toolkit based on the unique risks associated with your geographic area. For example, if you live in an earthquake-prone region, add sturdy shoes and helmets to protect against falling debris. In hurricane zones, consider investing in tarps or plastic sheeting to cover windows or doors effectively.
Additionally, think about family members’ specific needs—infants may require formula while seniors might need specialized medications or mobility aids included in the kit. The key is recognizing that preparation looks different for everyone but should always prioritize safety and accessibility.
*Creating an Effective Communication Plan**
When disaster strikes, ensuring effective communication is paramount. Develop an emergency contact list that includes local authorities as well as family members who may be separated during an event. Identify multiple methods of communication—texts may get through when calls cannot due to network congestion.
Establish meeting points where everyone knows to go if separated. Make sure each family member understands this plan by practicing it regularly so it becomes second nature when speed matters most.
*Regular Maintenance: Updating and Practicing Your Preparedness Plan**
Having a toolkit is only half the battle; regular maintenance ensures its effectiveness over time. Set reminders every six months to check expiration dates on food items and replace anything that has been used or damaged. Rotate stock so nothing goes unused past its prime.
Moreover, practice your disaster response plans together as a family unit—drill scenarios as if they were real emergencies. This will help reinforce memory recall under pressure while also highlighting any gaps in your preparations that need addressing.
*Community Resources: Engaging with Local Emergency Services and Support Networks**
To wrap up, don’t overlook community resources! Engage with local emergency services—they often provide valuable training courses on CPR or first aid which can enhance your skill set beyond mere survival supplies. Joining community groups focused on preparedness can offer access to additional resources while building networks of support among neighbors during crises.
By being proactive rather than reactive when it comes to disaster preparedness, you not only safeguard yourself but also contribute positively to your community’s resilience against unforeseen events. So take those steps today; after all, peace of mind starts with preparation!